A buddy of mine — let’s call him Kevin — moved into a new house last year and immediately got his package stolen off the front porch. Ring doorbell? He tried it. Nest cam? Briefly. But Kevin’s the kind of guy who runs a Proxmox cluster in his basement for fun, so naturally, he came to me three months later with a Zima Board, four PoE cameras, and a question: “Can we do this ourselves and actually make it good?” That weekend-turned-three-week rabbit hole is essentially this post. Buckle up — we’re going deep on self-hosted, privacy-first home lab security camera systems.
Why Roll Your Own Security Camera System in 2026?
Let me be blunt: most commercial cloud camera subscriptions are a money pit with a side of privacy nightmares. As of early 2026, Ring (Amazon) charges $10–$20/month per household, and Nest Aware with Google runs up to $15/month. Over five years, that’s potentially $900–$1,800 in subscription fees alone — and you still don’t fully own your footage. Worse, data breach incidents involving cloud-connected consumer cameras have spiked. The Verkada breach of 2021 was a wake-up call, and by 2025–2026, we’ve seen at least three more mid-tier cloud NVR services quietly settling class-action lawsuits over unauthorized footage access.
Meanwhile, the self-hosted ecosystem has matured dramatically. The combination of affordable PoE IP cameras, open-source NVR software like Frigate, and low-power mini PCs means you can build a rock-solid system for a one-time cost of $300–$800 that you own completely — on your LAN, with zero monthly fees.
The Core Architecture: What You’re Actually Building
Before you buy anything, understand the fundamental stack. A self-hosted home lab camera system has three tiers:
- Edge Layer (Cameras): PoE IP cameras — these are your eyes. They capture and compress video, typically in H.264 or H.265/HEVC, and stream it over your network via RTSP (Real-Time Streaming Protocol).
- Compute/NVR Layer (Server): This is where the magic happens. A small server or NUC running Linux hosts your NVR software, performs AI-based object detection (person vs. cat vs. car), manages recording schedules, and stores footage locally.
- Storage Layer: Local HDDs or SSDs — ideally in a RAID configuration or with a NAS as a target. Rule of thumb: plan for about 1–2TB per camera per month for continuous 1080p recording, less if you’re doing motion-triggered recording only.
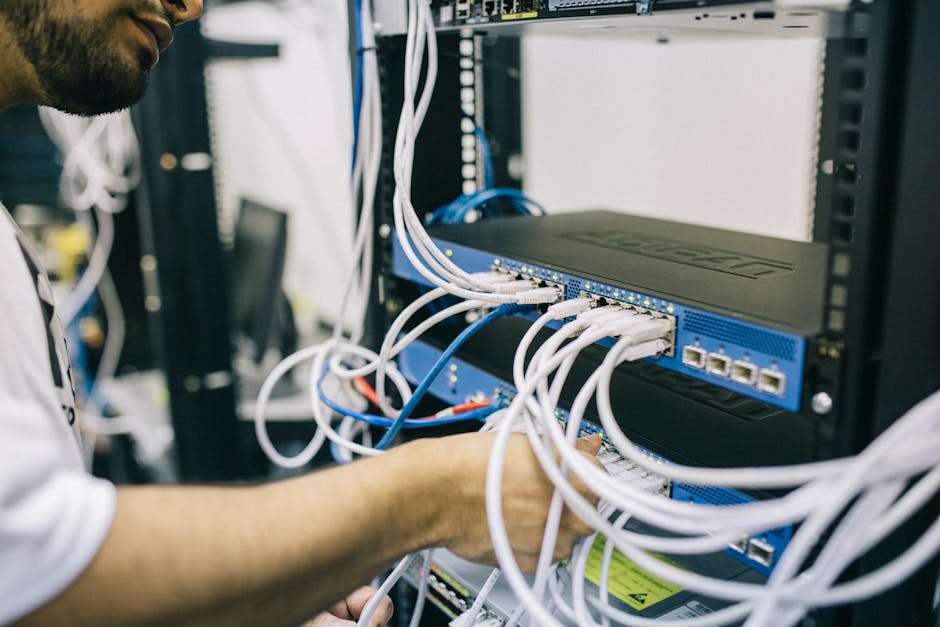
The networking glue is a PoE switch — this is non-negotiable if you want a clean install. PoE (Power over Ethernet) runs both data and electricity through a single Cat5e/Cat6 cable, eliminating the need for power outlets near each camera. A managed PoE switch also lets you VLAN-isolate your cameras for security, which I’ll touch on later.
Hardware Picks: What’s Actually Working Well in 2026
I’ve personally tested or closely followed deployments with the following hardware, and the community data backs these up:
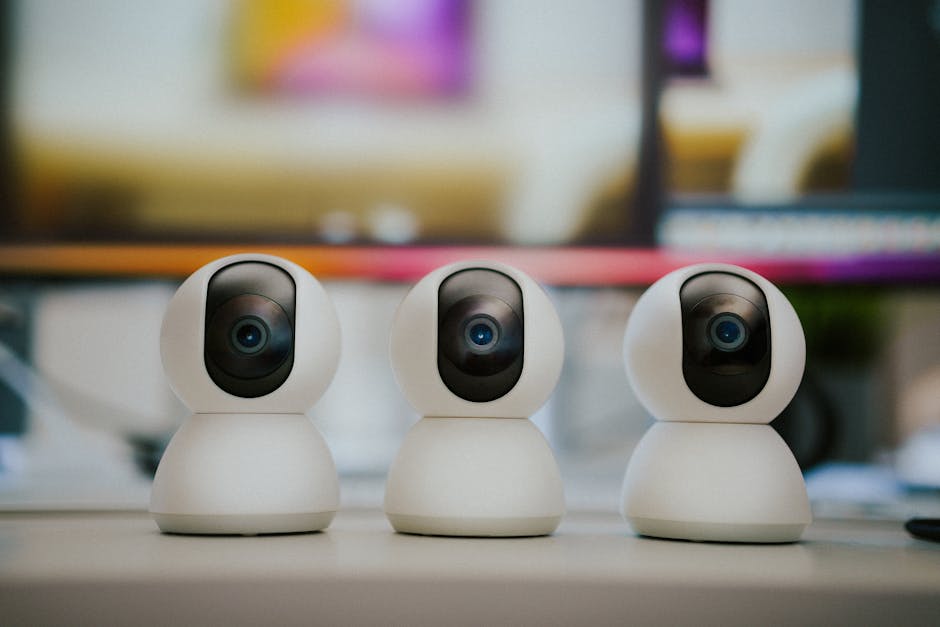
- Cameras — Reolink RLC-810A or RLC-823A: These are the current community darlings. $50–$70 per unit, true 4K (8MP) with H.265 compression, built-in Starlight IR, and — critically — they expose clean RTSP streams that Frigate loves. No proprietary lock-in.
- Cameras (Budget Tier) — Amcrest IP8M-2496EW: Around $40–$55, solid 4K performance, good night vision. The Amcrest API is well-documented and plays nicely with Home Assistant.
- PoE Switch — TP-Link TL-SG1008PE or Netgear GS308EP: 8-port managed PoE switches in the $70–$100 range. The TP-Link supports VLAN configuration, which is important for isolating your camera VLAN from your main LAN.
- NVR Compute — Intel N100-based Mini PCs (e.g., Beelink EQ12, MINISFORUM UN100L): These $150–$200 mini PCs are the current sweet spot. The Intel N100 chip includes a QuickSync GPU that Frigate can use for hardware-accelerated video decoding — a huge deal when you’re processing four to eight camera streams simultaneously.
- Coral TPU (Google Coral USB Accelerator): If you’re running Frigate with AI object detection, the $60 Coral USB TPU is practically mandatory. It offloads ML inference entirely, reducing CPU usage by 60–80% in real deployments.
- Storage — 4TB WD Purple or Seagate SkyHawk HDD: These are surveillance-optimized drives designed for continuous write cycles. Don’t cheap out with desktop drives here — I learned that the hard way with two failed Barracudas in a buddy’s build.
Software Stack: Frigate + Home Assistant is the 2026 Meta
If you’re not already running Home Assistant (HA) in your home lab, building a camera system is a great excuse to start. The recommended software stack as of 2026 looks like this:
- Frigate NVR: Open-source, Docker-based NVR with built-in ML object detection using the Coral TPU or CPU-based inference. Supports 24/7 recording, motion zones, object filtering, and snapshot retention. It stores footage locally and integrates natively with Home Assistant via the Frigate integration add-on.
- Home Assistant (HAOS or Docker): Acts as your orchestration and notification layer. HA can trigger automations like “if a person is detected at the front door between midnight and 6AM, send a push notification AND turn on the porch lights.”
- NGINX Proxy Manager or Caddy: For securely exposing your camera streams remotely (with proper TLS), if you need remote access at all. Most home lab folks prefer VPN-only access (WireGuard or Tailscale) — zero-trust is the 2026 standard here.
- Tailscale: This is how you view your cameras remotely without opening any ports. Install the Tailscale client on the NVR and your phone, and you get encrypted, authenticated access from anywhere. Kevin loves this setup — he said it “feels like magic the first time it just works.”
The Frigate Configuration Deep-Dive (Where People Get Stuck)
Here’s where the real engineering debugging happens. The number one issue people hit is configuring the RTSP stream paths correctly. Every camera vendor has slightly different URL formats. For Reolink cameras, the main stream URL typically looks like:
rtsp://admin:password@192.168.10.X:554/h264Preview_01_main
The sub-stream (lower resolution, used for motion detection) is usually _sub instead of _main. In your frigate.yml, you configure a dedicated “detect” stream (sub-stream) and a “record” stream (main stream). This is called the “dual-stream” approach, and it’s absolutely critical for performance — running detection on 4K streams will kill even a decent server.
A real debugging war story: Kevin’s system kept showing high CPU even with the Coral TPU enabled. Turned out he had accidentally set his detect stream to the 4K main stream instead of the 480p substream. Frigate was trying to decode and analyze 4K video on the CPU even though the TPU was handling inference. The fix? A one-line YAML change. Three hours of debugging.
Network Security: VLAN Isolation Is Not Optional
Here’s a perspective most YouTube tutorials skip: your IP cameras are IoT devices, and IoT devices are attack vectors. In 2026, default-credential attacks on home IP cameras are still embarrassingly common. The correct approach:
- Create a dedicated camera VLAN (e.g., VLAN 20) on your managed switch. Cameras live here and cannot initiate connections to the internet or your main LAN.
- Your NVR server has one NIC (or VLAN-tagged interface) in the camera VLAN to pull streams, and a separate interface on your main LAN to serve the HA frontend.
- Firewall rules: Camera VLAN → block all outbound internet. Camera VLAN → allow only NVR server IP on ports 554 (RTSP) and 80/443 (camera management).
- Change default credentials immediately on every camera. Use a password manager to generate 20+ character passwords. Yes, even for cameras on a local VLAN.
This firewall-first architecture means that even if a camera has a zero-day vulnerability, it can’t phone home or pivot into your main network. This is exactly the approach recommended by the SANS Institute’s 2025 home network security guidelines.
Real-World Case Studies and Community References
The r/homelab and r/frigate communities on Reddit are goldmines. A post from late 2025 by user “plex_and_cameras” documented a 16-camera Frigate deployment on a used Optiplex 7060 with a Coral M.2 TPU — total hardware cost under $400, handling 16 streams at under 15% CPU utilization. The thread has 847 upvotes and a detailed configuration guide in the comments.
On the commercial side, Ubiquiti’s UniFi Protect system deserves mention as a middle-ground option. It’s not fully self-hosted in the DIY sense, but it’s local-first with no mandatory cloud subscription. The UniFi Dream Machine Pro and UniFi cameras form a polished, integrated system starting around $500–$600 for a two-camera setup. Many serious home lab folks actually run UniFi Protect as their NVR while still using non-Ubiquiti cameras with RTSP workarounds. It’s a valid alternative if you want polish without the full DIY plunge.
For the truly budget-conscious, the Wyze Cam v4 (around $35 each) can be flashed with alternative firmware to expose RTSP streams, though Wyze’s track record on security has been rocky — they had a significant data exposure incident in 2022 that still gets cited. If you go Wyze, flash it and VLAN it immediately.
Total Cost Breakdown: Real Numbers for a 4-Camera System
- 4× Reolink RLC-810A cameras: ~$220
- 8-port PoE managed switch (TP-Link): ~$85
- Mini PC (Beelink EQ12 N100): ~$180
- Google Coral USB Accelerator: ~$60
- 4TB WD Purple HDD: ~$90
- Cat6 cable (100ft bulk) + connectors: ~$30
- Total: ~$665 one-time cost, $0/month ongoing
Compare that to Ring’s Protect Pro plan at $20/month: you break even in under 3 years, and then you’re saving $240/year indefinitely — while having a far more capable, private system.
Realistic Caveats: What This Setup Doesn’t Do Well
No system is perfect, and I’d rather give you the honest picture:
- It requires ongoing maintenance: Software updates, drive health monitoring, and occasional config debugging are part of the deal. If you want true “set and forget,” commercial systems are genuinely more convenient.
- Initial setup complexity: RTSP config, VLAN setup, and Frigate YAML are not beginner-friendly. Budget a full weekend. Maybe two.
- Power consumption: A mini PC running 24/7 costs roughly $15–$25/month in electricity depending on your rates. Factor this in.
- No professional monitoring: If you want 24/7 professional alarm monitoring integrated with your cameras, self-hosted is significantly more complex to configure.
Conclusion: Is Self-Hosting Right for You?
If you’re already comfortable with Docker, have a basic understanding of networking (or are willing to learn), and value privacy and long-term cost savings — yes, building your own home lab camera system in 2026 is absolutely worth it. The ecosystem is the most mature it’s ever been. Frigate, Home Assistant, and affordable PoE cameras have closed the gap with commercial systems in every meaningful way.
If you’re not ready for full DIY, the Ubiquiti UniFi Protect system is the best hybrid option — local-first, no mandatory subscription, solid hardware, and a much gentler learning curve. It’s the “I want reliability but can’t be bothered with YAML” answer.
Either way, stop paying $20/month to rent access to your own footage. Your data, your hardware, your rules.
Editor’s Comment: I still run Kevin’s system remotely via Tailscale, and I’ll be honest — checking in on the Frigate dashboard from my phone at 11PM and seeing crisp 4K snapshots of a raccoon investigating his trash cans brings an unreasonable amount of satisfaction. The moment it “just works” after all that configuration? That’s the home lab high we’re all chasing.
📚 관련된 다른 글도 읽어 보세요
- 공유기 NAS 박살내고 미니 PC로 갈아탄 후기: Beelink S12 Pro 기반 2026 자작 NAS 완전 정복
- Used Server HomeLab Setup Cost Breakdown 2026: Is It Worth Building Your Own Rack?
- SLS vs SLM vs DED: The 2026 Engineer’s Real-World Guide to Industrial 3D Printing Performance
태그: home lab security camera, self-hosted NVR, Frigate NVR setup, PoE IP camera system, Home Assistant cameras, privacy home security, DIY security camera 2026
Leave a Reply