A friend of mine — let’s call him Dave — picked up a MIG welder last spring after watching a few YouTube videos. Three weeks later, he called me frustrated, saying his welds looked like bird droppings and he’d burned through two sheets of thin steel. Sound familiar? That conversation is exactly what pushed me to write this guide. Welding is one of those skills that looks deceptively simple on screen but has a surprisingly steep learning curve when you’re actually holding the gun yourself.
So let’s work through this together — from picking the right machine to diagnosing those maddening weld defects — with real numbers and honest talk.
What Type of Welding Should You Actually Start With?
This is the first fork in the road, and it matters more than most tutorials admit. In 2025, the three realistic options for beginners are:
- MIG (GMAW): The most beginner-friendly. Wire feeds automatically, shielding gas does most of the protection work. Expect a decent bead within your first 2–3 hours of practice. Entry-level machines like the Lincoln Electric POWER MIG 140c run around $500–$600.
- Flux-Core (FCAW): No shielding gas required — the flux is inside the wire. Great for outdoor or windy conditions. Messier slag cleanup, but more forgiving on dirty or rusty metal. This is often what $150–$250 “gasless” machines use.
- Stick (SMAW): Old-school but brutally effective for thick material and outdoor repairs. Steeper learning curve — rod angle, arc length, and travel speed all need to be right simultaneously. Machines start at around $200 but rods and cleanup take patience.
- TIG (GTAW): Beautiful, precise welds — but don’t start here unless you enjoy punishment. Both hands and a foot pedal need coordination. Realistic learning curve: 6–12 months before consistent results.
My honest recommendation for 2025: If your situation is garage hobby or auto bodywork on thin metal (under 3/16″), go MIG. If you need outdoor farm/field repairs on thicker stock, go Flux-Core or Stick.
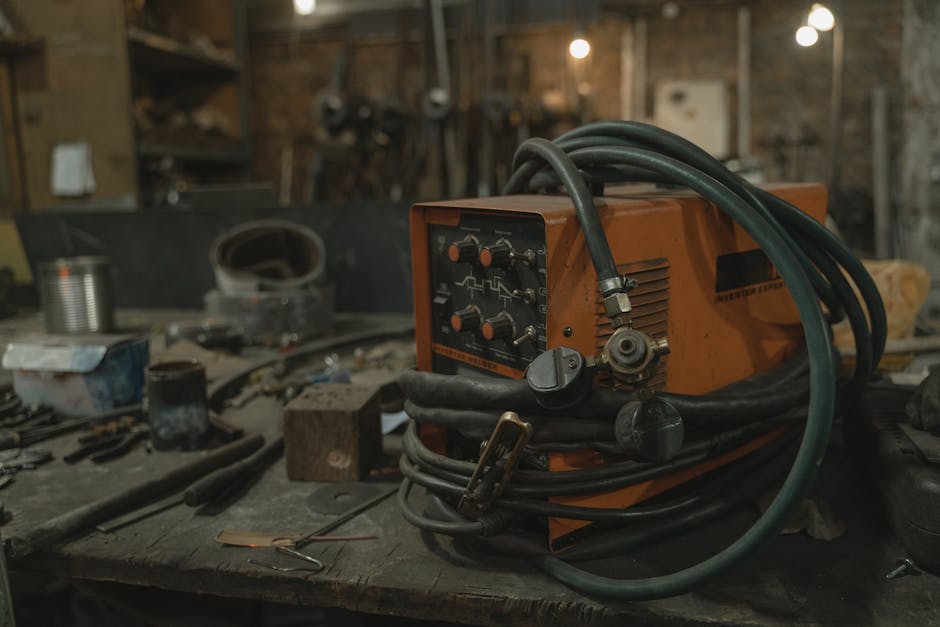
The Numbers That Actually Matter When Buying a Welder
Manufacturers love to advertise peak amperage and maximum material thickness, but those specs are often measured under ideal lab conditions. Here’s what to actually look at:
- Duty Cycle: A 20% duty cycle at 90A means you can weld for 2 minutes, then must let the machine cool for 8 minutes. For hobby use, 20–30% is fine. For production work, you want 60%+. The Hobart Handler 140 offers a 20% duty cycle at 90A — perfectly acceptable for weekend projects.
- Input Power: 120V machines plug into standard household outlets but cap out around 140A. 240V machines (like the Miller Millermatic 211) give you 210A and can handle up to 3/8″ steel in a single pass.
- Wire Feed Speed Range: Look for 40–700 IPM (inches per minute) range minimum. Too narrow a range limits versatility across different metal thicknesses.
- Shielding Gas: For MIG on mild steel, 75% Argon / 25% CO₂ (C25) is the industry standard. Pure CO₂ is cheaper but produces more spatter. Don’t skip the gas — “gasless MIG” is flux-core, a different process entirely.
The 4 Most Common Beginner Weld Defects (And Their Actual Causes)
When Dave sent me photos of his welds, I could immediately diagnose the problems. Here’s the honest cause-and-effect breakdown that most beginner guides gloss over:
- Porosity (holes/pits in the weld): Almost always caused by contamination — oil, rust, mill scale, or paint on the base metal, OR insufficient shielding gas coverage (check for leaks, set flow rate to 15–25 CFH). Also check that you’re not welding in wind above ~5 mph without a windscreen.
- Undercut (groove along weld edges): Amperage too high, travel speed too fast, or gun angle too steep (beyond 15° from vertical). Reduce amps by 5–10A or slow your travel speed.
- Cold lap / lack of fusion: Amperage too low or travel speed too fast. The weld metal is sitting ON the base metal instead of fusing INTO it. This is a structural failure point — not just cosmetic.
- Burn-through on thin metal: Classic problem on sheet metal under 18 gauge. Solution: Use a stitch/tack weld pattern (weld 1″, skip 2″, repeat), reduce wire to 0.023″ diameter, and drop voltage 1–2 settings.

Safety: The Part Everyone Skips Until They Get Hurt
This isn’t boilerplate — there are specific risks in 2025 that weren’t as prominently discussed a decade ago:
- Fume extraction: Galvanized steel releases zinc oxide fumes that cause metal fume fever — flu-like symptoms within 4–12 hours. Never weld galvanized without proper respiratory protection (P100 + OV cartridge respirator minimum) and forced ventilation.
- Arc eye (photokeratitis): Even a 2-second unprotected glance at the arc can cause severe eye pain 6–12 hours later. Auto-darkening helmets with shade 10–13 are standard; look for ones with reaction time under 1/25,000 second.
- Fire watch: Spatter can travel up to 35 feet and ignite materials. The NFPA recommends a 35-foot clear zone and a 30-minute fire watch after welding in any area with combustibles.
- Grounding: Always clamp the work lead as close to the weld joint as possible. A poor ground causes erratic arc behavior and can send current through unintended paths — dangerous near electronics or fuel lines.
What the Welding Community Is Actually Using in 2025
The r/Welding subreddit (currently 400k+ members) and the WeldingWeb.com forums are goldmines of real-world feedback. In 2025, the machines getting consistent praise from hobbyists include:
- Lincoln Electric POWER MIG 140c — Benchmark hobbyist MIG, reliable wire feed, good duty cycle for price (~$550).
- Hobart Handler 190 — Steps up to 240V, handles up to 5/16″ steel, considered an excellent mid-range value (~$800).
- Miller Multimatic 215 — Multi-process (MIG, Flux-Core, DC TIG, Stick) in one unit. Popular with serious hobbyists and small shops (~$1,300). Auto-set feature genuinely helps beginners dial in parameters.
- YesWelder MIG-205DS — Budget-conscious pick from a Chinese brand that’s earned credibility through consistent quality control improvements. Around $350, and a solid starter option if budget is tight.
For online learning, Lincoln Electric’s own “Welding University” (lincolnelectric.com/education) offers free structured courses that go beyond YouTube tutorials. The American Welding Society (aws.org) also publishes free reference guides on joint design and material prep.
Realistic Practice Plan for the First 30 Days
Rather than just “practice a lot,” here’s a structured approach that builds foundational muscle memory:
- Week 1: Run beads on flat plate (1/8″ mild steel) with no joint. Focus solely on maintaining consistent travel speed and gun angle (10–15° push angle for MIG). Listen for the “frying bacon” sound — that’s your target arc sound.
- Week 2: Practice butt joints and T-joints in flat (1F/2F) position. Learn to read your bead width as a proxy for heat input — roughly 2–3x the wire diameter is your target bead width.
- Week 3: Move to vertical-up welding (3F position). This is where most beginners struggle — you’ll need to reduce voltage/amps by 10–15% compared to flat welding to fight gravity.
- Week 4: Build something simple — a small shelf bracket, a garden tool rack. Real projects expose fitup and tack welding skills you don’t get from plate practice alone.
Cost Reality Check for 2025
Let’s be honest about what starting welding actually costs. Initial setup for a hobbyist MIG rig:
- Welder: $500–$800 (mid-range)
- Shielding gas (cylinder + initial fill): $150–$250
- Auto-darkening helmet (decent quality): $80–$150
- Gloves, jacket/sleeves, chipping hammer, wire brush: $60–$100
- Practice steel (10 lbs of 1/8″ flat bar): $20–$30
- Realistic total: $800–$1,300 to start properly
If that feels steep, check whether your area has a local makerspace or community college welding lab — many offer monthly memberships ($50–$150/month) that include machine access, gas, and sometimes basic materials. That’s a dramatically lower entry cost while you figure out if this is a long-term hobby for you.
Also: buy quality consumables. Cheap contact tips and liners cause more frustration than almost anything else — they’re responsible for erratic wire feeding (the symptom is a stuttering, spitting arc, often misdiagnosed as a voltage problem).
Bottom line: Welding has a real learning curve, but it’s one of the most satisfying skills you can develop. Dave — my frustrated friend — is now building a custom motorcycle frame. The turning point for him wasn’t a better machine; it was understanding why his welds were failing and fixing those specific variables. Start with MIG, practice on clean flat plate, respect the safety fundamentals, and give yourself 30 focused hours before judging your progress. The bird-dropping welds are just a phase — everybody has them.
📚 관련된 다른 글도 읽어 보세요
- Build Your Own Home Lab Security Camera System in 2026: The Engineer’s No-BS Guide
- Additive Manufacturing for Mass Production in 2026: Reality Check — Can 3D Printing Finally Scale?
- 어릴때 이것 키워주지 않으면 후회해도 소용없어요 — 2026년 기준 수학 사고력, 지금 안 잡으면 진짜 늦습니다
태그: []
Leave a Reply