Category: Uncategorized

  • Additive Manufacturing in Aerospace: Real-World Applications Transforming the Skies in 2026

    Picture this: it’s 2015, and an engineer at GE Aviation is staring at a fuel nozzle assembly made from 20 separate brazed components. Fast-forward to today in 2026, and that same part is a single, flawlessly printed piece — 25% lighter, five times more durable, and produced in a fraction of the time. That leap didn’t happen overnight, but it tells us everything about where additive manufacturing (AM) has taken the aerospace industry. If you’ve been wondering whether 3D printing in aerospace is still a “future concept” or a living, breathing reality, buckle up — because the answer is firmly the latter.

    aerospace 3D printed titanium engine component close-up manufacturing

    What Exactly Is Additive Manufacturing? A Quick Primer

    Before we dive into the big examples, let’s level-set. Additive manufacturing is the process of building a part layer by layer from a digital design — the polar opposite of traditional subtractive manufacturing, where you carve material away from a block. In aerospace, the dominant AM methods include:

    • Selective Laser Melting (SLM): Uses a high-powered laser to fuse metallic powder, ideal for dense, structural parts.
    • Electron Beam Melting (EBM): Operates in a vacuum using an electron beam — excellent for reactive metals like titanium.
    • Direct Energy Deposition (DED): Melts material as it’s deposited, great for repairing or adding features to existing parts.
    • Binder Jetting: A newer player gaining traction for high-volume, complex geometries at lower cost.

    Each method has its sweet spot depending on the material, complexity, and production volume required. That nuance matters a lot when we’re talking about parts that need to survive 30,000 feet, hypersonic speeds, or the vacuum of space.

    Why Aerospace and AM Are a Perfect Match: The Data Tells the Story

    Aerospace has always been obsessed with two things: reducing weight and ensuring reliability. AM delivers on both — but the numbers are what really make engineers sit up straight.

    • Weight reduction: Topology-optimized AM parts routinely achieve 40–70% weight savings compared to traditionally machined equivalents. In aerospace, every kilogram saved translates to roughly $1,300–$2,500 in annual fuel savings per aircraft.
    • Buy-to-fly ratio: Traditional titanium machining wastes up to 90% of raw material. AM brings that waste down to under 10% in many cases — a massive cost and sustainability win.
    • Part consolidation: Complex assemblies with dozens of parts can be redesigned as single printed components, slashing assembly time and potential failure points.
    • Lead time compression: Replacement or custom parts that once took 12–18 months to procure through traditional supply chains can now be produced in days or weeks.

    As of 2026, the global aerospace AM market is estimated to exceed $6.8 billion annually, with compounded annual growth tracking above 18% through the end of the decade. That’s not speculation — that’s an industry doubling down on a technology that’s already proven itself.

    Real-World Applications: From Jet Engines to Spacecraft

    Let’s get specific, because this is where the story gets genuinely exciting.

    1. GE Aerospace — The Fuel Nozzle That Changed Everything

    GE’s LEAP engine fuel nozzle remains one of the most cited AM success stories in aerospace history — and for good reason. Printed from a cobalt-chrome powder alloy, the nozzle is 25% lighter and has a service life five times longer than its predecessor. As of 2026, GE Aerospace has printed well over 100,000 of these nozzles, making it one of the highest-volume AM metal parts in production globally. The success of this nozzle was essentially the proof-of-concept that unlocked boardroom budgets across the industry.

    2. Boeing — Structural Brackets and Beyond

    Boeing has been integrating AM parts into its commercial and defense platforms at an accelerating pace. The Boeing 787 Dreamliner now flies with titanium structural brackets produced via AM — each one lighter than its forged equivalent and geometrically impossible to produce through traditional methods. Boeing’s defense division has gone further, using large-scale DED systems to print structural frames for classified platforms, with some printed titanium components spanning over a meter in dimension.

    3. Airbus — The Bionic Partition That Went Viral

    Airbus’s “bionic partition” for the A320 — a cabin wall component inspired by bone microstructure — demonstrated that AM’s value isn’t just in engines and brackets. The partition is 45% lighter than its conventional counterpart. Across a fleet of A320 aircraft, Airbus calculated that this single part could reduce CO₂ emissions by up to 465,000 metric tons annually. In 2026, Airbus continues to expand its Additive Manufacturing Centre in Filton, UK, and has integrated AM components across multiple fuselage and nacelle systems.

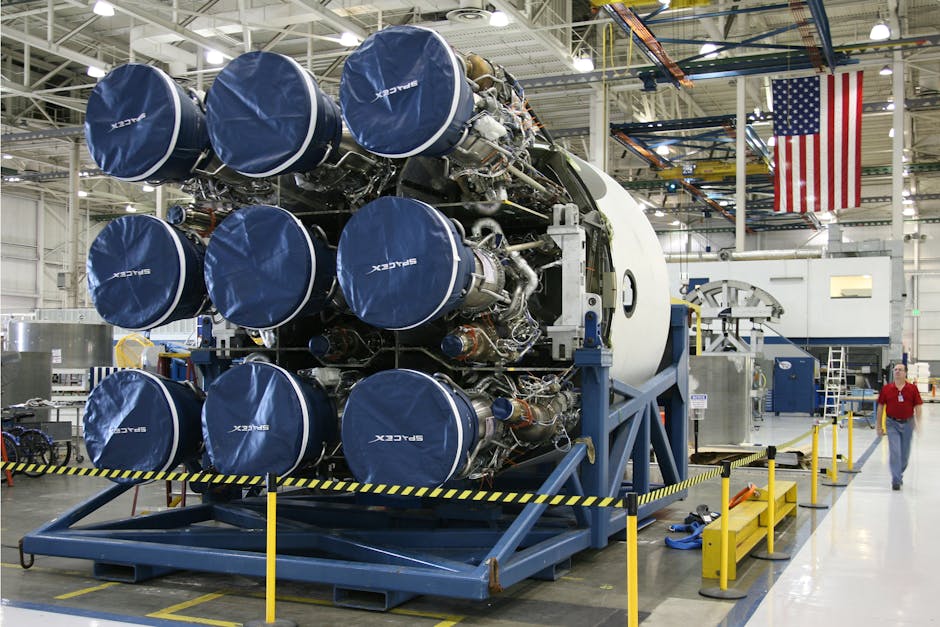
    4. SpaceX and the Rocket Engine Revolution

    SpaceX has arguably pushed aerospace AM further than any other organization. The Merlin engine’s regeneratively cooled thrust chamber uses AM components, and the Raptor engine — powering the Starship — relies heavily on AM for its complex internal cooling channels, which are geometrically impossible to drill or cast conventionally. Rival Rocket Lab prints the entire Rutherford engine (including the chamber, injectors, and pump components) using AM, achieving a production time of just 24 hours per engine. In 2026, the commercial launch sector’s aggressive production demands have made AM not just preferable but operationally necessary.

    5. Korean Aerospace Industries (KAI) — A Domestic Perspective

    Closer to home in the Asia-Pacific region, Korea Aerospace Industries has been ramping up AM integration as part of its KF-21 Boramae fighter program and next-generation rotorcraft platforms. KAI partnered with domestic research institutes like KITECH (Korea Institute of Industrial Technology) to develop titanium AM capabilities for structural brackets and cooling components. By 2026, KAI has qualified multiple AM part families for flight use — a significant milestone reflecting how AM expertise has genuinely globalized beyond the traditional aerospace powers.

    SpaceX Raptor engine additive manufacturing metal printing aerospace 2026

    The Challenges You Should Know About (Honesty Matters Here)

    Now, I want to be fair — because AM in aerospace isn’t without its hurdles, and a balanced view helps everyone make smarter decisions.

    • Certification complexity: Aviation regulators like the FAA and EASA require exhaustive qualification of AM parts, including microstructure analysis, non-destructive testing, and process validation. This process can take years and adds significant cost.
    • Surface finish limitations: AM parts often require post-processing (machining, shot peening, HIP treatment) to meet aerospace surface and fatigue specifications — adding time and cost back into the equation.
    • Material database gaps: The AM materials knowledge base, while growing rapidly, still lags behind decades of data for traditionally processed alloys. Engineers must proceed carefully.
    • Scalability vs. unit cost: AM shines for low-to-medium volume complexity. For very high-volume, simpler parts, traditional manufacturing remains more cost-effective.

    Realistic Alternatives Depending on Your Situation

    If you’re an aerospace engineer or procurement professional trying to decide whether AM is right for your next project, here’s a grounded framework:

    • If your part has complex internal channels (cooling, fuel flow): AM is almost certainly your best option — traditional methods simply can’t achieve the geometry.
    • If you need rapid prototyping or low-volume custom parts: AM wins on lead time and cost flexibility every time.
    • If you’re dealing with a high-volume, structurally simple component: Stick with forging or casting. The unit economics don’t favor AM here yet.
    • If you’re a smaller aerospace supplier or MRO operator: Consider hybrid approaches — DED for repairing expensive components rather than full replacement, which can deliver 60–80% cost savings on legacy parts.
    • If sustainability is a core KPI: AM’s dramatically improved buy-to-fly ratio and weight savings make it compelling even when the unit cost is slightly higher.

    The trajectory is clear: additive manufacturing isn’t replacing aerospace manufacturing — it’s becoming an indispensable layer of it. The organizations investing in AM capability and certification expertise today are building a moat that will be extremely difficult to cross in five years. Whether you’re a student, an engineer, or just an aviation enthusiast following where technology is headed, the 3D-printed sky above us is more real than most people realize.


    Editor’s Comment : What genuinely excites me about the aerospace AM story in 2026 is that it’s no longer a debate about “if” — it’s a sophisticated conversation about “where and how.” The real frontier now is certification acceleration and multi-material printing, and whichever players crack those two challenges will define the next decade of aerospace manufacturing. Keep watching this space; it moves faster than a LEAP engine at 35,000 feet.

    태그: [‘additive manufacturing aerospace’, ‘3D printing aerospace applications’, ‘aerospace AM 2026’, ‘metal additive manufacturing’, ‘GE fuel nozzle 3D printing’, ‘SpaceX Raptor engine AM’, ‘aerospace lightweight components’]


    📚 관련된 다른 글도 읽어 보세요

  • 적층 제조(3D 프린팅)가 바꾸는 항공우주 산업 – 2026년 최신 적용 사례 완전 정리

    몇 년 전, 한 항공 엔지니어가 이런 말을 했다고 합니다. “우리가 설계한 부품을 실제로 만들 수 있는 제조 기술이 없었다\

    태그: []


    📚 관련된 다른 글도 읽어 보세요

  • How to Set Up VLANs in Your Home Lab Network in 2026: A Step-by-Step Guide for Every Skill Level

    Let me paint a picture that might feel familiar. You’ve got a Raspberry Pi running a media server, an old laptop repurposed as a NAS, a handful of IoT smart home devices, and your daily-use laptop — all sharing the same home network. Everything seems fine until your smart fridge (yes, really) starts generating suspicious traffic, or your media server unexpectedly slows down because your IoT devices are chattering away non-stop. Sound chaotic? That’s exactly the problem VLANs were built to solve — and the good news is, setting them up in a home lab is way more approachable in 2026 than it used to be.

    Whether you’re just starting your home lab journey or you’ve had a rack in your basement for years, let’s think through VLAN configuration together — logically, practically, and without unnecessary jargon overload.

    home lab network rack setup VLAN diagram 2026

    What Exactly Is a VLAN, and Why Should You Care?

    A VLAN (Virtual Local Area Network) is essentially a way to split one physical network into multiple isolated logical networks. Think of it like building separate rooms inside one big house — devices in different rooms can’t “hear” each other unless you deliberately open a door (i.e., configure routing between VLANs).

    In a home lab context, VLANs let you:

    • Isolate IoT devices — Your smart bulbs and thermostats stay sandboxed away from your personal workstation.
    • Segment lab traffic — Your virtualization experiments won’t saturate the bandwidth your family uses for streaming.
    • Improve security posture — A compromised device in one VLAN can’t easily pivot to another without routing rules allowing it.
    • Practice enterprise-grade networking — Skills you build here translate directly to real-world IT certifications like CCNA or CompTIA Network+.
    • Simplify troubleshooting — When something breaks, knowing which segment it lives in cuts your diagnostic time dramatically.

    What Hardware Do You Actually Need in 2026?

    Here’s the realistic equipment checklist. The great news is that VLAN-capable gear has become genuinely affordable. You don’t need enterprise Cisco switches to get started anymore.

    • A managed switch — This is non-negotiable. Brands like TP-Link (TL-SG108E is still a community favorite at around $30), Netgear GS308E, or MikroTik CSS326 give you full 802.1Q VLAN tagging support. In 2026, MikroTik’s CRS series has become especially popular in the home lab community for their price-to-feature ratio.
    • A VLAN-aware router or firewall — pfSense, OPNsense (running on hardware like a Protectli Vault), or even a MikroTik RouterOS device. Many people also run these as VMs inside Proxmox.
    • A VLAN-capable Wi-Fi access point — If you need wireless devices segmented by VLAN, you’ll need an AP that supports multiple SSIDs mapped to VLANs. UniFi, TP-Link Omada, and OpenWrt-flashed routers all handle this well.
    • Patch cables and patience — Seriously, label your cables. Future-you will be grateful.

    Understanding 802.1Q: The Protocol Behind It All

    When we talk about VLANs on a managed switch, we’re almost always talking about IEEE 802.1Q tagging. Here’s the core concept broken down simply:

    Tagged vs. Untagged ports: A tagged port (also called a trunk port) carries traffic from multiple VLANs simultaneously, with each Ethernet frame carrying a 4-byte VLAN tag identifying which VLAN it belongs to. An untagged port (access port) strips that tag and delivers traffic to a device that doesn’t know about VLANs — like your printer or smart TV.

    A practical rule of thumb: trunk ports connect switches to routers or to each other; access ports connect to end devices.

    Step-by-Step: Configuring VLANs on a TP-Link Smart Switch + OPNsense

    Let’s walk through a real-world home lab setup. We’ll create three VLANs: a main LAN (VLAN 10), an IoT segment (VLAN 20), and a lab/experimental network (VLAN 30).

    Step 1 — Plan your VLAN IDs and subnets first

    Before touching any hardware, sketch this out:

    • VLAN 10 — Main LAN — 192.168.10.0/24
    • VLAN 20 — IoT Devices — 192.168.20.0/24
    • VLAN 30 — Home Lab — 192.168.30.0/24

    Step 2 — Configure the managed switch

    Log into your switch’s web interface. Navigate to the 802.1Q VLAN section. Create VLAN IDs 10, 20, and 30. Assign port 1 as a tagged (trunk) member of all three VLANs — this will connect to your router/firewall. Assign the remaining ports as untagged members of their respective VLANs based on what device plugs in where. For example, ports 2–4 untagged on VLAN 10, ports 5–6 untagged on VLAN 20, and ports 7–8 untagged on VLAN 30.

    Step 3 — Create VLAN interfaces in OPNsense

    In OPNsense, navigate to Interfaces → Other Types → VLAN. Create a VLAN interface for each ID (10, 20, 30) on the physical NIC connected to your switch. Then go to Interfaces → Assignments and assign each VLAN interface as a new interface. Give each one an IP address matching your planned subnets (e.g., 192.168.10.1/24 as the gateway for VLAN 10).

    Step 4 — Set up DHCP for each VLAN

    Under Services → DHCPv4, enable DHCP on each new interface and define your IP ranges. For VLAN 20 (IoT), consider a tighter range and shorter lease times since IoT devices tend to cycle on and off more frequently.

    Step 5 — Create firewall rules

    This is where the real security work happens. By default in OPNsense, inter-VLAN traffic is blocked. You’ll want to explicitly allow:

    • All VLANs: outbound internet access (allow traffic to WAN)
    • Main LAN (VLAN 10): access to Lab VLAN (VLAN 30) for management purposes
    • IoT (VLAN 20): internet-only access, block all inter-VLAN communication
    • Lab (VLAN 30): isolated unless you specifically need it to reach VLAN 10
    OPNsense VLAN firewall rules configuration dashboard

    Real-World Home Lab Examples from the Community

    The global home lab community has been sharing some impressive setups worth learning from. In the r/homelab and r/selfhosted communities on Reddit, a widely referenced 2026 approach involves running Proxmox as the hypervisor with OPNsense as a VM, using a PCIe passthrough NIC to handle VLAN-tagged trunk links. This “all-in-one” approach saves physical rack space while maintaining proper network segmentation.

    In South Korea, tech enthusiasts in communities like 클리앙 (Clien) and 뽐뿌 have documented detailed builds using MikroTik hAP ax³ routers paired with TP-Link Omada access points — an affordable combo that handles VLAN segmentation beautifully for homes with 10–15 connected devices across different trust levels.

    In Japan, the homeserver.jp community has popularized using the Yamaha RTX series routers (a domestic brand known for rock-solid VLAN support) alongside commodity managed switches. This combination is particularly favored by Japanese home lab operators who run Kubernetes clusters at home — a trend that’s exploded in 2026 as k3s and Talos Linux have made edge Kubernetes genuinely viable.

    Common Mistakes and How to Avoid Them

    • Forgetting the native VLAN: On most switches, VLAN 1 is the default/native VLAN. It’s best practice to change the native VLAN on trunk ports to an unused VLAN ID to prevent VLAN hopping attacks.
    • Misconfiguring the PVID (Port VLAN ID): The PVID determines which VLAN untagged ingress traffic gets assigned to. Getting this wrong means devices end up on the wrong segment silently.
    • No inter-VLAN routing for management: Locking yourself out is a rite of passage, but you can avoid it by keeping a dedicated management VLAN with a local access method (console port or out-of-band access).
    • Overlooking Wi-Fi VLAN mapping: If you set up VLANs on wired ports but forget to map SSIDs to VLANs on your access point, your IoT Wi-Fi devices bypass the whole segmentation scheme.

    Realistic Alternatives If Full VLAN Setup Feels Overwhelming

    Here’s where I want to be honest with you: a full managed switch + dedicated firewall VLAN setup has a learning curve. If you’re just starting out, here are realistic stepping stones:

    • Start with Guest Wi-Fi networks: Most modern routers (even consumer ones) support a guest SSID that’s isolated from your main network. It’s not as granular as a VLAN, but it achieves basic IoT isolation instantly.
    • Use a single VLAN as your first project: Just isolate IoT on VLAN 20 first. Don’t try to build the whole architecture in one weekend. Master one segment, then expand.
    • Try GNS3 or EVE-NG first: These are network simulation tools where you can practice VLAN configuration virtually before touching physical gear. Zero risk of locking yourself out of your home network.
    • Consider Ubiquiti UniFi as a beginner-friendly VLAN platform: The UniFi controller has a GUI-driven VLAN workflow that’s far more forgiving than raw CLI configuration on enterprise gear, while still teaching real concepts.

    The point is: perfect architecture built incrementally beats a theoretically ideal design that never gets implemented because the complexity is paralyzing. Start small, validate it works, then layer on complexity.


    Editor’s Comment : Setting up VLANs in your home lab isn’t just a nerdy exercise — it’s one of the most practical skills you can build in 2026, especially as home networks carry an increasingly mixed workload of personal devices, smart home gadgets, and serious compute infrastructure. The beauty of doing this in a home lab is that mistakes are cheap and lessons are permanent. If your first VLAN config bricks your switch config and you have to factory reset, congratulations — you’ve just learned something no YouTube video could teach you as effectively. Start with a managed switch, pick one firewall (OPNsense is my recommendation for depth of features), and segment just one problematic device category first. The confidence you build will compound quickly.

    태그: [‘home lab VLAN setup’, ‘VLAN configuration guide 2026’, ‘OPNsense VLAN tutorial’, ‘home network segmentation’, ‘managed switch 802.1Q’, ‘IoT network isolation’, ‘homelab networking beginner’]


    📚 관련된 다른 글도 읽어 보세요

  • 홈랩 네트워크 VLAN 설정법 완전 정복 — 2026년 초보자도 따라하는 네트워크 분리 가이드

    얼마 전 지인이 이런 이야기를 하더라고요. 집에 NAS, 스마트 TV, 보안 카메라, 개인 노트북까지 죄다 같은 공유기 아래 물려놨더니 어느 날 NAS에 저장해 둔 파일이 이상하게 접근되더라는 거예요. 딱히 해킹을 당한 건 아니었지만, 어린 조카가 스마트 TV로 공유기를 통해 NAS에 접근해서 파일을 지워버린 거였죠. 웃픈 일이지만, 이게 바로 네트워크 분리가 되어 있지 않을 때 생기는 전형적인 문제라고 봅니다.

    홈랩(Home Lab)을 구성하는 분들이 2026년 현재 굉장히 많아졌어요. 예전엔 IT 전문가나 개발자들의 전유물처럼 여겨졌는데, 이제는 재택근무 환경 개선, NAS 서버 운영, 스마트홈 기기 관리 등의 이유로 일반 가정에서도 홈랩을 꾸리는 분들이 늘어나고 있거든요. 그런데 기기를 많이 연결한다고 해서 끝이 아닙니다. VLAN(Virtual Local Area Network)을 이용한 네트워크 분리가 없다면, 사실상 모든 기기가 한 방에 모여 서로의 속을 다 들여다보는 상황이나 마찬가지예요.

    오늘은 홈랩 환경에서 VLAN을 왜 설정해야 하는지, 어떻게 구성하는지를 함께 차근차근 살펴보도록 할게요.

    home lab network VLAN setup diagram rack server

    ✅ VLAN이란 무엇인가 — 개념부터 짚고 가기

    VLAN은 물리적으로 같은 네트워크에 연결되어 있더라도 논리적으로 서로 다른 네트워크처럼 동작하게 해주는 기술입니다. 쉽게 말하면, 하나의 스위치나 공유기에 연결된 기기들을 “그룹”으로 나눠서, 그룹 간에는 서로 통신이 안 되도록 막는 거예요.

    일반적인 가정용 공유기는 기본적으로 모든 기기가 같은 서브넷(예: 192.168.1.0/24)에 묶입니다. 이 경우 스마트홈 IoT 기기, 업무용 노트북, 보안 카메라가 모두 같은 네트워크에 있기 때문에 이론적으로는 서로 통신이 가능한 상태예요. 보안상으로도, 관리 측면으로도 이건 좋지 않은 구조라고 봅니다.

    📊 수치로 보는 홈 네트워크 보안 위협

    국제 사이버 보안 기관 ENISA(유럽 네트워크 정보보안기구)의 2025년 보고서에 따르면, 스마트홈 기기를 통한 내부 네트워크 침투 사고가 전년 대비 약 34% 증가했습니다. 특히 IoT 기기(스마트 스피커, IP 카메라 등)는 펌웨어 업데이트 주기가 느리고 기본 보안 설정이 취약한 경우가 많아, 같은 네트워크에 있는 다른 기기의 피벗(Pivot) 포인트로 활용되는 사례가 많다고 해요.

    국내에서도 한국인터넷진흥원(KISA)의 2025년 하반기 발표 자료 기준, 가정 내 네트워크 침해 사고의 약 61%가 IoT 기기를 통해 동일 서브넷의 다른 기기로 확산된 것으로 나타났습니다. VLAN으로 네트워크를 분리하면 이런 확산을 물리적 교체 없이도 논리적으로 차단할 수 있다는 점에서, 홈랩 환경에서는 사실상 필수 구성 요소라고 봐도 무방합니다.

    🏗️ 홈랩 VLAN 구성 — 어떻게 나눌까?

    먼저 어떤 VLAN을 만들지 설계하는 게 중요해요. 정답은 없지만, 2026년 현재 홈랩 커뮤니티에서 가장 널리 사용되는 구성 예시를 정리해 봤습니다.

    • VLAN 10 — 관리(Management) 네트워크: 공유기, 스위치, AP 등 네트워크 장비 관리 인터페이스 전용. 외부에서 접근 불가하도록 격리.
    • VLAN 20 — 신뢰(Trusted) 네트워크: 개인 노트북, 스마트폰, 업무용 PC 등 신뢰할 수 있는 기기. 인터넷 및 NAS 접근 허용.
    • VLAN 30 — 서버(Server) 네트워크: NAS, 홈 서버, 가상머신 호스트 등. 특정 포트/프로토콜만 허용하는 방화벽 규칙 적용.
    • VLAN 40 — IoT 네트워크: 스마트 TV, 스마트 스피커, 로봇청소기 등 IoT 기기. 인터넷은 허용하되 다른 VLAN 접근은 차단.
    • VLAN 50 — 게스트(Guest) 네트워크: 방문객 기기 전용. 인터넷 접근만 허용하고 나머지 내부 네트워크는 완전 격리.

    🔧 실제 설정 방법 — 필요한 장비와 핵심 절차

    VLAN을 설정하려면 VLAN을 지원하는 스위치(관리형 스위치, Managed Switch)VLAN 라우팅을 지원하는 라우터 또는 방화벽이 필요합니다. 가정용 일반 공유기 대부분은 VLAN 기능이 없거나 매우 제한적이에요.

    2026년 현재 홈랩용으로 가장 인기 있는 조합은 다음과 같습니다:

    • 라우터/방화벽: pfSense, OPNsense (오픈소스, 미니 PC에 설치), 또는 Mikrotik RouterOS
    • 관리형 스위치: TP-Link TL-SG108E, Netgear GS308E (저가형 입문용), 또는 Ubiquiti UniFi 시리즈 (중급 이상)
    • 무선 AP: Ubiquiti UniFi AP, TP-Link EAP 시리즈 (SSID별 VLAN 태깅 지원)

    설정의 핵심 흐름을 간단히 정리하면 이렇습니다:

    1. 라우터(OPNsense 기준)에서 각 VLAN ID(예: 10, 20, 30…)를 생성하고, 각 VLAN에 서브넷을 할당합니다. (예: VLAN 20 → 192.168.20.0/24)
    2. 각 VLAN에 DHCP 서버를 활성화하여 기기들이 자동으로 IP를 받을 수 있게 합니다.
    3. 관리형 스위치에서 포트별로 VLAN을 할당합니다. 라우터와 연결된 포트는 트렁크(Trunk) 포트로 설정하여 모든 VLAN 태그가 통과할 수 있게 하고, 일반 기기가 꽂히는 포트는 액세스(Access) 포트로 설정해 해당 VLAN만 통신하도록 합니다.
    4. 라우터의 방화벽 규칙에서 VLAN 간 통신 정책을 설정합니다. 예를 들어 IoT VLAN에서 서버 VLAN으로의 접근을 차단하는 규칙을 추가하는 식이에요.
    5. 무선 AP에서 SSID(와이파이 이름)별로 VLAN을 매핑합니다. 예: “HomeNet-Guest” SSID → VLAN 50 태깅.
    OPNsense pfSense VLAN firewall rule configuration interface

    🌐 국내외 홈랩 커뮤니티 사례

    해외에서는 Reddit의 r/homelab, r/selfhosted 커뮤니티가 굉장히 활성화되어 있어요. 2025~2026년 사이 포스팅들을 보면 OPNsense + UniFi 스위치 + UniFi AP 조합이 압도적으로 많이 언급됩니다. 특히 UniFi는 컨트롤러 소프트웨어 하나로 스위치, AP, 방화벽을 통합 관리할 수 있어 설정 편의성이 높다는 평가를 받고 있어요.

    국내에서는 클리앙, 뽐뿌, 그리고 네이버 카페 ‘홈서버 마니아’ 등에서 비슷한 구성 사례를 많이 찾아볼 수 있습니다. 특히 국내 홈랩 유저들 사이에서는 TP-Link TL-SG108E + pfSense/OPNsense 조합이 가성비 측면에서 인기 있는 것 같습니다. TL-SG108E는 2만 원대 후반의 저렴한 8포트 관리형 스위치임에도 802.1Q VLAN을 지원하기 때문에 입문자에게 특히 추천되고 있어요.

    ⚠️ 자주 하는 실수와 주의사항

    • Native VLAN 설정 오류: 트렁크 포트에서 태그가 없는 트래픽이 어느 VLAN으로 가는지(Native VLAN)를 명확히 설정하지 않으면 예상치 못한 VLAN으로 트래픽이 흘러 보안 허점이 생깁니다.
    • VLAN 간 방화벽 규칙 누락: VLAN을 만들었어도 라우터에서 기본적으로 VLAN 간 라우팅이 허용되어 있을 수 있어요. 반드시 “기본 차단(Default Deny)” 규칙을 먼저 설정하고 필요한 트래픽만 허용하는 화이트리스트 방식을 권장합니다.
    • 관리 VLAN 노출: 관리 VLAN(VLAN 10)은 절대 일반 기기나 게스트 기기에서 접근이 안 되도록 완전히 격리해야 합니다.
    • 무선 AP VLAN 태깅 미설정: 스위치 포트 VLAN만 설정하고 AP의 SSID별 VLAN 태깅을 빠뜨리는 경우가 많아요. 와이파이로 연결되는 기기도 반드시 올바른 VLAN에 들어오도록 확인해야 합니다.

    태그: []


    📚 관련된 다른 글도 읽어 보세요

  • Industrial Additive Manufacturing Materials in 2026: The Breakthroughs Quietly Reshaping How Things Are Made

    A few months ago, I was chatting with a materials engineer at a small aerospace supplier in Stuttgart. She was telling me how, just two years prior, her team had to reject a client’s design because no printable alloy could handle the thermal cycling requirements. Then, almost overnight, a new high-entropy alloy powder hit the market — and suddenly the part was not only buildable but outperformed the traditionally machined version. That story stuck with me, because it captures exactly what’s happening in industrial additive manufacturing (AM) materials right now: the material science is finally catching up to the ambition of the machines.

    So let’s dig into what’s actually changing in 2026, what the data tells us, and — critically — what this means if you’re deciding whether to invest, retool, or simply stay curious.

    industrial 3D printing metal powder aerospace manufacturing 2026

    The Numbers Don’t Lie: Where the Market Stands in 2026

    According to the latest industry analysis from SmarTech Analysis and Wohlers Associates, the global market for AM materials alone is projected to cross $8.2 billion USD in 2026, up from roughly $5.4 billion in 2023. That’s not just printer sales — that’s feedstock: powders, filaments, resins, and bio-inks. The materials segment is now growing faster than hardware, which is a telling signal that the industry is maturing from experimentation into production-scale deployment.

    What’s driving this? Three converging forces:

    • Supply chain resilience pressure: Post-pandemic and post-geopolitical disruption, manufacturers want on-demand, localized part production — and that requires reliable, certified AM materials.
    • Sustainability mandates: The EU’s updated industrial decarbonization framework (effective January 2026) has pushed manufacturers to adopt near-net-shape processes that minimize waste. AM, by nature, fits perfectly.
    • Performance parity — and beyond: In several categories, AM-produced parts now match or exceed the mechanical properties of wrought or cast equivalents.

    Metal Powders: High-Entropy Alloys and Refractory Materials Take Center Stage

    If there’s one material category dominating R&D conversations in 2026, it’s High-Entropy Alloys (HEAs). Unlike conventional alloys built around one dominant element (think: stainless steel is mostly iron, titanium alloys are mostly titanium), HEAs consist of five or more principal elements in roughly equal proportions. The result? Extraordinary combinations of strength, corrosion resistance, and thermal stability that were previously impossible to achieve simultaneously.

    Companies like Höganäs (Sweden) and Carpenter Additive (USA) have rolled out atomized HEA powder grades specifically optimized for Laser Powder Bed Fusion (LPBF) and Directed Energy Deposition (DED) processes. Early adopters in the aerospace and energy sectors are reporting fatigue life improvements of 15–30% over traditional Inconel 718 in high-temperature applications.

    Meanwhile, refractory materials — tungsten, molybdenum, and their composites — are gaining traction for defense and semiconductor tooling applications. The challenge has always been their extreme melting points (tungsten melts at over 3,400°C), but advances in Electron Beam Powder Bed Fusion (EB-PBF) processing parameters are making these materials genuinely printable at scale.

    Polymers and Composites: PEEK Isn’t the Ceiling Anymore

    For years, PEEK (Polyether ether ketone) was the gold standard for high-performance polymer AM — praised for its chemical resistance, biocompatibility, and thermal stability. In 2026, it’s still excellent, but it’s no longer the ceiling.

    PAEK-family materials (Polyaryletherketone) including PEKK and PEKKEK are now commercially available in filament and powder form from suppliers like Solvay and Evonik. These offer slightly superior stiffness-to-weight ratios and, crucially, better processability on Multi Jet Fusion (MJF) platforms — opening up high-throughput production that wasn’t feasible with traditional PEEK.

    The real excitement, though, is in continuous fiber-reinforced composites. Markforged’s X7 platform and Continuous Composites’ CF3D technology have both received significant industrial adoption in 2026, particularly in automotive and industrial robotics end-use parts. We’re talking about carbon fiber, fiberglass, and even Kevlar being deposited in continuous strands — not just chopped filler — resulting in parts with structural properties that genuinely compete with aluminum for many applications.

    continuous fiber reinforced 3D printed composite part industrial application

    Real-World Examples: Who’s Actually Doing This?

    Let’s ground this in reality, because the hype-to-deployment gap in manufacturing can be enormous.

    • Siemens Energy (Germany/Global): Has been using DED-printed turbine blade repair with IN738 superalloy powder since 2024, but in 2026 expanded to full blade manufacturing using a new proprietary powder blend, cutting lead time from 18 weeks to under 4 weeks.
    • POSCO (South Korea): The steel giant launched a dedicated AM materials division in late 2025, producing custom stainless and tool steel powders optimized for Korean defense and shipbuilding clients — a clear signal that traditional materials producers are pivoting toward AM feedstock as a revenue stream.
    • Relativity Space (USA): Their Terran R rocket, in active development, uses an updated aluminum-lithium alloy (developed in partnership with Elementum 3D) that’s been reformulated for their large-format DED system. The alloy achieves aerospace-grade strength while remaining printable at scale — something that was genuinely unsolved just three years ago.
    • KAIST & Hyundai Motor (South Korea): A joint research program published findings in early 2026 on gradient-composition titanium parts for EV structural components — where the material composition actually changes continuously through the part to optimize stiffness where needed and dampen vibration elsewhere. This is called Functionally Graded Materials (FGM), and it’s moving from the lab toward the production floor.

    The Certification Bottleneck — and How It’s Being Solved

    Here’s the honest reality check: having a great material means very little if it isn’t certified for your industry. Aerospace (AS9100), medical (ISO 13485), and automotive (IATF 16949) all require rigorous qualification. And traditionally, qualifying a new AM material has taken 3–5 years and millions of dollars.

    Two developments in 2026 are beginning to crack this open:

    • Digital material twins: Companies like Ansys and Seurat Technologies are using physics-based simulation to pre-validate material behavior, significantly shortening experimental qualification cycles. The FAA and EASA have both issued updated guidance acknowledging simulation-assisted qualification pathways — a regulatory shift that was years in the making.
    • AM material databases: NIST’s AM Material Database (AMMD), expanded significantly in late 2025, now includes standardized test data for over 400 material-process combinations. This shared infrastructure means a material qualified at one facility has a much clearer path to acceptance at another.

    Realistic Alternatives: What Should You Actually Do With This Information?

    Not everyone reading this is running an aerospace OEM. So let’s be practical about how to engage with these developments based on where you are:

    • If you’re a small/mid-size manufacturer: You probably don’t need to develop your own powder alloys. Focus on qualifying one or two well-supported materials (17-4PH stainless, AlSi10Mg, or PEEK) on a certified service bureau platform before chasing exotic materials. Get the fundamentals right first.
    • If you’re in R&D or product development: This is the moment to prototype with composite filaments and HEA powders through service providers like Xometry or Protolabs, which now offer these materials on-demand. You can evaluate performance without capital investment.
    • If you’re an investor or strategist: The materials segment — not the hardware — is where durable value is being created. Powder atomization, material informatics, and certification support services are all underserved relative to printer OEMs.
    • If you’re a student or early-career engineer: Material informatics and process-structure-property relationships in AM are genuinely hot skills in 2026. Consider coursework or projects at the intersection of alloy design and machine learning — it’s a rare combination that’s in high demand.

    The trajectory is clear: industrial AM is no longer waiting for better materials — in many categories, the materials are now ahead of the widespread adoption. The challenge has shifted from “can we print this?” to “how do we qualify, scale, and economically justify printing this?” That’s actually a much more interesting problem to solve.

    Editor’s Comment : What excites me most about where we are in 2026 isn’t any single breakthrough alloy or composite — it’s the maturation of the ecosystem around them. Certification frameworks, shared databases, simulation-assisted qualification: these are the unglamorous infrastructure pieces that turn a laboratory curiosity into something a factory floor can rely on. If you’re in any part of the industrial manufacturing world, the time to build literacy in AM materials is now — not because everything will change tomorrow, but because the companies that understand these materials deeply today will have a quietly enormous advantage in the next five years.

    태그: [‘industrial additive manufacturing’, ‘AM materials 2026’, ‘metal powder 3D printing’, ‘high entropy alloys’, ‘continuous fiber composites’, ‘PEEK alternatives additive manufacturing’, ‘additive manufacturing trends 2026’]


    📚 관련된 다른 글도 읽어 보세요

  • 2026년 산업용 적층 제조 소재 최신 개발 동향 — 금속부터 바이오 복합재까지, 지금 무슨 일이 일어나고 있나

    얼마 전 한 항공우주 엔지니어링 컨퍼런스에서 흥미로운 장면이 있었다고 해요. 발표자가 손바닥 위에 작은 터빈 블레이드 하나를 올려놓고 이렇게 말했다는 거죠. “이 부품은 단 하나의 소재로 만들어진 게 아닙니다.” 니켈 합금 기반 구조 안에 세라믹 코팅이 그라디언트(gradient) 방식으로 녹아 있고, 내부 냉각 채널까지 한 번의 프린팅으로 완성됐다는 설명에 청중이 술렁였다고 하더군요. 이 이야기가 단순한 기술 자랑처럼 들릴 수도 있지만, 사실 2026년 현재 산업용 적층 제조(AM, Additive Manufacturing) 소재 분야가 바로 이 방향으로 빠르게 진화하고 있다는 걸 보여주는 상징적인 장면이라고 봅니다.

    3D 프린팅이라는 단어가 더 이상 낯설지 않은 시대가 됐지만, 정작 ‘어떤 소재로 무엇을 만들 수 있는가’에 대한 이해는 여전히 일반 독자에게 멀게 느껴지는 영역이에요. 오늘은 그 간극을 조금이나마 좁혀보려 합니다.

    industrial additive manufacturing metal powder 3D printing 2026

    📊 숫자로 보는 2026년 AM 소재 시장 — 얼마나 커졌나

    글로벌 시장조사 기관들의 최신 데이터를 종합해 보면, 2026년 전체 적층 제조 소재 시장 규모는 약 48억 달러(약 6조 4천억 원) 수준으로 추정되고 있어요. 2022년 대비 연평균 성장률(CAGR)이 약 19~21%에 달한다는 점이 눈에 띕니다. 특히 소재별로 성장 속도에 차이가 있는데요.

    • 금속 분말(Metal Powder) 소재: 시장 점유율 약 38%. 타이타늄(Ti-6Al-4V), 인코넬(Inconel 625/718), 알루미늄 합금(AlSi10Mg)이 3대 주력 소재로, 항공·의료·방산 분야 수요가 견인하고 있어요.
    • 고성능 폴리머 소재: PEEK(폴리에테르에테르케톤), PEKK 계열의 수요가 2023년 대비 약 34% 증가. 특히 척추 임플란트와 항공기 내장재 분야에서 급성장 중입니다.
    • 세라믹 및 복합재: 알루미나, 지르코니아 기반 세라믹이 치과·반도체 분야를 중심으로 연간 22% 성장률을 보이고 있어요.
    • 바이오 소재 및 하이드로겔: 조직공학과 약물전달 시스템 적용을 목적으로 한 소재 개발이 2025~2026년을 기점으로 본격 상용화 단계에 진입했다는 평가를 받고 있습니다.

    흥미로운 점은 단일 소재보다 멀티 머티리얼(Multi-material) 프린팅 관련 소재 개발 투자가 전년 대비 약 47% 급증했다는 거예요. 하나의 빌드 챔버 안에서 기계적 특성이 다른 소재들을 동시에, 혹은 순차적으로 적층하는 기술이 현실화되면서, 소재 개발의 방향 자체가 ‘단일 성능 극대화’에서 ‘이종 소재 간 결합 최적화’로 무게중심이 이동하고 있는 것 같습니다.

    🌍 국내외 주요 개발 사례 — 연구실을 벗어나 공장으로

    해외 사례부터 살펴보면, 독일의 소재 기업 Evonik Industries는 2025년 말 PEEK 계열 신소재인 VESTAKEEP® iC4600 AM의 업그레이드 버전을 공개했어요. 기존 대비 층간 결합 강도(interlayer bonding strength)를 약 31% 향상시켰고, 멸균 공정에서도 물성 저하가 거의 없다는 점에서 의료기기 분야의 주목을 받고 있습니다. 미국의 6K Additive는 플라즈마 구형화(UniMelt® 공정) 기술로 재활용 금속 스크랩을 고품질 프린팅용 구형 분말로 재생산하는 공정을 2026년 초 대규모로 확장했는데, 이는 소재 원가를 최대 40% 낮추는 동시에 탄소 발자국을 줄인다는 점에서 지속 가능성 트렌드와도 맞닿아 있어요.

    국내 상황을 보면, 한국재료연구원(KIMS)이 2025년부터 추진해온 ‘기능성 경사조성 소재(FGM, Functionally Graded Material)’ 프로젝트가 2026년 상반기에 의미 있는 성과를 냈습니다. 티타늄과 스테인리스강을 연속적으로 조성 비율을 바꿔가며 적층하는 기술을 통해, 두 이종 금속 간 열팽창 계수 차이로 인한 계면 크랙 문제를 상당 부분 해소했다는 보고가 있어요. 또한 국내 소재 기업 티씨케이(TCK)와 일부 스타트업들이 반도체 공정용 고순도 세라믹 AM 소재 국산화에 속도를 내고 있는데, 이는 공급망 리스크를 줄이려는 산업계의 요구와 맞물려 상당한 추진력을 얻고 있는 것 같습니다.

    PEEK polymer biocomposite 3D printing medical aerospace material

    🔬 2026년 주목해야 할 소재 기술 키워드 3가지

    • 1. 고엔트로피 합금(HEA, High-Entropy Alloy) 분말: 5가지 이상의 원소를 거의 동등한 비율로 혼합한 합금으로, 기존 단일 합금 대비 월등한 내열성·내부식성을 보입니다. AM 공정에서의 적용 연구가 2025~2026년을 기점으로 폭발적으로 증가하고 있어요.
    • 2. 광경화성 세라믹 레진(Photocurable Ceramic Resin): DLP(디지털 광처리) 방식으로 정밀도 높은 세라믹 부품을 제작할 수 있게 해주는 소재예요. 소결(sintering) 후 수축률을 예측·보정하는 알고리즘과 결합하면서 치과 크라운부터 반도체 지그까지 응용 범위가 넓어지고 있습니다.
    • 3. 자가 치유 폴리머(Self-healing Polymer): 미세 균열이 발생했을 때 특정 조건(열, 빛, 습기)에서 스스로 결합을 복원하는 소재예요. 아직 산업용 AM에서의 상용화는 초기 단계이지만, 유지보수 비용 절감 가능성 때문에 장기 연구 투자가 상당히 집중되고 있는 분야라고 봅니다.

    💡 현실적 대안 — 중소 제조업체는 지금 무엇을 해야 할까

    여기까지 읽으면서 “우리 회사 규모에서 고엔트로피 합금이나 자가 치유 폴리머를 쓰는 건 먼 이야기 아닌가”라는 생각이 드셨을 수도 있어요. 그 생각, 충분히 타당합니다.

    현실적으로 중소 규모의 제조업체가 당장 주목할 만한 영역은 크게 두 가지라고 봐요. 첫째는 범용 엔지니어링 폴리머(PA12, PA-CF, PETG 등)의 공정 파라미터 최적화입니다. 비싼 신소재를 도입하기 전에, 현재 사용 중인 소재를 프린팅 온도·속도·레이어 높이 조합을 정밀하게 튜닝하는 것만으로도 기계적 물성을 15~25% 끌어올릴 수 있다는 실험 결과들이 꾸준히 보고되고 있거든요. 둘째는 소재 공급사와의 직접 협업 채널 확보입니다. 대형 소재 기업들은 자사 신소재의 레퍼런스 케이스를 만들기 위해 파일럿 파트너를 적극적으로 찾고 있어요. 공식 파트너십을 맺으면 소재를 시중가보다 저렴하게 공급받으면서 최신 소재를 먼저 테스트해 볼 기회를 얻을 수 있습니다.

    적층 제조 소재의 세계는 빠르게 움직이고 있지만, 모든 것을 한꺼번에 따라잡으려 하면 오히려 길을 잃기 쉬워요. 자신의 산업군에 가장 영향력 있는 소재 트렌드 하나를 먼저 깊게 파고드는 전략이 현실적으로 더 효과적인 것 같습니다.

    에디터 코멘트 : 2026년 AM 소재 트렌드의 핵심 키워드는 결국 ‘이종 결합’‘순환 가능성’이라고 봐요. 더 강하게, 더 가볍게 만드는 것을 넘어서, 서로 다른 소재를 얼마나 자연스럽게 연결하고 또 얼마나 지속 가능하게 순환시킬 수 있느냐가 앞으로 소재 경쟁력의 기준이 될 것 같습니다. 당장 최첨단 소재를 도입하지 않더라도, 이 흐름을 이해하고 있는 것 자체가 제조 현장에서 중요한 판단 기준이 될 거예요.

    태그: [‘적층제조소재’, ‘산업용3D프린팅’, ‘금속분말AM’, ‘PEEK고성능폴리머’, ‘멀티머티리얼프린팅’, ‘고엔트로피합금’, ‘2026제조트렌드’]


    📚 관련된 다른 글도 읽어 보세요

  • Best Low-Power Home Lab Servers in 2026: Cut Your Electricity Bill Without Cutting Corners

    Let me paint you a picture. It’s late 2025, and my friend Marcus — a self-described “weekend tinkerer” — proudly showed me his home lab setup: four repurposed enterprise servers humming away in his spare bedroom. Cool setup, right? Then his electricity bill arrived. $180 extra per month. His partner was… not thrilled. Fast forward to today in 2026, and Marcus has completely rebuilt his lab around low-power hardware, slashed that bill down to under $25/month, and honestly? His setup is more capable than before. That’s the story we’re unpacking today.

    Whether you’re running Proxmox, self-hosting services like Nextcloud or Plex, or just experimenting with Kubernetes at home, your server’s idle wattage is the silent budget killer nobody warns you about. Let’s think through this together — logically, practically, and without spending a fortune.

    low power home lab server mini PC setup desk

    Why Idle Power Draw Is the Real Enemy

    Here’s the math most people skip. A server drawing 150W idle running 24/7 costs roughly:

    • 150W × 24h × 365 days = 1,314 kWh/year
    • At the 2026 U.S. average of ~$0.17/kWh, that’s ~$223/year just sitting there doing nothing intensive
    • In South Korea (where our original keyword originates), with rates around ₩150/kWh, that’s roughly ₩197,000/year (~$145 USD)

    Now flip it: a machine drawing 10–15W idle? You’re looking at $22–33/year. That’s the difference between a hardware upgrade fund and a bill you resent every month.

    Top Low-Power Home Lab Picks for 2026

    Let’s get specific. The market has matured beautifully — here are the categories worth your attention right now:

    • Intel N100 / N305 Mini PCs (e.g., Beelink EQ12, Minisforum UN305) — The N100 chip is a genuine 2026 sweetheart. At 6–12W idle with full virtualization support (VT-x, VT-d), it’s ideal for running 3–5 lightweight VMs or containers. Typical price: $150–$220.
    • AMD Ryzen 7840U / 8840U Mini PCs (e.g., Minisforum UM890 Pro) — If you need GPU passthrough for transcoding, the integrated Radeon 780M is surprisingly capable. Idles around 8–15W. Price: $350–$450.
    • Raspberry Pi 5 (8GB) Cluster — Still a fantastic edge case for pure ARM workloads. A single Pi 5 idles at ~3–5W. Running three in a cluster for distributed services? Still under 20W total. Price per unit: ~$80.
    • Arm-based SBCs: Orange Pi 5 Plus / Rock 5B — The RK3588 chip delivers 8-core performance at ~8W idle. Great for NAS duties or lightweight Docker hosts. Price: $90–$130.
    • Refurbished Thin Clients: HP t740 / Lenovo ThinkCentre M75q Gen 5 — Often overlooked in 2026, but these machines offer enterprise reliability, low wattage (10–18W idle), and NVMe support. You can find them refurbished for $100–$180.

    Real-World Examples: How People Are Actually Building in 2026

    Let’s look beyond the spec sheets. In South Korea’s active 홈서버 (home server) community on Naver Cafe and Reddit’s r/homelab, a consistent pattern has emerged this year:

    The “Korean All-in-One” setup trending in 2026 combines a single Beelink EQ12 (N100) running Proxmox with LXC containers for AdGuard Home, Jellyfin (light transcoding), and Nextcloud. Total monthly power cost reported by multiple users: ₩2,500–₩4,000/month (~$1.80–$2.90 USD). Remarkable.

    In Europe, where electricity rates have stabilized but remain high (averaging €0.28/kWh in Germany in 2026), homelab enthusiasts on the HomeServerHobbyist.de forums favor the HP t740 thin client for its certified low-power profile and easy RAM expansion. Running TrueNAS Scale with two drives, it reportedly costs under €4/month in electricity.

    In North America, the r/homelab community in 2026 increasingly debates whether the Minisforum UM890 Pro justifies its higher cost — and the consensus is: only if you need GPU transcoding for 4K Plex. Otherwise, the N100 class wins on pure efficiency math.

    electricity bill comparison home server power consumption chart 2026

    Factors to Weigh Before You Buy

    • RAM ceiling matters: The N100 maxes out at 16GB DDR5. If you’re planning serious VM density (10+ VMs), you’ll want a platform supporting 32GB+ like the Ryzen 8840U options.
    • Storage flexibility: Look for at least two NVMe slots or SATA ports. A great CPU with no room for drives becomes a bottleneck fast.
    • ECC memory needs: Running a NAS with critical data? ECC support is largely absent in mini PC territory. Consider the ASRock Industrial or a used Supermicro X11SCL-F (which, yes, is still efficient with Xeon D chips) if data integrity is paramount.
    • Noise levels: Low power often means quieter fans, but verify this — some budget mini PCs have notoriously annoying fan profiles under even light load.
    • Wake-on-LAN / scheduled power: If your workloads aren’t 24/7, this feature alone can cut consumption by 40–60%. Not all mini PCs implement it reliably.

    Realistic Alternatives for Different Budgets

    Not everyone is starting from zero, so let’s be practical:

    • Already own an old desktop? Before buying anything new, install a smart plug with energy monitoring (like the Kasa EP25 or Tapo P115) and measure actual idle draw. A Core i5-8400 machine might idle at 35–45W — not terrible, and potentially good enough if you already own it.
    • Tight budget ($100 or under)? A used Raspberry Pi 4 (8GB) or an Orange Pi 5 can host surprisingly functional setups with Docker. Limited but real.
    • Mid-range sweet spot ($150–$300)? The N100 mini PC class is almost certainly your answer in 2026. The ecosystem of guides, community support, and compatibility is mature.
    • Want room to grow? The Ryzen 8840U platform with 32GB RAM running Proxmox gives you genuine headroom for years, and at 8–15W idle, it’s still dramatically better than any used enterprise server.

    The bottom line is this: building a home lab in 2026 doesn’t require choosing between capability and your electricity bill. The hardware available today makes that a false choice. Think carefully about your actual workload requirements — not aspirational ones — match the platform to those needs, and you’ll end up with something Marcus-before-the-bill would have envied, at a fraction of the running cost.

    Editor’s Comment : The best home lab server is the one that doesn’t make you wince every time the utility bill arrives. In 2026, the N100 mini PC ecosystem has hit a genuinely sweet spot of price, power, and performance that’s hard to argue against for most use cases. But honestly? Start by measuring what you already own before spending anything. A $15 smart plug with energy monitoring might just change your entire perspective — and save you from a decision you’ll regret.

    태그: [‘low power home lab server 2026’, ‘home server electricity savings’, ‘N100 mini PC Proxmox’, ‘homelab power consumption’, ‘self-hosting low wattage’, ‘best mini PC home server 2026’, ‘reduce server electricity bill’]


    📚 관련된 다른 글도 읽어 보세요