Category: Uncategorized

  • Additive Manufacturing Quality Control & Post-Processing in 2026: What Actually Works (And What Doesn’t)

    A colleague of mine — a senior process engineer at a mid-sized aerospace supplier in Stuttgart — told me something that stuck with me last month: “We spent six figures on a metal 3D printer, and our biggest headache isn’t the machine. It’s everything that happens before and after the print button.” That sentence perfectly captures where the additive manufacturing (AM) industry finds itself in 2026. The hardware has matured dramatically, but quality control and post-processing? That’s where the real battle is being fought.

    If you’re working in manufacturing, product design, or even prototyping, you’ve probably run into this gap yourself. Let’s think through it together — what the current landscape looks like, what the data tells us, and what realistic options you have depending on your budget and workflow.

    additive manufacturing quality control inspection metal 3D printing industrial 2026

    Why Quality Control in AM Is a Different Beast

    Traditional subtractive manufacturing (think CNC milling) removes material from a known, homogeneous block. You measure as you go. Additive manufacturing, by contrast, builds layer by layer — sometimes hundreds or thousands of layers — meaning defects can be buried mid-structure, invisible to the naked eye and even to many conventional inspection tools.

    According to a 2026 industry report by Wohlers Associates, approximately 34% of metal AM parts in production environments still require some form of rework or scrapping due to quality issues — a figure that has improved from 41% in 2023, but is still commercially uncomfortable. The most common defect categories include:

    • Porosity: Micro-voids formed during powder fusion, often caused by inconsistent laser parameters or contaminated feedstock
    • Residual stress and warping: Thermal gradients during the build cycle cause internal stresses that deform the part post-build
    • Delamination: Layer adhesion failures, especially common in FDM (Fused Deposition Modeling) polymer parts under mechanical load
    • Surface roughness: Ra values in metal AM typically range from 10–30 µm as-built, often 5–10× rougher than machined surfaces
    • Dimensional deviation: Thermal shrinkage and support structure removal can shift critical tolerances by 0.1–0.5 mm on larger parts

    The 2026 QC Toolkit: In-Process vs. Post-Process Inspection

    Here’s where things get genuinely exciting. The QC approach has bifurcated into two philosophies, and honestly, the best operations are using both simultaneously.

    In-Process Monitoring is the newer frontier. Systems like EOS’s EOSTATE suite, Sigma Labs’ PrintRite3D, and Zeiss’s AM monitoring platform use real-time melt pool imaging and thermal cameras to detect anomalies as each layer is deposited. The data these systems generate is staggering — a single metal powder bed fusion build can produce over 1 TB of sensor data. The challenge in 2026 isn’t data collection; it’s meaningful interpretation. AI-driven anomaly detection models (trained on datasets from hundreds of thousands of builds) have reduced false-positive alert rates from ~22% in 2024 to around 8% today, which makes them actually usable in a production setting without drowning your team in noise.

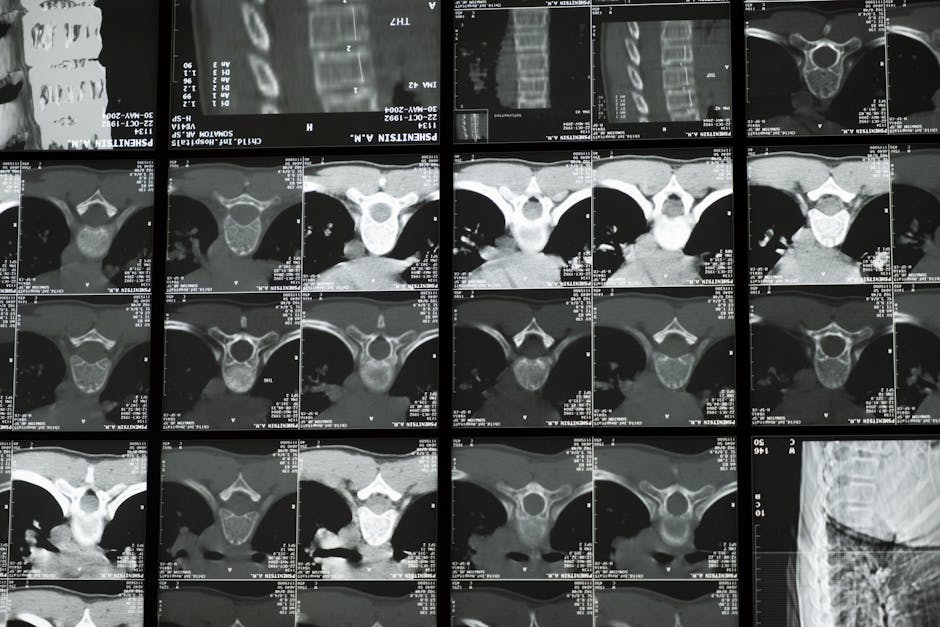
    Post-Process Inspection remains essential because in-process monitoring isn’t yet certified for all applications — particularly in aerospace and medical device sectors where regulatory frameworks (AS9100, ISO 13485) demand traceable, standardized inspection methods. The gold standard here is industrial Computed Tomography (CT scanning), which can detect internal voids as small as 10 µm. A full CT scan of a complex aerospace bracket used to cost $800–$1,200 per part in 2022. Increased competition and faster scanning hardware have pushed that to roughly $300–$600 in 2026 — still not cheap for high-volume production, but viable for flight-critical components.

    Post-Processing: The Hidden Time and Cost Sink

    Let’s be honest — post-processing is the part of the AM workflow that gets the least glamorous coverage, but it often accounts for 30–60% of total part cost. Understanding your options here can genuinely transform your ROI.

    The major post-processing categories in 2026 include:

    • Support removal: Still largely manual for complex metal parts; robotic support removal using force-feedback arms has emerged but remains niche
    • Heat treatment: Stress relief annealing is virtually mandatory for metal AM parts — typically 2–4 hours at 600–900°C depending on alloy — to release residual stresses before any machining
    • HIP (Hot Isostatic Pressing): Closes internal porosity by applying simultaneous heat (~1,100°C for titanium) and high pressure (~100–200 MPa). Increases fatigue life by 15–40% in titanium alloys. Expensive but increasingly required in aerospace contracts
    • CNC machining: Finish-machining of functional surfaces to achieve tight tolerances (±0.02 mm) and low roughness — nearly always required for mating/sealing surfaces
    • Surface finishing: Abrasive flow machining, electrochemical polishing, vibratory finishing, and media blasting each serve different geometry and roughness requirements
    • Coating and plating: PVD coatings, anodizing, and electroless nickel plating add corrosion resistance and wear properties

    International Case Studies: Who’s Getting This Right in 2026

    Let’s look at some real-world examples that illustrate both ends of the spectrum.

    GE Aerospace (USA) has arguably the most mature AM quality system in the world for the LEAP engine fuel nozzles — parts that have accumulated over 100 million flight hours. Their integrated approach combines in-situ monitoring, mandatory HIP, CT inspection of 100% of flight parts, and a digital thread that links every build parameter to the finished part’s serial number. What’s instructive here is that this level of QC took over a decade to develop and certify. It’s genuinely world-class, but it’s also a reminder that robust AM quality systems require sustained institutional investment.

    Trumpf and Fraunhofer ILT (Germany) have been collaborating on a closed-loop quality control system where in-process thermal data is fed back to adjust laser power parameters in real time — effectively a self-correcting build. In 2026 trials on Inconel 718 parts, this approach reduced porosity rates by approximately 60% compared to fixed-parameter builds. The technology is still transitioning from research to commercial deployment, but it represents a compelling near-term future.

    HD Hyundai’s shipbuilding division (South Korea) has taken an interesting middle path: rather than investing in sophisticated in-process monitoring, they’ve focused on rigorous digital twin validation before printing. Using simulation software (primarily Autodesk Netfabb and Simufact), they predict residual stress patterns and optimize part orientation and support structures computationally. Their finding: 70% of warping issues can be prevented before the machine even starts. For organizations with budget constraints, this compute-first approach is highly practical.

    Renishaw’s UK medical device clients have demonstrated that for titanium orthopedic implants, a standardized post-processing protocol — stress relief → HIP → bead blast → electrochemical polish → CT inspection — consistently achieves the mechanical properties and surface specifications required for ISO 10993 biocompatibility. The protocol adds roughly £180–£250 per implant but has essentially eliminated field failures in their customer base since 2024.

    post-processing additive manufacturing heat treatment surface finishing CT scanning industrial workflow

    Realistic Alternatives Based on Your Situation

    Here’s where I want to have a frank conversation about what’s actually appropriate for your context, because a one-size-fits-all QC strategy is a fast track to wasted budget.

    If you’re a small design studio or product development team doing prototype work in polymer (FDM, SLA, or MJF), you honestly don’t need a CT scanner. Invest instead in: a calibrated digital caliper set, a basic surface profilometer (desktop models now start around $2,000–$3,000), and — critically — consistent material storage with moisture control for hygroscopic resins and nylons. Most prototype failures I’ve seen in small studios trace back to degraded filament, not machine parameters.

    If you’re a medium-sized manufacturer moving AM parts into low-to-medium criticality production (tooling, fixtures, end-use plastic housings), a practical QC investment is: statistical process control (SPC) on your key build parameters, coordinate measuring machine (CMM) spot-checking on a 10–20% sample basis, and partnership with a third-party CT scanning service for first-article inspection of new geometries. This hybrid approach captures 80% of the QC benefit at 30–40% of the cost of a fully in-house system.

    If you’re targeting aerospace, defense, or medical applications, there is no shortcut — but there are smart prioritization strategies. Start your certification journey early (AS9100 Rev D or ISO 13485 qualification takes 18–36 months minimum), partner with an accredited material testing lab rather than building that capability in-house initially, and prioritize CT inspection of 100% of initial production builds even if you move to sampling later as your process matures. The cost of a field failure in these sectors dwarfs any QC savings.

    For polymer AM at any scale, one underrated investment is process simulation before printing. Tools like Materialise Magics and Autodesk Fusion’s AM workspace now include simulation modules that predict warping and identify optimal part orientation in minutes. This is genuinely accessible at $200–$600/month subscription and prevents a large proportion of geometric failures without any physical inspection cost.

    The Emerging Standards Landscape in 2026

    One more thing worth flagging: the standards environment has matured considerably. ISO/ASTM 52941 (covering acceptance testing for powder bed fusion systems) and the expanded ASTM F42 committee standards now provide much clearer guidance on qualification testing requirements. The FDA’s 2025 final guidance on AM medical devices has also clarified post-processing validation requirements for the US market. If you’re navigating regulatory compliance, investing in a regulatory consultant with AM-specific experience has an ROI that consistently surprises people — the certification path is significantly shorter when you don’t have to learn it by making expensive mistakes.

    The bottom line? Additive manufacturing quality and post-processing in 2026 is genuinely solvable — but it requires matching your investment level to your application’s criticality, leveraging simulation to catch problems before they’re physical, and thinking of post-processing not as an afterthought but as an integrated design constraint from day one.

    Editor’s Comment : What consistently fascinates me about the AM quality space is that the technology gap has largely closed — the machines are capable — but the process knowledge gap is still wide. The teams winning in this space aren’t necessarily the ones with the most expensive hardware; they’re the ones who’ve treated QC and post-processing as engineering disciplines worthy of serious systematic investment. If you’re just starting out, resist the urge to spend everything on the printer itself. Budget 30–40% of your total AM investment for QC infrastructure and post-processing capability, and you’ll find your actual part quality — and your client relationships — will thank you for it.

    태그: [‘additive manufacturing quality control’, ‘3D printing post-processing’, ‘metal AM inspection 2026’, ‘industrial CT scanning’, ‘powder bed fusion defects’, ‘AM post-processing techniques’, ‘additive manufacturing certification’]


    📚 관련된 다른 글도 읽어 보세요

  • 적층 제조 품질 관리 완벽 가이드 2026 | 후처리 기술부터 불량률 제로까지

    얼마 전 지인이 운영하는 소규모 3D 프린팅 스타트업을 방문했을 때의 일이에요. 한쪽 구석에 쌓인 폐기 출력물 더미가 눈에 띄었는데, 알고 보니 레이어 분리(delamination) 불량과 표면 거칠기 문제로 납품을 거절당한 파트들이었어요. 그 모습을 보면서 ‘적층 제조(Additive Manufacturing, AM)’가 단순히 “출력만 잘 하면 되는 기술”이 아니라는 걸 다시 한번 실감했습니다. 2026년 현재, 글로벌 AM 시장이 항공·의료·자동차 산업 깊숙이 침투하면서 품질 관리(QC)와 후처리(Post-processing) 기술이 사실상 적층 제조의 경쟁력을 좌우하는 핵심 변수가 됐다고 봅니다. 오늘은 이 두 가지 주제를 함께 파헤쳐 볼게요.

    additive manufacturing quality control 3D printing inspection process

    본론 1. 숫자로 보는 적층 제조 품질 관리의 현주소

    ① 글로벌 AM 시장과 불량률 – 얼마나 심각한 문제인가?

    시장조사기관 IDTechEx의 2026년 보고서에 따르면, 글로벌 적층 제조 시장 규모는 약 310억 달러(약 41조 원)에 달하며, 2030년까지 연평균 성장률(CAGR) 18.4%로 확대될 것으로 전망됩니다. 문제는 성장 속도만큼 품질 이슈도 함께 커지고 있다는 점이에요.

    산업용 FDM(열용융 적층) 및 SLS(선택적 레이저 소결) 방식에서 보고되는 평균 불량률은 공정 변수 미최적화 시 12~18%에 달한다는 연구 결과가 있어요(Fraunhofer IPA, 2025). 이 수치는 대량생산 기준 사출성형의 불량률(<1%)과 비교하면 여전히 큰 격차입니다. 특히 다음과 같은 결함 유형이 전체 불량의 약 70%를 차지한다고 봅니다:

    • 레이어 분리(Delamination): 레이어 간 접합력 부족으로 발생, FDM 공정에서 가장 흔하며 전체 불량의 약 28% 차지
    • 워핑(Warping): 열수축에 의한 변형, 베드 온도·소재 특성 불일치가 주원인 (약 22%)
    • 내부 기공(Porosity): 금속 AM(LPBF, DED) 공정에서 치명적, 피로 강도를 최대 40%까지 저하 (약 20%)
    • 치수 편차(Dimensional deviation): 허용 공차 초과, 정밀 부품 납품 거절의 주요 원인 (약 15%)
    • 표면 거칠기(Surface roughness): Ra 값이 기능성 요구 조건을 초과하는 경우 (약 15%)

    ② 인라인 모니터링(In-line Monitoring)의 부상 – 사후 검사에서 실시간 감지로

    전통적인 품질 관리는 출력이 끝난 뒤 CMM(좌표 측정기)이나 CT 스캔으로 사후 검사하는 방식이었어요. 하지만 이 방법은 불량을 이미 완성된 파트에서 발견한다는 치명적 한계가 있죠. 2026년 현재 주목받는 접근법은 인라인 공정 모니터링입니다.

    머신 비전(Machine Vision)과 AI 기반 이상 탐지 알고리즘을 결합하면, 레이어 단위로 실시간 결함을 감지하고 공정 파라미터를 자동 보정할 수 있어요. EOS, Renishaw 등 주요 장비 메이커는 자사 금속 AM 장비에 광학 토모그래피(Optical Tomography) 모듈을 기본 내장하기 시작했고, 이를 통해 불량률을 기존 대비 최대 60~70% 저감했다는 사례가 보고되고 있습니다.

    ③ 공정 파라미터 최적화 – 데이터 기반 접근의 위력

    레이저 출력, 스캔 속도, 레이어 두께, 해칭 거리(hatch spacing) 등 금속 LPBF(레이저 분말 층상 용융) 공정에서 관리해야 할 파라미터는 수십 가지에 달합니다. 이를 전통적인 DOE(실험 계획법)로만 최적화하려면 수백 번의 시험 출력이 필요해요. 반면, 베이지안 최적화(Bayesian Optimization)머신러닝 기반 서로게이트 모델을 활용하면 시험 횟수를 80% 이상 줄이면서도 최적 파라미터 구간을 빠르게 도출할 수 있다고 봅니다.

    본론 2. 국내외 선도 사례 – 후처리 기술의 진화

    후처리, 왜 이렇게 중요한가?

    적층 제조로 만든 파트는 ‘출력 완료 = 완제품’이 아니에요. 서포트 제거, 표면 처리, 열처리(응력 완화), 기계 가공 등 후처리 공정이 최종 품질의 30~50%를 결정한다고 해도 과언이 아닙니다. 특히 의료용 임플란트나 항공 부품처럼 기능 안전이 중요한 분야에서는 후처리가 단순 마감이 아닌 필수 인증 요건이에요.

    🌐 해외 사례 – GE Aerospace의 적층 제조 품질 체계

    GE Aerospace는 항공기 엔진 연료 노즐을 LPBF 방식으로 생산하면서, 기존 20개 부품을 단 1개로 통합(부품 통합, Parts Consolidation)하는 데 성공했습니다. 핵심은 엄격한 품질 체계에 있어요. 출력 후 HIP(열간 등압 성형, Hot Isostatic Pressing)을 통해 내부 기공을 제거하고, 이후 CT 검사로 100% 전수 검사를 시행합니다. 이 공정 덕분에 연료 노즐의 피로 수명이 기존 대비 5배 이상 향상됐다고 알려져 있어요.

    🇰🇷 국내 사례 – 항공우주 분야의 도전, 한국항공우주산업(KAI)과 국내 AM 생태계

    국내에서도 의미 있는 움직임이 있어요. 한국항공우주산업(KAI)은 2025년부터 티타늄 합금(Ti-6Al-4V) 브래킷 파트를 적층 제조로 전환하는 파일럿 프로젝트를 진행 중이며, 후처리 단계에서 국내 열처리 전문기업과의 협업을 통해 잔류 응력 제거 및 조직 균질화 공정을 표준화하고 있습니다. 또한 재료연구원(KIMS)은 금속 AM 소재의 미세조직-기계적 특성 상관관계 데이터베이스를 구축해 국내 중소기업들이 이를 활용할 수 있도록 개방형 플랫폼 형태로 운영 중이에요.

    주목할 후처리 기술 트렌드 2026

    • 전기화학적 연마(Electrochemical Polishing): 복잡한 내부 채널의 표면 거칠기를 Ra 0.2㎛ 이하로 낮추는 기술. 의료·유체 장치 분야에서 채택 확대 중
    • 레이저 표면 처리(Laser Surface Treatment): 표면 경도 및 내마모성을 선택적으로 향상, 별도 코팅 공정 대체 가능
    • 자동화 서포트 제거(Automated Support Removal): 협동 로봇(Cobot)과 비전 시스템을 결합해 수작업 의존도를 낮추는 방향으로 발전 중
    • DED(직접 에너지 적층) + CNC 하이브리드: 출력과 절삭 가공을 한 장비에서 반복 수행해 치수 정밀도를 ±0.05mm 이내로 제어
    • 화학적 평활화(Chemical Smoothing): 폴리머 AM 파트 대상, 용제 증기 처리로 표면을 빠르게 평활화. 단, 독성 관리가 과제
    metal 3D printing post-processing surface treatment quality inspection

    결론 – 품질 관리와 후처리, 어디서부터 시작할까?

    적층 제조의 기술적 가능성은 이미 충분히 증명됐지만, 그것을 실제 산업 현장에서 신뢰성 있게 구현하는 건 여전히 도전 과제인 것 같아요. 결국 품질은 출력 버튼을 누르는 순간이 아니라, 소재 선정부터 공정 파라미터 설계, 인라인 모니터링, 그리고 후처리 전 과정의 유기적인 연결에서 나온다고 봅니다.

    지금 당장 모든 것을 갖출 수 없다면, 현실적으로 다음 순서로 접근하는 걸 권장해요:

    • 단기: 공정 파라미터 데이터 로깅 체계 구축 → 불량 발생 시 원인 추적 가능한 구조 만들기
    • 중기: 주요 불량 유형에 특화된 인라인 모니터링 도입 (예: 카메라 기반 레이어 검사)
    • 장기: 설계-공정-후처리를 통합한 DfAM(Design for Additive Manufacturing) 프로세스 내재화 및 디지털 트윈 연계

    에디터 코멘트 : 적층 제조 품질 문제의 70~80%는 사실 “알고 있었는데 관리하지 못한” 파라미터에서 비롯되는 경우가 많아요. 거창한 AI 솔루션보다 먼저, 지금 내 공정에서 어떤 데이터를 측정하고 기록하고 있는지 점검하는 것이 가장 빠른 품질 개선의 출발점이 아닐까 싶습니다. 화려한 장비보다 꼼꼼한 기록 습관이 때로는 더 강력한 품질 무기가 된다는 걸 기억해 주세요.

    태그: [‘적층제조품질관리’, ‘3D프린팅후처리’, ‘금속AM공정’, ‘인라인모니터링’, ‘적층제조불량률’, ‘DfAM설계’, ‘적층제조2026’]


    📚 관련된 다른 글도 읽어 보세요

  • Proxmox VE Home Server Setup Tutorial 2026: Run Multiple VMs on One Machine Like a Pro

    Picture this: it’s a lazy Saturday afternoon, and a friend of mine — a software developer who’d been running three separate old laptops just to keep his home lab, media server, and NAS going — texts me: “There has to be a better way.” He was right. Three machines humming away, three power bills, three times the cable clutter. That’s exactly the kind of problem that Proxmox VE was built to solve. Within a weekend, he consolidated everything onto a single refurbished workstation, and honestly? He’s never looked back.

    If you’ve been curious about home server virtualization but felt intimidated by enterprise-level tools, this tutorial is your friendly guided walkthrough. We’re going to reason through the whole setup together — hardware considerations, installation, network config, and even some realistic alternatives if Proxmox turns out not to be your perfect match.

    proxmox home server rack setup hardware 2026

    What Exactly Is Proxmox VE — and Why Does It Matter in 2026?

    Proxmox Virtual Environment (VE) is a free, open-source server virtualization platform based on Debian Linux. It supports two virtualization technologies simultaneously:

    • KVM (Kernel-based Virtual Machine) — for full virtual machines running any OS (Windows, Linux, BSD, etc.)
    • LXC (Linux Containers) — for lightweight, OS-level virtualization with near-native performance

    As of 2026, Proxmox VE 8.x is the stable release, and it’s remarkably polished. The web-based management interface runs over HTTPS on port 8006, meaning you can manage your entire home lab from any browser on your network. No need to install a separate management app.

    According to community stats from the Proxmox forums in early 2026, the platform has surpassed 1.2 million registered installations worldwide, with a significant chunk being home lab enthusiasts — not just enterprise admins. That tells you something: this tool has crossed the barrier from “intimidating server room tech” into genuinely hobbyist-friendly territory.

    Minimum Hardware Requirements: What You Actually Need

    Let’s be realistic here. Proxmox itself is lean, but your VMs and containers will need resources. Here’s a practical breakdown:

    • CPU: Any 64-bit processor with virtualization support (Intel VT-x or AMD-V). Check your BIOS/UEFI — it must be enabled. In 2026, even mid-range CPUs from 2018 onward almost universally support this.
    • RAM: 8GB minimum to run a couple of containers; 16–32GB is the sweet spot for a capable home lab with 3–5 VMs.
    • Storage: A dedicated SSD for the Proxmox OS install (as small as 32GB works, but 120GB+ is recommended). Separate storage for VM disks — an NVMe SSD gives excellent performance.
    • Network: A single Gigabit NIC works fine. A second NIC enables more advanced configurations like dedicated storage or VM traffic separation.
    • Boot Media: A USB drive of at least 1GB for the installer.

    A popular budget approach in 2026 is using refurbished mini PCs — the Beelink SER series or an Intel NUC equivalent. These offer surprisingly capable specs (Ryzen 7, 32GB RAM, 512GB NVMe) for under $300 USD, making them perfect Proxmox hosts.

    Step-by-Step Installation: Getting Proxmox Running

    Let’s walk through this together, step by step.

    Step 1 — Download the ISO: Head to proxmox.com/downloads and grab the latest Proxmox VE 8.x ISO. Always verify the SHA256 checksum — it takes 30 seconds and confirms the file isn’t corrupted.

    Step 2 — Create a Bootable USB: Use Rufus (Windows) or Balena Etcher (cross-platform) to flash the ISO to your USB drive. Select DD mode in Rufus if prompted — this matters.

    Step 3 — Boot and Install: Boot your target machine from the USB. The Proxmox installer is graphical and guided. Key decisions here:
    Target disk: Select your dedicated SSD. Warning — this will be wiped.
    File system: For home use, ext4 is simple and reliable. ZFS is powerful (with built-in RAID and snapshots) but RAM-hungry — ZFS ideally wants 1GB RAM per 1TB of storage.
    Network config: Assign a static IP address. Something like 192.168.1.100 with your router as the gateway. This is crucial — you don’t want your server’s IP changing.

    Step 4 — First Login: Once installed and rebooted, open your browser on another machine and go to https://[your-server-ip]:8006. Accept the self-signed certificate warning (normal for home setups), and log in with root and the password you set during install.

    Step 5 — Fix the Subscription Repository (Important!): Proxmox by default points to an enterprise update repository that requires a paid subscription. For home use, you’ll want to switch to the no-subscription repository. In the web UI, go to your node → Shell, and run these commands:

    sed -i 's|enterprise.proxmox.com|download.proxmox.com/debian|g' /etc/apt/sources.list.d/pve-enterprise.list
    echo "deb http://download.proxmox.com/debian/pve bookworm pve-no-subscription" > /etc/apt/sources.list.d/pve-no-subscription.list
    apt update && apt dist-upgrade -y

    This gives you free, community-supported updates — perfectly functional for home use.

    Creating Your First VM and Container

    Now the fun part. In the Proxmox web UI:

    • To create a VM: Click “Create VM” → give it a name, select your ISO (upload it to local storage first via Datacenter → Storage → Upload), set RAM, CPU cores, and disk size. Boot it up and install the OS as you normally would.
    • To create an LXC Container: Click “Create CT” → download a container template from the built-in template repository (Ubuntu, Debian, Alpine, etc. — all available with one click). Containers start in seconds and use a fraction of the resources a full VM would.

    A practical home lab setup might look like: one Ubuntu Server VM running Docker for apps like Jellyfin or Home Assistant, one Windows VM for occasional compatibility needs, and several lightweight LXC containers for services like Pi-hole (network ad-blocking), Nginx Proxy Manager, or a personal VPN.

    proxmox web interface VM dashboard containers 2026

    Real-World Examples: How People Are Using This in 2026

    Let’s ground this in reality with some concrete examples from the community:

    The Korean Home Lab Community (국내 사례): On popular Korean tech communities like CLIEN and SLR Club, Proxmox-based home servers have become a trending topic in 2026. Many users are running Proxmox on repurposed office workstations (think: Dell OptiPlex or HP EliteDesk) to consolidate NAS functions, self-hosted cloud storage (Nextcloud), and media serving — all on one machine pulling about 35–65W under normal load.

    International Home Lab Enthusiasts (r/homelab, ServeTheHome): In communities like r/homelab on Reddit, “Proxmox first timers” posts are consistently among the most upvoted each month in 2026. A common success story: someone replacing three Raspberry Pis running separate services with a single Proxmox host running those same services as containers — saving power and gaining a centralized management interface.

    Small Business Micro-Virtualization: In 2026, a growing trend among small IT shops is using Proxmox as a cost-free alternative to VMware ESXi (which shifted to a fully paid model). A single Proxmox node can host a business’s firewall VM (pfSense or OPNsense), a Windows Server VM for Active Directory, and several Linux application servers — at zero licensing cost.

    Networking Tips: Getting VMs to Talk to the World

    By default, Proxmox creates a Linux bridge called vmbr0 connected to your physical NIC. VMs attached to this bridge get full LAN access — they appear as separate devices on your network, each with their own IP (great for home use). Think of vmbr0 as a virtual switch.

    For more advanced setups, you can configure VLANs, create separate bridges for storage traffic, or set up SDN (Software Defined Networking) — but for a starter home server, the default bridge is all you need.

    Realistic Alternatives: When Proxmox Might Not Be the Right Fit

    Let’s be honest — Proxmox isn’t for everyone. Here’s how to reason through alternatives:

    • If you just want a NAS: TrueNAS Scale (also free, also Debian-based) is purpose-built for storage, with virtualization as a secondary feature. If 80% of your use case is file storage, start there.
    • If you’re totally new to Linux: Unraid has a gentler learning curve and a strong community, though it costs $59–$129 USD. It’s a legitimate choice if you value ease of setup over cost.
    • If you need a single-purpose media server: A dedicated Raspberry Pi 5 running Jellyfin might be simpler and quieter than a full virtualization host.
    • If you have budget and want enterprise reliability: VMware vSphere Essentials (now Broadcom’s product) is still an option, though licensing costs have made it less attractive for home use in 2026.

    The key question to ask yourself: How many separate services do I realistically want to run? If the answer is more than three, Proxmox’s consolidation benefits kick in strongly. If it’s one or two, a simpler solution might serve you better.

    Common Pitfalls to Avoid

    • Not assigning a static IP during setup — you’ll lose access to the web UI if your router reassigns the IP. Either set it in Proxmox or reserve it in your router’s DHCP settings.
    • Forgetting to enable IOMMU in BIOS — required for PCI passthrough (passing a GPU or NIC directly to a VM). Without it, you can’t do GPU virtualization.
    • Installing Proxmox on a spinning HDD — technically possible, but painfully slow. Always use an SSD for the OS drive.
    • Skipping backups — Proxmox has a built-in backup scheduler. Set it up on day one. Schedule weekly backups to a local disk or network share. You’ll thank yourself later.

    Editor’s Comment : Proxmox in 2026 sits in a genuinely sweet spot — it’s professional enough to handle serious workloads, yet accessible enough that a determined weekend experimenter can have a fully functional home lab running in an afternoon. The free tier removes the biggest barrier that enterprise virtualization tools have always had. My honest take? Don’t let the Linux underpinning scare you off. The web UI handles 90% of what you’ll ever need, and the community documentation is exceptional. Start simple: one VM, one container, get comfortable — then expand. The biggest mistake most beginners make is trying to architect everything perfectly before they understand how it actually feels to use. Just start, and let your real needs guide how your setup evolves.

    태그: [‘Proxmox VE’, ‘home server virtualization’, ‘Proxmox tutorial 2026’, ‘home lab setup’, ‘KVM LXC containers’, ‘self-hosted server’, ‘Proxmox installation guide’]


    📚 관련된 다른 글도 읽어 보세요

  • 2026년 Proxmox 가상화 홈서버 설치 완벽 튜토리얼 | 초보자도 따라하는 단계별 가이드

    얼마 전 지인 한 분이 이런 고민을 털어놨어요. “NAS 하나로 쓰던 집 서버가 슬슬 부족해지는데, 가상머신이랑 컨테이너를 한 번에 관리하고 싶은데 어디서 시작해야 할지 모르겠어.\

    태그: []


    📚 관련된 다른 글도 읽어 보세요

  • 3D Printing in Mass-Production Automotive Parts: Where Are We Really in 2026?

    Picture this: it’s the late 1980s, and a group of engineers at a Detroit automaker are huddled around a chunky plastic prototype that just came out of a machine roughly the size of a refrigerator. They called it “rapid prototyping,” and back then, nobody seriously imagined that the same underlying technology would one day be stamping out actual production-grade car parts at scale. Fast forward to 2026, and that imagination has become — at least partially — reality. But how far has it actually come? Let’s dig in together and separate the hype from the hardware.

    3D printed automotive parts manufacturing facility 2026

    The Numbers Don’t Lie: Where 3D Printing Stands in Auto Manufacturing Today

    As of 2026, the global additive manufacturing market specifically for automotive applications is valued at approximately $4.1 billion USD, up from roughly $2.3 billion in 2022 — a compound annual growth rate hovering around 15–17%. That sounds impressive, but here’s the grounding reality: traditional injection molding and stamping still account for well over 90% of physical part production volume in the industry. So 3D printing isn’t replacing conventional manufacturing — at least not yet. It’s carving out very specific, strategic niches.

    The key metric to watch isn’t just revenue — it’s part qualification rates. In aerospace, additive manufacturing achieved FAA-certified part production years ago. Automotive OEMs have been slower, but by early 2026, several Tier 1 suppliers have crossed a critical threshold: end-use structural parts (not just jigs, fixtures, or prototypes) now represent about 28% of all automotive additive manufacturing output, compared to just 11% in 2020. That’s a meaningful shift.

    Which Parts Are Actually Being 3D Printed at Scale?

    Not all parts are created equal when it comes to additive viability. The sweet spot in 2026 falls into a few clear categories:

    • Lightweight brackets and mounting hardware: Metal powder bed fusion (PBF) processes like Selective Laser Melting (SLM) are now routinely used for aluminum and titanium brackets, especially in EVs where every gram of weight reduction extends range.
    • Heat exchangers and fluid management components: Complex internal geometries — impossible with traditional machining — allow for optimized coolant channels in battery thermal management systems. This is arguably the biggest win for EVs in 2026.
    • Customized interior trim and ergonomic components: Luxury brands are using large-format polymer printing to offer personalized dashboard inserts, seat adjustment components, and tactile control panels — often made-to-order.
    • Tooling, jigs, and assembly aids: Still the bread-and-butter use case. Factories reduce lead time from weeks to hours by printing custom fixtures on-site.
    • Spare and legacy parts: Instead of warehousing obsolete parts, automakers now maintain digital inventories and print on-demand. This is a genuine supply chain revolution for older vehicle models.
    • Exhaust and intake manifold components: High-temperature polymer and metal sintering processes now meet OEM durability specs for certain non-combustion-facing engine adjacent parts.

    Global and Domestic Case Studies: Who’s Leading the Charge?

    Let’s ground this in real examples, because the theory only goes so far.

    Volkswagen Group (Germany/International): VW has been running one of the most ambitious additive manufacturing programs in the industry. Their Wolfsburg facility uses HP’s Metal Jet binder jetting technology to produce structural steel components for multiple model lines. By 2026, they’ve reportedly achieved cycle times competitive enough to justify production runs of 50,000+ units annually for select bracket families — a genuine mass-production milestone.

    Ford Motor Company (USA): Ford’s Advanced Manufacturing Center in Michigan has scaled up its use of Carbon DLS (Digital Light Synthesis) technology for end-use polymer parts. Particularly notable is their use of additive-manufactured HVAC duct inserts across several F-150 variants — parts that are lighter, more geometrically optimized, and cheaper to produce in mid-volume runs than injection-molded equivalents.

    Hyundai-Kia (South Korea): Domestically in Korea, Hyundai’s in-house additive team at the Namyang R&D Center has integrated metal 3D printing into the production prep pipeline for the IONIQ series. While full production-volume stamped parts remain conventional, they’ve implemented a “hybrid tooling” approach where 3D-printed conformal cooling inserts dramatically reduce injection mold cycle times — an indirect but highly cost-effective application.

    BYD (China): China’s EV giant has taken a particularly pragmatic route. Rather than printing end-use parts directly, BYD uses large-scale polymer printing to create rapid tooling for low-volume derivative models, cutting tooling investment costs by an estimated 40-60% for niche variants. Smart, scalable, and very 2026 in its pragmatism.

    EV battery thermal management 3D printed component closeup

    The Honest Bottlenecks You Should Know About

    Look, it would be easy to write a breathless piece about how 3D printing is transforming everything — but that wouldn’t be fair to you. There are real, persistent challenges:

    • Surface finish and post-processing cost: Most metal printed parts still require significant CNC finishing, heat treatment, and surface treatment — adding time and cost that erodes the economic advantage, especially at high volumes.
    • Material qualification time: Automotive OEMs require extensive validation for any production material. Even when a 3D-printable material performs well in testing, the certification runway can stretch 18–36 months.
    • Speed vs. volume tradeoff: For truly high-volume parts (think: 500,000+ units per year), injection molding and stamping still win on pure throughput economics. 3D printing’s sweet spot economically sits in the 500–50,000 unit range depending on part complexity.
    • Workforce skill gap: Operating and maintaining industrial metal printing systems requires a different skill set than traditional CNC machining. Training pipelines haven’t fully caught up yet.

    Realistic Alternatives and Strategic Paths Forward

    If you’re an automotive engineer, supplier, or even an enthusiast wondering how to think about this technology practically, here’s how I’d frame your options in 2026:

    For OEMs and Tier 1 suppliers: Don’t chase full production replacement of stamped metal parts — not yet. Instead, focus additive manufacturing investment on tooling acceleration, spare parts digitization, and EV-specific thermal and structural components where design freedom genuinely beats conventional methods. The ROI story is most compelling there.

    For Tier 2/3 suppliers: Investing in polymer additive capacity (FDM or SLS) for jigs, fixtures, and low-volume custom parts is genuinely accessible now. Industrial-grade systems from vendors like Markforged, Bambu Lab Industrial, or Stratasys Fortus series are within reach and have proven shop-floor durability.

    For aftermarket and restoration communities: This is honestly one of the most exciting spaces. The ability to scan, model, and print legacy parts that no longer exist in supply chains is transformative. If you’re working on classic vehicle restoration or specialized builds, a combination of 3D scanning services and FDM/SLA printing gives you capabilities that would have cost tens of thousands of dollars a decade ago.

    The trajectory is clear: 3D printing won’t replace the automotive supply chain wholesale, but it’s permanently reshaping which parts get made how, and the companies that understand exactly where additive manufacturing outperforms — rather than just assuming it will take over everything — are the ones winning in 2026.

    Editor’s Comment : What genuinely excites me about the state of automotive 3D printing in 2026 isn’t the flashy headline applications — it’s the quiet, unglamorous wins in tooling and spare parts logistics. The real transformation is happening in factory back rooms and digital warehouses, not just on the showroom floor. If you’re evaluating whether to invest in or adopt this technology, chase those unsexy applications first. That’s where your fastest, clearest return on investment is waiting.

    태그: [‘3D printing automotive’, ‘additive manufacturing 2026’, ‘mass production 3D parts’, ‘EV manufacturing technology’, ‘automotive supply chain innovation’, ‘metal 3D printing cars’, ‘automotive additive manufacturing trends’]


    📚 관련된 다른 글도 읽어 보세요

  • 3D 프린팅 자동차 부품 양산 적용 현황 2026 — 공장은 어떻게 바뀌고 있을까?

    지난해 말, 한 국내 완성차 업체의 연구소를 방문한 적이 있었어요. 담당 엔지니어가 손에 들고 있던 부품 하나를 보여주며 이렇게 말했습니다. “이거, 금형 없이 만든 거예요.” 단번에 알아보기 힘들 만큼 매끄러운 마감이었는데, 알고 보니 금속 3D 프린팅으로 제작된 서스펜션 브래킷이었습니다. 시제품이 아니라 실제 차량에 들어가는 양산 부품이라고 했을 때, 솔직히 조금 놀랐어요. 3D 프린팅이 ‘빠른 시제품 제작 도구’라는 이미지를 넘어 실제 양산 라인에 진입했다는 사실이 피부로 느껴진 순간이었습니다.

    2026년 현재, 자동차 산업에서 3D 프린팅(적층 제조, Additive Manufacturing)의 역할은 단순한 프로토타이핑을 넘어 본격적인 양산(Mass Production) 단계로 무게중심이 이동하고 있는 것 같습니다. 오늘은 그 현황을 숫자와 사례로 함께 살펴볼게요.

    automotive 3D printing factory production line metal parts

    📊 시장 규모가 말해주는 것 — 숫자로 보는 2026년 현황

    글로벌 시장조사기관 SmarTech Analysis의 최근 보고서에 따르면, 자동차 분야 적층 제조 시장 규모는 2026년 기준 약 68억 달러(한화 약 9조 원)에 달할 것으로 추정됩니다. 2020년 대비 약 3.4배 성장한 수치예요. 특히 주목할 부분은 이 성장의 절반 이상이 ‘최종 부품 생산(End-Part Production)’에서 발생하고 있다는 점입니다.

    공정별로 보면 어떨까요?

    • 금속 분말층 용융 방식(LPBF, Laser Powder Bed Fusion): 내연기관 및 전기차의 경량 구조 부품 제작에 활발히 적용. 알루미늄·티타늄 합금 부품 생산에 주로 사용.
    • 바인더 젯팅(Binder Jetting): 생산 속도가 빠르고 단가가 낮아 소형 금속 부품 대량 생산에 적합. BMW, Ford 등이 상용화 중.
    • FDM/FFF 계열(수지·복합소재): 내장재 클립, 덕트류, 가스켓 홀더 등 비구조 부품에 광범위하게 활용. 진입 비용이 낮아 중소 부품사에서도 채택 가능.
    • 연속섬유 강화 복합재(CFF) 방식: 탄소섬유 복합 소재를 이용한 고강도 경량 부품에 적용. 2026년 현재 EV 플랫폼 구조 부재에 채택이 늘고 있는 추세.

    완성차 한 대에 평균 약 30,000개의 부품이 들어간다고 보면, 이 중 3D 프린팅으로 생산 가능한 부품 비율이 2022년 약 2~3%에서 2026년 현재 8~12% 수준까지 확대됐다고 봅니다. 비율 자체는 아직 작아 보일 수 있지만, 절대 개수와 시장 영향력으로 따지면 상당히 의미 있는 변화예요.

    🌍 국내외 주요 사례 — 누가, 어디서, 어떻게?

    BMW는 적층 제조 분야에서 가장 공격적인 행보를 보이는 완성차 메이커 중 하나입니다. 뮌헨 인근 캄프하우젠 공장의 ‘AM Campus’에서는 연간 30만 개 이상의 부품을 3D 프린팅으로 생산하고 있어요. 특히 롤스로이스 팬텀 시리즈의 맞춤형 내장 부품이나, Mini 쿠퍼의 일부 조향 계통 브래킷은 이미 양산 부품 지위를 획득했습니다.

    포르쉐(Porsche)는 희귀 클래식카 부품을 3D 프린팅으로 재생산하는 프로그램을 운영하고 있어요. 단종된 모델의 금형을 다시 만드는 것보다 3D 프린팅으로 소량 제작하는 편이 비용과 시간 모두 효율적이라는 논리인데, 이 접근 방식은 국내 완성차 업체들도 벤치마킹할 만한 사례라고 봅니다.

    현대자동차·기아의 경우, 남양연구소와 협력사 체계 안에서 3D 프린팅 기반 툴링(치공구) 제작은 이미 수년 전부터 정착된 상태예요. 2026년 현재는 한 발 더 나아가 아이오닉 플랫폼(E-GMP) 계열 차량의 냉각 채널 일체형 배터리 케이스 부품 일부를 금속 적층 제조로 시험 양산하고 있다는 소식이 들려오고 있습니다. 아직 전면 양산 적용은 아니지만, 로드맵 상에서 2027~2028년 내 공식 채택을 목표로 한다고 알려져 있어요.

    국내 부품사 중에서는 성우하이텍, 화신, 일진그룹 계열사 등이 3D 프린팅 기반 경량화 부품 개발에 투자를 확대하고 있습니다. 중소 부품사 레벨에서는 아직 진입 장벽이 존재하지만, 정부 주도의 ‘스마트 제조 혁신 사업’ 지원을 통해 장비 도입 비용을 일부 상쇄하는 사례도 늘고 있는 것 같아요.

    EV electric vehicle 3D printed lightweight components battery structure

    🔧 왜 양산 적용이 생각보다 느렸을까? — 현실적인 장벽

    3D 프린팅이 이렇게 유망하다면, 왜 아직 전체 부품의 10% 남짓에만 적용되고 있을까요? 몇 가지 구조적 이유가 있습니다.

    • 반복 재현성(Repeatability) 문제: 금형 사출은 수십만 번 찍어도 동일한 품질이 나오지만, 적층 제조는 소재 배치, 온도, 레이어 간 접합 품질 등 변수가 많습니다. 자동차 안전 부품에 요구되는 엄격한 공차(Tolerance)를 일관되게 충족시키는 것이 아직 도전 과제예요.
    • 생산 속도 한계: 대형 부품 하나를 LPBF 방식으로 출력하는 데 수 시간이 걸리기도 합니다. 분당 수천 개를 찍어내는 기존 사출·프레스 공정과의 속도 격차는 여전히 큰 편이에요.
    • 인증·표준화 지연: 국제자동차규제(IATF 16949) 체계 내에서 적층 제조 부품에 대한 공식 인증 프로세스가 아직 완전히 정립되지 않은 부분이 있습니다.
    • 소재 비용: 금속 분말 소재는 1kg당 수십만 원에서 수백만 원까지 가는 경우도 있어, 원가 경쟁력 확보가 쉽지 않아요.

    🚀 그럼에도 양산이 확대되는 이유 — EV 전환이 촉매

    역설적으로, 이 모든 장벽에도 불구하고 3D 프린팅의 양산 적용이 가속되는 핵심 촉매는 전기차(EV) 전환입니다. 이유가 꽤 명확해요.

    EV는 내연기관차에 비해 파워트레인 부품 수가 대폭 줄어들고, 대신 배터리 구조 최적화·열관리 시스템·경량화가 핵심 경쟁력이 됩니다. 이 세 가지 모두 3D 프린팅이 강점을 발휘하는 영역이에요. 예를 들어, 배터리 팩 내부의 위상 최적화(Topology Optimization) 구조물은 기존 공정으로는 제작 자체가 불가능하거나 비효율적인 형상이 많은데, 적층 제조로는 구현이 가능합니다.

    또한 EV 플랫폼은 모델 다양화와 소량 다품종 생산이 증가하는 추세라, 금형 투자 없이 유연하게 대응할 수 있는 3D 프린팅의 장점이 더욱 부각되고 있는 상황입니다.

    💡 결론 — 현실적으로 어떻게 접근해야 할까?

    3D 프린팅이 자동차 양산 공장의 모든 공정을 대체할 것이라는 전망은 아직 과장이라고 봅니다. 하지만 틈새 영역에서의 필수 공정으로 자리 잡는 속도는 생각보다 훨씬 빠르게 진행 중이에요.

    현실적인 접근 방향을 정리하면 이렇습니다. 완성차 메이커라면 양산 전 단계 검증과 소량 특수 부품에 우선 집중하고, 중소 부품사라면 치공구·지그 제작부터 시작해 기술 내재화를 쌓는 것이 리스크를 낮추는 방법이라고 봐요. 소재와 장비 기술이 발전하는 속도를 감안하면, 2028~2030년 사이에는 지금 논의되는 장벽의 상당 부분이 해소될 가능성이 높습니다.

    에디터 코멘트 : 3D 프린팅을 ‘미래 기술’로만 바라보는 시선은 이제 조금 업데이트가 필요한 것 같아요. 2026년 현재, 이미 내 차 어딘가에 적층 제조로 만들어진 부품이 조용히 들어가 있을 수도 있거든요. 아직 완전한 주류는 아니지만, ‘준비 중인 기술’에서 ‘조용히 확산 중인 기술’로 넘어간 시점이 바로 지금이라고 봅니다. 관련 업계에 계신 분이라면, 지금이 기술 내재화 타이밍을 고민해볼 최적의 시점이 아닐까 싶어요.

    태그: [‘3D프린팅자동차’, ‘적층제조양산’, ‘자동차부품제조’, ‘금속3D프린팅’, ‘전기차경량화’, ‘AddtiveManufacturing2026’, ‘스마트제조’]


    📚 관련된 다른 글도 읽어 보세요

  • Home Lab Server Setup 2026: A Beginner’s Complete Guide to Building Your Own Personal Cloud

    A couple of years ago, a friend of mine — a graphic designer with zero networking background — decided she was tired of paying $15/month for cloud storage. She bought a used Dell PowerEdge off eBay for $80, watched a few YouTube tutorials, and within a weekend had her own home lab server running. Fast forward to today, and she’s hosting her own media server, running automated backups, and even self-hosting a portfolio website. Her monthly cloud bill? Zero. That story isn’t unique anymore — in 2026, home lab server building has become one of the most rewarding and cost-effective tech hobbies you can pick up.

    But let’s be honest: the phrase “home lab server” can sound intimidating if you’ve never touched server hardware before. Terms like RAID, hypervisor, NAS, and VLAN get thrown around like everyone already knows what they mean. So let’s slow down, reason through the decisions together, and build a realistic roadmap for you — whether you’re a complete beginner or someone who’s dabbled and wants to go deeper.

    home lab server setup desk hardware 2026

    Why 2026 Is Actually a Great Time to Start a Home Lab

    The barrier to entry has dropped dramatically. Here’s what’s changed in the hardware and software landscape that makes this the right moment to dive in:

    • Used enterprise hardware is cheaper than ever: Servers from the 2018–2022 generation (like Dell PowerEdge R720, HP ProLiant DL380 Gen9) are flooding the secondary market. You can pick up a fully capable dual-socket server for $100–$200 USD on eBay or local resale platforms in 2026.
    • Mini PCs have matured significantly: Devices like the Beelink EQ12 Pro and the Intel NUC 13 Pro offer surprisingly capable specs in a tiny, low-power form factor — perfect for beginners who don’t want loud rack servers in their home.
    • Proxmox VE 8.x is stable and free: The open-source hypervisor Proxmox has become the de facto standard for home lab virtualization, allowing you to run multiple virtual machines and containers on a single physical machine.
    • TrueNAS SCALE has broad community support: For those primarily focused on storage (NAS), TrueNAS SCALE offers enterprise-grade features with an active community and free licensing.
    • Power costs are a real consideration: With electricity prices fluctuating globally, low-power ARM-based options like the Raspberry Pi 5 or Orange Pi 5 Plus are genuinely viable for lightweight workloads — and they sip power at 5–15W versus a full rack server’s 150–300W.

    Step 1 — Define Your Use Case Before Buying Anything

    This is where most beginners go wrong. They buy hardware first and figure out the use case later. Let’s flip that logic. Ask yourself: What problem am I actually trying to solve? Here are the most common home lab goals in 2026 and the appropriate hardware tier for each:

    • Self-hosted cloud storage (replacing Google Drive/Dropbox): A Raspberry Pi 5 or a mini PC with a couple of external drives running Nextcloud is more than sufficient. Budget: $80–$200.
    • Media server (replacing Netflix/streaming subscriptions): A used mini PC or low-end NAS device running Jellyfin or Plex. Budget: $100–$300.
    • Learning networking and cybersecurity: A slightly beefier machine to run multiple VMs — think a used business desktop (like a Dell OptiPlex 9020) or a mini PC with 32GB RAM. Budget: $150–$400.
    • Full virtualization lab (running multiple OS environments, Docker containers, Kubernetes): A used enterprise server or a high-end mini PC/NUC. Budget: $200–$600.
    • Home automation hub + all-in-one: A mid-range mini PC running Home Assistant OS alongside Docker containers. Budget: $200–$400.

    Step 2 — Choosing Your Operating System / Hypervisor

    Think of the OS layer as the foundation of your house. Everything you run sits on top of it. In 2026, here are the most practical choices depending on your comfort level:

    For absolute beginners: Start with Raspberry Pi OS or Ubuntu Server LTS. These have massive documentation libraries and forgiving learning curves. You’ll learn Linux fundamentals — file permissions, networking, SSH — which are skills that transfer everywhere.

    For intermediate users: Proxmox VE is the gold standard for home lab hypervisors. It’s Debian-based, free to use (the enterprise subscription is optional), and lets you spin up KVM virtual machines and LXC containers side by side through a clean web UI. A popular 2026 beginner stack is: Proxmox as the hypervisor → TrueNAS SCALE in a VM for storage → Ubuntu/Debian containers for services.

    For storage-focused setups: TrueNAS SCALE (the Linux-based version) or OpenMediaVault (OMV) are both excellent. TrueNAS is more feature-rich; OMV is lighter and simpler to manage for smaller deployments.

    Real-World Examples: How Home Labbers Are Building in 2026

    Let’s look at some concrete setups people are actually running this year:

    The “Silent Living Room Lab” (South Korea & Japan trend): In space-constrained urban apartments across Seoul and Tokyo, a popular approach in 2026 is the “silent mini PC cluster” — two or three Beelink or MINISFORUM mini PCs connected via a small managed switch (like the TP-Link TL-SG108E), running Proxmox in a cluster. Total power draw is under 60W for the whole setup. Total cost: around $400–$600 for a capable three-node cluster. This is genuinely impressive for virtualization learning.

    The “Rack in the Garage” (North America): In the US and Canada, where homes often have garages or basements, used enterprise racks are popular. A Dell PowerEdge R730 with dual Xeon E5-2680 v4 CPUs and 128GB RAM can be acquired for under $300 in 2026, offering compute power that would have cost tens of thousands of dollars a decade ago. The tradeoff: noise levels can be significant (60–70dB with stock fans), though fan replacement mods are well-documented in the r/homelab community.

    The “Always-On Raspberry Pi Stack” (Europe/UK): Energy-conscious European home labbers frequently favor Raspberry Pi 5 clusters or single-board computer (SBC) setups. A Pi 5 running Home Assistant OS, Adguard Home (network-level ad blocking), and a Wireguard VPN server draws about 5–8W total. Monthly electricity cost at average European rates: roughly €0.50–€1.00. That’s genuine sustainability.

    proxmox dashboard home lab virtual machines 2026

    Step 3 — Networking Basics You Can’t Skip

    Here’s something most beginners underestimate: networking knowledge matters more than hardware choice. A powerful server with a misconfigured network is useless — and potentially a security risk. Here are the essential concepts to understand before going live:

    • VLANs (Virtual Local Area Networks): These let you segment your network so your home lab traffic doesn’t mix with your personal devices. Think of it as building invisible walls inside your network. A managed switch (even a cheap TP-Link or Netgear GS308E) lets you implement VLANs.
    • Reverse Proxy: Tools like Nginx Proxy Manager or Traefik let you route web traffic to different services on your server using domain names rather than awkward IP:port combinations. This is how you access nextcloud.yourdomain.com instead of 192.168.1.50:8080.
    • Dynamic DNS (DDNS): Most home internet connections have dynamic IP addresses that change periodically. Services like DuckDNS (free) or Cloudflare DDNS automatically update your domain’s DNS record to point to your current IP.
    • Firewall basics: Never expose services directly to the internet without understanding what ports are open and why. UFW (Uncomplicated Firewall) on Ubuntu or pfSense/OPNsense as a dedicated router/firewall VM are the community favorites in 2026.

    Realistic Alternatives If a Full Server Feels Like Too Much

    Let’s be real — not everyone needs to dive headfirst into enterprise hardware and hypervisors. Here’s a graduated approach based on where you are today:

    • If you just want private cloud storage: A Raspberry Pi 5 with a 4TB external SSD running Nextcloud AIO (All-In-One) is a perfectly viable, low-maintenance solution. Setup time: 2–3 hours. Monthly cost: essentially just electricity (~$0.50–$1.00).
    • If you want to learn without buying hardware: Proxmox can be run inside VirtualBox or VMware Workstation on your existing PC for pure learning purposes. It won’t be production-grade, but you’ll learn the UI and concepts for free.
    • If noise/space is a hard constraint: The Synology DS923+ or similar consumer NAS devices in 2026 offer a middle ground — more capable than a Pi, quieter than enterprise servers, with polished software but less flexibility than a DIY setup.
    • If you’re technically curious but time-poor: Start with a single Docker host running on an old laptop or mini PC. Learning Docker and Docker Compose is genuinely foundational knowledge that makes every subsequent home lab step easier.

    Estimated Budget Breakdown for 2026

    Here’s a transparent cost picture to help you plan realistically:

    • Starter tier (Pi/mini PC): $80–$250 total hardware investment. Great for single-purpose setups.
    • Mid tier (used business desktop or NUC): $150–$450. Good balance of power, noise, and cost.
    • Advanced tier (used enterprise server): $200–$700. Maximum compute and storage, but consider noise mitigation costs.
    • Annual electricity cost (estimate): $6–$120 depending on hardware tier and local electricity rates.
    • Software cost: $0 for the core stack (Proxmox, TrueNAS SCALE, Ubuntu, Docker). Optional paid add-ons exist but aren’t necessary.

    The total cost of ownership over two years for a mid-tier home lab is often less than a single year of premium cloud subscriptions — and the learning value is something no subscription can give you.

    The home lab journey isn’t a destination; it’s an ongoing experiment. You’ll break things, rebuild them, discover services you didn’t know existed, and gradually build a setup that’s genuinely yours. The community at places like r/homelab, r/selfhosted, and the Proxmox forums is incredibly welcoming to beginners in 2026 — don’t hesitate to ask questions there.

    Editor’s Comment : What I love most about the home lab movement in 2026 is that it’s fundamentally about taking back ownership — of your data, your learning, and your infrastructure. You don’t need to be an IT professional to start. You just need curiosity, a willingness to occasionally Google an error message at midnight, and maybe one spare weekend. Start smaller than you think you need to, learn the fundamentals before scaling up, and remember: every expert home labber you admire online started with a single machine and a lot of patience. Your first broken configuration isn’t a failure — it’s lesson one.

    태그: [‘home lab server 2026’, ‘beginner home server setup’, ‘Proxmox VE guide’, ‘self-hosted cloud storage’, ‘home lab hardware 2026’, ‘TrueNAS SCALE beginner’, ‘home server build guide’]


    📚 관련된 다른 글도 읽어 보세요

  • 홈랩 서버 구축 2026 초보자 완벽 가이드 | 비용·하드웨어·OS까지 한 번에

    직장 동료 한 명이 얼마 전 이런 말을 했어요. “집에 미니 PC 하나 사서 서버 돌려보고 싶은데, 어디서부터 시작해야 할지 모르겠어.” 사실 이 고민, 생각보다 훨씬 많은 분들이 하고 계실 거라 봅니다. 클라우드 서비스 요금이 꾸준히 오르면서 2026년 현재, ‘내 서버를 내 손으로 굴린다’는 홈랩(Home Lab) 문화가 국내에서도 빠르게 확산되고 있거든요. 그렇다고 무턱대고 장비부터 사면 낭패를 보기 쉽습니다. 오늘은 초보자 눈높이에서 홈랩 서버 구축의 A부터 Z까지 함께 살펴볼게요.

    home lab server setup mini PC rack 2026

    🖥️ 홈랩이 뭔지부터 짚고 넘어가요

    홈랩은 말 그대로 집(Home)에 꾸린 실험실(Lab)이에요. 데이터센터 수준의 장비가 아니라, 중고 미니 PC 한 대, 혹은 NAS 한 박스부터 시작할 수 있습니다. 주로 다음과 같은 목적으로 활용돼요.

    • 개인 클라우드 스토리지 (Nextcloud, Immich 등)
    • 미디어 서버 (Jellyfin, Plex)
    • VPN·방화벽·DNS 필터링 (WireGuard, Pi-hole)
    • 쿠버네티스(Kubernetes) 및 도커(Docker) 학습 환경
    • CI/CD 파이프라인 자체 호스팅
    • 스마트홈 허브 (Home Assistant)

    단순한 취미를 넘어, 실제 DevOps·클라우드 엔지니어링 실력을 쌓는 발판이 되기도 한다는 점에서 요즘 IT 직군 분들 사이에서 특히 인기가 높은 것 같습니다.


    💸 2026년 현실적인 홈랩 예산 분석

    예산대별로 어느 수준까지 구성할 수 있는지 구체적인 수치로 정리해 봤어요. (2026년 3월 국내 기준 시세 참고)

    예산대 추천 구성 예상 소비전력 월 전기요금 추가분
    10만 원 이하 라즈베리파이 5 (8GB) 또는 중고 씬클라이언트 5~15W 약 1,000~2,500원
    30~60만 원 Intel N100 / N305 미니 PC (RAM 16~32GB 업그레이드) 15~30W 약 2,500~5,000원
    80~150만 원 중고 엔터프라이즈 서버 (HP ProLiant Gen10 등) 또는 AMD Ryzen 기반 커스텀 빌드 60~150W 약 1~2만 원

    재밌는 포인트는 소비전력이에요. 홈랩을 24시간 365일 운영한다고 하면, 장비 구매가보다 장기 전기요금이 총 비용을 좌우하는 경우가 생깁니다. Intel N100 계열 미니 PC가 2026년 초보자들에게 ‘가성비 넘버원’으로 꼽히는 이유가 바로 여기에 있다고 봐요 — 저전력이면서도 가상화까지 무난하게 소화하거든요.


    🌍 국내외 홈랩 트렌드: 사람들은 어떻게 하고 있을까?

    해외의 경우, Reddit의 r/homelab 커뮤니티는 2026년 현재 구독자 수 200만 명을 넘어섰어요. 예전엔 랙마운트 서버를 집에 들이는 ‘하드코어’ 유저가 주를 이뤘다면, 최근엔 “미니 PC 한 대에 Proxmox 깔고 VM 10개 굴린다”는 라이트 유저층이 급격히 늘어난 추세입니다. 특히 Proxmox VE 8.x 버전이 안정화되면서 무료 하이퍼바이저로서의 입지가 더 단단해졌다고 봐요.

    국내에서도 변화가 느껴집니다. 클리앙, 뽐뿌, 디시인사이드 서버·NAS 갤러리 등지를 보면 시놀로지(Synology) NAS를 넘어 직접 TrueNAS SCALE을 설치하거나, Home Assistant로 스마트홈을 직접 구축하는 사례가 2025~2026년 사이 눈에 띄게 늘었어요. 국내 클라우드 스토리지 요금 인상 기조도 이 흐름에 불을 붙인 것 같습니다.

    Proxmox VE dashboard home server virtualization

    🛠️ 초보자를 위한 홈랩 구축 단계별 로드맵

    처음부터 모든 걸 한꺼번에 세팅하려 하면 지칩니다. 아래 순서대로 차근차근 가는 걸 추천해요.

  • Medical Custom 3D-Printed Implants in 2026: Are They Worth It? An Honest Deep-Dive Review

    A colleague of mine — a sports medicine physician in Seoul — recently told me about a patient who’d been living with a shattered orbital bone for two years, unable to find an off-the-shelf implant that fit properly. The traditional solution involved multiple revision surgeries and a lot of misery. Then, in late 2025, her hospital partnered with a medical-grade 3D printing lab, and within three weeks, the patient had a titanium implant sculpted precisely from CT scan data. The recovery? Remarkably smooth. That story stuck with me, and it’s exactly why I wanted to write this review today — because custom 3D-printed medical implants are no longer science fiction. They’re quietly becoming the new standard of care, and it’s worth understanding what that actually means for you.

    medical 3D printed titanium implant surgical procedure 2026

    What Exactly Is a Custom 3D-Printed Implant?

    Let’s start from the ground up, because the terminology can get confusing fast. A custom 3D-printed medical implant — sometimes called an patient-specific implant (PSI) — is a prosthetic device manufactured using additive manufacturing technology, where material (usually titanium alloy, PEEK polymer, or cobalt-chrome) is built up layer by layer, guided by a digital 3D model derived directly from a patient’s medical imaging (CT or MRI scans).

    Unlike mass-produced implants that come in S/M/L sizes and require surgeons to “make do,” PSIs are engineered to match your exact anatomy. Think of it like the difference between buying shoes off a rack versus having them hand-cobbled to a plaster cast of your foot. The fit is fundamentally different.

    The Data in 2026: How Far Has This Technology Come?

    The numbers in 2026 are genuinely exciting. Here’s what the current landscape looks like:

    • Market size: The global medical 3D printing market reached approximately $4.8 billion USD in 2025 and is projected to exceed $6.2 billion by end of 2026, according to industry research aggregators tracking additive manufacturing adoption rates.
    • Lead time reduction: Five years ago, fabricating a complex craniofacial implant could take 6–8 weeks. Today’s advanced sintering systems at leading centers produce comparable implants in 5–10 business days.
    • Fit accuracy: Studies from orthopedic surgery journals published in early 2026 show PSIs achieving sub-millimeter positional accuracy (±0.3mm tolerance) compared to conventional implants, which can deviate by 3–5mm requiring intraoperative adjustment.
    • Revision surgery rates: Early multi-center data from European orthopedic consortiums suggests PSIs are associated with approximately 28–34% lower revision rates over a 3-year follow-up period compared to standard implants in complex reconstructive cases.
    • Material evolution: Porous titanium lattice structures — designed computationally to mimic cancellous bone — are now routinely used, promoting osseointegration (bone growing into the implant) far more reliably than smooth surfaces.

    Where Are These Implants Being Used?

    The application range in 2026 is broader than most people realize. Let’s break it down by specialty:

    • Craniofacial & maxillofacial surgery: Skull reconstruction after trauma or tumor removal, orbital floor repair, and jaw reconstruction are perhaps the most established use cases. The geometry here is extraordinarily complex, making custom fabrication almost mandatory for good outcomes.
    • Orthopedic joint reconstruction: Custom knee and hip implants for patients with unusual anatomy (severe deformity, revision cases, pediatric patients still growing) are seeing rapid adoption.
    • Spinal surgery: 3D-printed interbody cages and vertebral body replacement devices with patient-matched end plates are reducing subsidence (the implant sinking into bone) significantly.
    • Dental implantology: Guided surgical templates and custom abutments have been mainstream for years, but fully printed zirconia crown-implant systems are gaining regulatory approvals globally through 2025–2026.
    • Cardiac & vascular: Still largely experimental, but 3D-printed patient-specific cardiac patches and structural heart devices are in active clinical trials at major centers.
    porous titanium lattice bone implant osseointegration CT scan comparison

    Real-World Examples: Domestic & International

    Let me give you some concrete examples rather than staying abstract, because this is where the story really comes alive.

    South Korea — Samsung Medical Center & InVivo Therapeutics Partnership (2025–2026): One of the most-discussed domestic cases involves a 47-year-old patient who underwent total pelvic ring reconstruction following a rare bone tumor resection. Using proprietary Korean-developed software and EBM (electron beam melting) titanium printing, the surgical team fabricated a hemipelvic implant with integrated acetabular cup in under two weeks. As of early 2026, the patient is walking with a cane — an outcome considered nearly impossible with conventional implant inventory.

    Germany — Charité Berlin & EOS Systems: Charité’s craniofacial unit published landmark 2026 data showing that in a cohort of 112 complex skull base reconstructions using custom PEEK implants, infection rates dropped to 3.6% compared to a historical 9.1% with titanium mesh — partly attributed to better fit reducing dead space where bacteria colonize.

    United States — Mayo Clinic Additive Manufacturing Lab: Mayo’s in-house printing facility, which went fully operational for PSI production in 2024, reported in their 2026 annual review that they’ve now produced over 800 patient-specific devices across spine, ortho, and craniofacial divisions, with a surgeon satisfaction score of 4.6/5 for intraoperative fit compared to 3.1/5 for comparable conventional implants.

    Japan — Stryker Japan & PMDA Fast-Track Approval: Japan’s regulatory body PMDA granted expedited approval pathways for certain categories of PSI devices in mid-2025, and Stryker’s Japanese division launched a custom knee implant service that’s processed over 1,200 cases in nine months. Early patient-reported outcome scores (KOOS surveys) show statistically significant improvements in pain and function at 6-month follow-up.

    The Real Costs — And Are They Justified?

    Here’s where I want to be really honest with you, because the enthusiasm around this technology is sometimes outpacing realistic expectations.

    A custom 3D-printed implant typically costs 2.5 to 6 times more than a comparable standard implant, depending on complexity and material. For a simple dental guide template, the premium might be minimal. For a full hemipelvic reconstruction? You could be looking at $15,000–$40,000 USD for the implant alone in the US market (as of 2026 pricing), before surgical fees.

    Insurance coverage remains inconsistent and frustrating. Many payers in the US and even parts of Europe still categorize PSIs as “investigational” for certain indications, despite growing evidence. In South Korea, the National Health Insurance Service (NHIS) covers specific PSI categories under limited conditions as of the 2026 coverage update, which is a meaningful step forward but still leaves gaps.

    The lead time, while dramatically reduced, also requires surgical planning discipline. If you’re dealing with an urgent trauma case, a 5–10 day fabrication window may not be feasible, and conventional implants or a bridging solution might still be the practical choice.

    Realistic Alternatives Worth Considering

    Not everyone is an ideal candidate for a fully custom implant, and that’s perfectly okay. Here’s how to think through your options logically:

    • Semi-custom or parametric implants: These use adjustable templates based on a library of anatomical shapes, offering much better fit than fully standard implants at a moderate price premium. Good middle ground for many orthopedic cases.
    • Intraoperative 3D-printed surgical guides + standard implant: Rather than printing the implant itself, printing a surgical cutting or drilling guide that ensures the standard implant is placed with patient-specific precision. This is already FDA-cleared, widely reimbursed, and dramatically improves outcomes at a fraction of the PSI cost.
    • Conventional implants with advanced sizing systems: For straightforward cases without anatomical complexity, modern templating software and expanded size ranges from major manufacturers (Zimmer Biomet, Smith+Nephew) have closed the gap considerably. Don’t let perfect be the enemy of good.
    • Waiting for technology cost reduction: If your case is semi-elective and your surgeon agrees there’s no urgency, it’s worth discussing whether waiting 12–24 months while the cost and accessibility landscape continues improving makes sense for your situation.

    The bottom line? Custom 3D-printed implants in 2026 represent a genuine leap forward in surgical precision, particularly for complex anatomy, revision cases, and patients where standard sizing fails. The evidence base is solidifying rapidly, and the technology’s day-to-day reliability has reached a point where I’d confidently say it’s no longer experimental — it’s emerging best practice. The honest caveats are cost, access, and the need for a surgical team experienced with PSI-specific planning workflows. If those boxes check out for your situation, the data strongly supports exploring this option with your specialist.

    Editor’s Comment : What strikes me most about this technology in 2026 isn’t just the engineering — it’s the philosophical shift it represents. Medicine has always tried to fit the patient to available tools. Custom implants quietly flip that equation: now the tools conform to the patient. That’s a big deal. If you’re facing a reconstructive procedure and haven’t asked your surgeon specifically about PSI options, that conversation is worth having. Bring the questions, bring your imaging, and push for the fit your body actually needs — not just the one that was on the shelf.

    태그: [‘custom 3D printed implants 2026’, ‘patient-specific implants review’, ‘medical additive manufacturing’, ‘3D printing orthopedic surgery’, ‘titanium PEEK implants’, ‘PSI implant cost and benefits’, ‘future of reconstructive surgery’]


    📚 관련된 다른 글도 읽어 보세요

  • 2026년 의료용 맞춤형 3D 프린팅 임플란트 리뷰 – 기술 혁신이 내 몸을 바꾼다

    얼마 전, 지인 한 분이 교통사고로 광대뼈 일부를 잃었습니다. 과거라면 기성품 임플란트를 조각하고 깎아 억지로 맞추는 방식이었겠지만, 2026년 현재 그분이 선택한 방법은 달랐어요. CT 데이터를 기반으로 정밀하게 제작된 맞춤형 3D 프린팅 임플란트를 이식받은 것이죠. 수술 후 회복 속도도 빠르고, 무엇보다 거울을 봤을 때 “내 얼굴 같다”고 말씀하시더라고요. 그 이야기를 듣고 나서, 이 기술이 정확히 어디까지 왔는지 한번 제대로 파헤쳐보고 싶어졌습니다.

    오늘은 의료용 맞춤형 3D 프린팅 임플란트의 현재 수준, 실제 사례, 그리고 현실적인 접근법까지 함께 살펴볼게요.

    medical 3D printing implant titanium custom prosthetics

    📊 본론 1 – 숫자로 보는 맞춤형 3D 프린팅 임플란트의 현재

    2026년 기준으로 글로벌 의료용 3D 프린팅 시장 규모는 약 47억 달러(한화 약 6조 3천억 원)에 달한다고 봅니다. 이 중 임플란트·보형물 분야가 전체의 약 38%를 차지하고 있어, 사실상 시장의 핵심 축이라 할 수 있어요.

    정밀도 측면에서는, 최신 금속 분말 소결 방식(SLM, Selective Laser Melting)을 활용한 티타늄 임플란트의 경우 오차 범위 ±0.05mm 이하를 구현하는 수준까지 올라왔습니다. 기성품 임플란트의 평균 오차가 ±0.3~0.5mm였던 것과 비교하면, 정밀도가 6~10배가량 향상된 셈이에요.

    골유착(osseointegration) 측면에서도 주목할 만한 수치가 있습니다. 3D 프린팅으로 제작된 다공성(porous) 구조 임플란트는 표면적이 기존 매끈한 임플란트 대비 약 200~300% 넓어, 실제 뼈세포가 침투하고 고정되는 속도가 유의미하게 빠르다고 알려져 있어요. 일부 임상 데이터에서는 초기 골유착 완성 기간이 기존 6~8개월에서 3~4개월로 단축된 사례도 보고되고 있습니다.

    소재 면에서도 선택지가 넓어졌어요. 티타늄(Ti-6Al-4V) 외에도 PEEK(폴리에테르에테르케톤), 바이오세라믹, 심지어 분해 흡수형 생체 재료까지 3D 프린팅이 가능한 단계에 이르렀습니다.

    🌍 본론 2 – 국내외 실제 적용 사례로 살펴보기

    해외 사례 – 미국·유럽
    미국 FDA는 이미 2020년대 초부터 3D 프린팅 의료기기에 대한 가이드라인을 정비해 왔으며, 2026년 현재 FDA 510(k) 승인을 받은 3D 프린팅 임플란트 제품군은 1,000종 이상으로 추산됩니다. 특히 척추 유합술(Spinal Fusion)에 사용되는 케이지(Cage) 임플란트 분야에서는 3D 프린팅 제품의 시장 점유율이 50%를 넘어선 것으로 보고되고 있어요. 유럽에서는 네덜란드 UMC 위트레흐트 병원이 두개골 전체를 3D 프린팅으로 제작해 이식하는 수술에 성공한 것이 큰 화제가 되었습니다.

    국내 사례 – 한국
    국내에서도 서울아산병원, 삼성서울병원 등 대형 의료기관을 중심으로 두개악안면 재건술, 골반 재건술 등에 맞춤형 3D 프린팅 임플란트가 적극적으로 도입되고 있는 추세입니다. 식품의약품안전처(MFDS)도 2025년부터 ‘환자 맞춤형 의료기기’ 인허가 패스트트랙을 운용하기 시작했고요. 국내 스타트업 중에서도 오스테오시스(Osteosys), 메디쎄이 같은 기업들이 CT/MRI 데이터 기반 자동 설계 소프트웨어와 임플란트 제조를 결합한 솔루션을 선보이고 있어 주목받고 있습니다.

    orthopedic 3D printed implant surgery Korea hospital

    ✅ 맞춤형 3D 프린팅 임플란트, 이런 점이 달라요

    • 개인 맞춤 정밀 설계: 환자의 CT/MRI 데이터를 직접 CAD 모델로 변환해 제작하기 때문에, 해부학적 구조에 가장 근접한 형태로 구현할 수 있어요.
    • 다공성 구조 설계 가능: 기존 가공법으로는 만들기 어려운 격자형·다공성 내부 구조를 자유롭게 설계해, 골유착과 혈관 침투를 유도할 수 있습니다.
    • 수술 시간 단축: 미리 완벽히 설계된 임플란트를 사용하면, 수술 중 형태를 조정하는 데 드는 시간이 크게 줄어든다고 봅니다.
    • 복잡한 재건 케이스에 유리: 암 수술 후 뼈 결손, 사고로 인한 복합 골절 등 기성품으로 대응하기 어려운 복잡한 케이스에서 특히 효과적이에요.
    • 수술 전 시뮬레이션: 가상 수술 계획 소프트웨어와 연동해, 집도의가 수술 전 임플란트 삽입을 3D로 미리 연습하고 최적 경로를 결정할 수 있습니다.
    • 재료 낭비 최소화: 필요한 부위에만 재료를 쌓는 적층 방식이라, 기존 절삭 가공 대비 소재 손실이 현저히 적어요.

    ⚠️ 아직 넘어야 할 현실적인 허들들

    물론 장밋빛 면만 있는 건 아닙니다. 현실적으로 짚어볼 부분도 있어요.

    첫째, 비용 문제입니다. 맞춤형 3D 프린팅 임플란트는 설계비, 재료비, 제조비가 모두 더해지다 보니 기성품 대비 2~5배 높은 비용이 드는 경우가 많아요. 국내 건강보험 급여 적용 범위가 점차 확대되고 있지만, 아직은 일부 적응증에 한정된다는 한계가 있습니다.

    둘째, 인허가와 제조 리드타임입니다. 맞춤 제작 특성상 수술 계획부터 임플란트 완성까지 통상 2~6주가 소요됩니다. 긴급한 케이스에서는 여전히 기성품을 활용해야 하는 상황도 생겨요.

    셋째, 장기 임상 데이터 부족입니다. 3D 프린팅 임플란트의 역사가 상대적으로 짧다 보니, 10~20년 단위의 장기 추적 관찰 데이터가 아직 충분히 쌓이지 않았다는 점은 솔직히 인정해야 할 것 같습니다.

    🔮 결론 – 2026년, 어떤 선택이 현실적일까요?

    맞춤형 3D 프린팅 임플란트는 분명히 의료의 패러다임을 바꾸고 있는 기술이라고 봅니다. 하지만 모든 환자에게 무조건 최선의 선택이 되는 건 아니에요. 척추 단순 유합술처럼 표준화된 케이스라면 기성품 3D 프린팅 임플란트로도 충분히 좋은 결과를 얻을 수 있고, 비용도 합리적입니다.

    반면, 암 수술 후 대규모 골 결손, 선천성 기형, 복잡한 외상 재건처럼 “이 사람만의 해부학적 구조”가 핵심인 케이스라면, 맞춤형 3D 프린팅 임플란트가 주는 이점은 비용을 상회한다고 생각해요. 의료진과 충분히 상의해 자신의 케이스가 어느 쪽에 해당하는지 먼저 파악하는 것이 현실적인 첫 번째 스텝이라고 봅니다.

    에디터 코멘트 : 3D 프린팅 임플란트를 처음 접하면 ‘최첨단 = 무조건 최선’이라는 생각이 들기 쉬운데요, 사실 가장 중요한 건 나의 케이스에 맞는 선택인가를 따지는 거라고 봅니다. 가능하다면 해당 분야에서 3D 프린팅 임플란트 적용 경험이 풍부한 의료진에게 세컨드 오피니언을 구해보는 걸 추천드려요. 기술은 이미 충분히 성숙해 있고, 이제는 ‘누가, 어떻게 활용하느냐’가 결과를 가르는 시대가 됐으니까요.

    태그: [‘3D프린팅임플란트’, ‘맞춤형임플란트’, ‘의료용3D프린팅’, ‘티타늄임플란트’, ‘골유착’, ‘디지털헬스케어’, ‘2026의료기술’]


    📚 관련된 다른 글도 읽어 보세요