Author: likevinci

  • Used Server Homelab Setup in 2026: Smart Buying Tips That Actually Save You Money

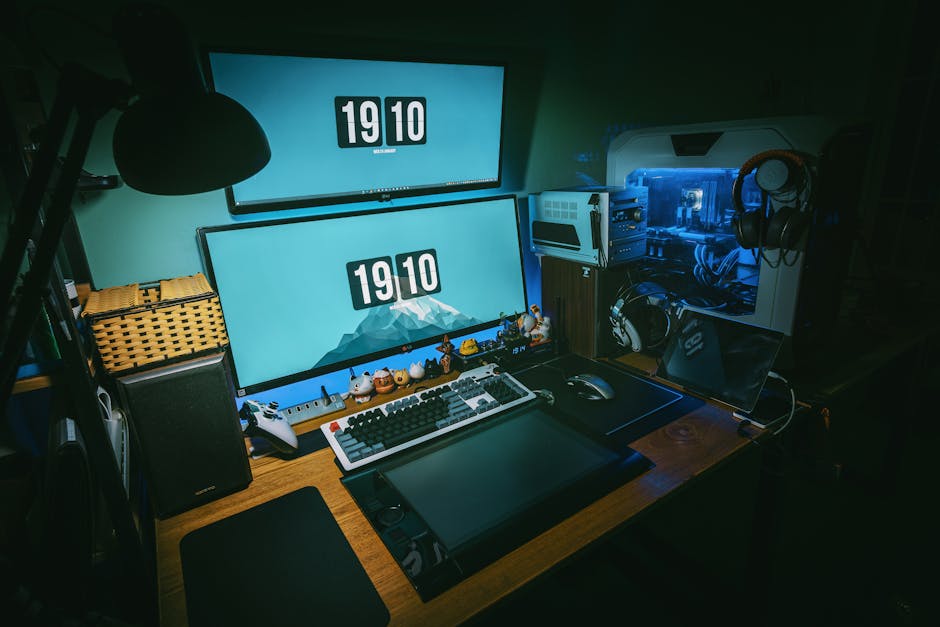
    A few years back, a friend of mine dragged two decommissioned Dell PowerEdge servers out of an enterprise auction — paid less than $200 total — and built a homelab that now runs his entire self-hosted cloud, game servers, and a personal AI inference rig. When he showed me the monthly electricity bill versus what he’d spend on equivalent cloud computing, my jaw dropped. That moment planted the homelab bug in me, and honestly, it probably will in you too once we dig into the numbers together.

    So if you’ve been eyeing used enterprise servers on eBay, ServerMonkey, or local auctions — wondering whether the savings are real or whether you’re walking into a money pit — let’s reason through this carefully, step by step, in 2026.

    used server rack homelab setup 2026 enterprise equipment

    Why Used Enterprise Servers Still Make Sense in 2026

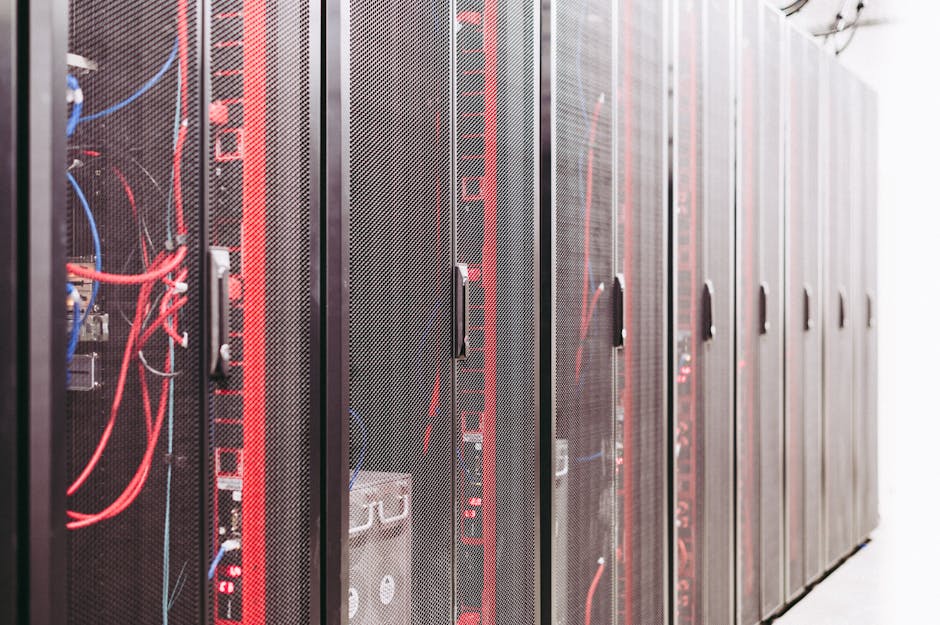
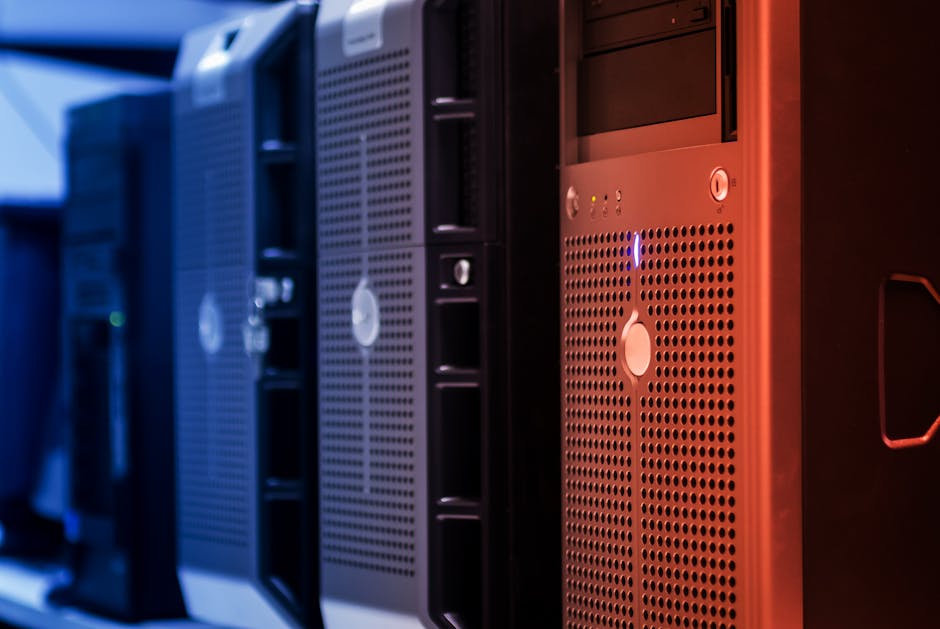
    The enterprise hardware refresh cycle is a homelabber’s best friend. Large corporations typically retire servers every 3–5 years regardless of actual remaining lifespan. This means hardware that still has 5–10 years of functional life floods the secondary market at a fraction of original cost.

    Let’s look at some real figures. A Dell PowerEdge R730 — a workhorse 2U server with dual Xeon E5-2600 v4 CPUs, capable of holding up to 768GB RAM — originally retailed around $8,000–$15,000 when new. In early 2026, you can find well-configured units on the secondary market for $150–$400 depending on RAM and storage configuration. That’s roughly a 95–98% depreciation from original retail, but the hardware itself is far from dead.

    Similarly, HPE ProLiant DL380 Gen9/Gen10 units — beloved for their reliability and iLO remote management — routinely surface for $200–$600 fully loaded. For someone building a Proxmox cluster, a Kubernetes learning environment, or a homeNAS-plus-compute combo, the value proposition is frankly hard to beat.

    What to Actually Look For Before You Buy

    Here’s where a lot of first-time buyers go wrong: they focus entirely on specs and ignore the ecosystem costs. Let me break this down logically.

    • Generation matters for power consumption: Older servers (pre-2014, like Gen8 or earlier) can idle at 150–300W. A Dell R730 idles around 80–120W. An R750 (newer) might idle at 60–90W. In 2026, with electricity costs in many US regions at $0.15–$0.22/kWh, that idle wattage difference compounds significantly over a year.
    • Check iDRAC/iLO licensing: Remote management cards (Dell’s iDRAC, HP’s iLO) are life-savers. Make sure the unit comes with an Enterprise license or that you can source one cheaply — this enables full KVM-over-IP access without needing a physical monitor.
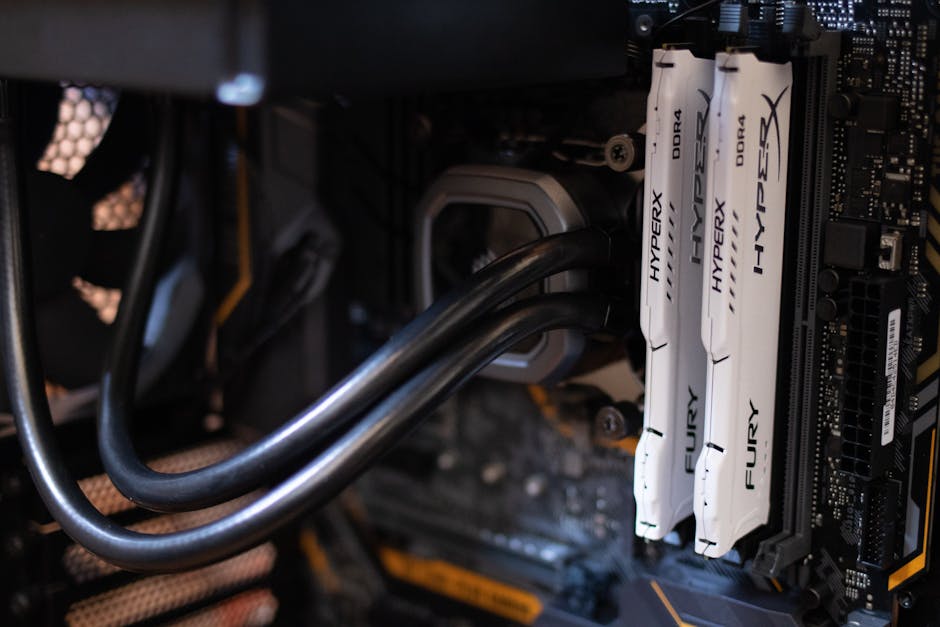
    • RAM type and availability: DDR3 RDIMM (common in older servers) is incredibly cheap right now — 32GB sticks can be had for $8–$15 each. DDR4 RDIMM is pricier but more power-efficient. Factor in your upgrade path.
    • Drive bays and backplane type: SAS vs. SATA matters. Enterprise SAS drives are durable but loud and power-hungry. Consider HBA passthrough cards (like an LSI 9211-8i flashed to IT mode) if you’re building a TrueNAS setup — this is basically mandatory for proper ZFS performance.
    • Warranty and condition grading: Look for sellers who grade hardware as “Grade A” (cosmetic wear only, fully tested) vs. “For Parts.” Always ask for a power-on test video if buying remotely.
    • Noise levels: Enterprise servers are loud. A rack server at full load can hit 60–75dB. If you’re putting this in a living space, research fan speed controllers or replacement fans (Noctua makes adapters for some units).
    • PSU redundancy: Dual PSU configurations are standard in enterprise gear. This is actually a reliability advantage — if one fails, the system keeps running.

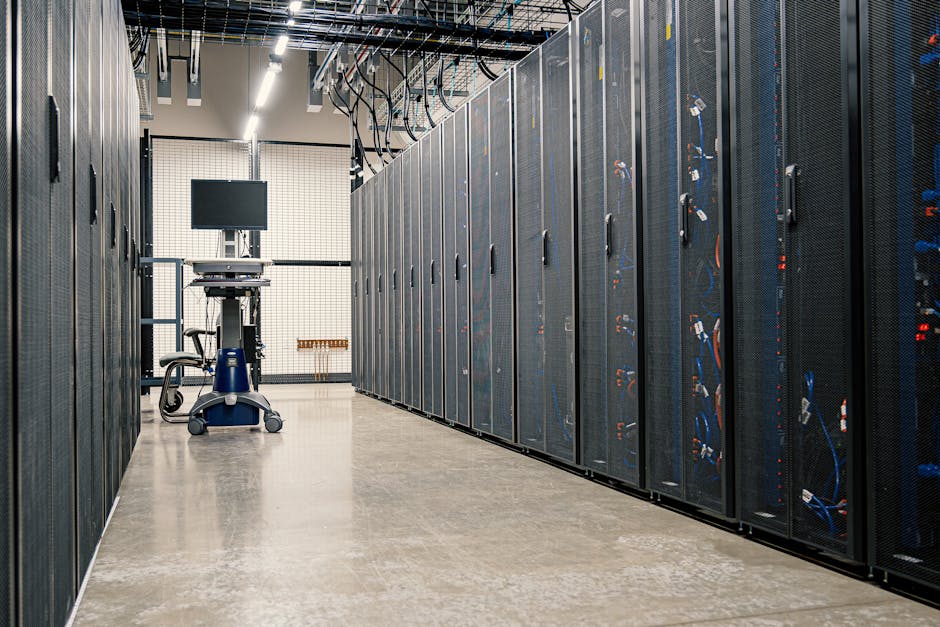
    Real-World Homelab Builds: What People Are Actually Doing in 2026

    In South Korea, the homelab community centered around communities like ARCA and various Naver Cafe groups has seen explosive growth since 2024. Korean homelabbers frequently import Dell R740s and SuperMicro units through platforms like Gmarket or direct from enterprise liquidation partners — building everything from personal Jellyfin media servers to local LLM inference rigs running Ollama with Llama 3-class models.

    In the US and Europe, Reddit’s r/homelab (now over 1.2 million members as of early 2026) showcases builds ranging from $300 two-server Proxmox VE clusters to elaborate multi-rack setups with 10GbE networking. The community consensus in 2026 leans heavily toward Dell R730/R740 and HPE DL380 Gen10 as the sweet spot between performance, price, and power efficiency.

    A particularly clever approach gaining traction internationally is the “1U compute + NAS hybrid” model: one cheap 1U server (like a Supermicro 1U with a Xeon D) handles low-power always-on tasks, while a beefier 2U or 4U machine powers up on demand for heavy workloads. Wake-on-LAN automation handles the switching — smart and energy-efficient.

    homelab rack servers Dell HPE Proxmox setup organized cabling

    Hidden Costs You Need to Budget For

    Let’s be honest about total cost of ownership — because this is where homelab budgets quietly balloon.

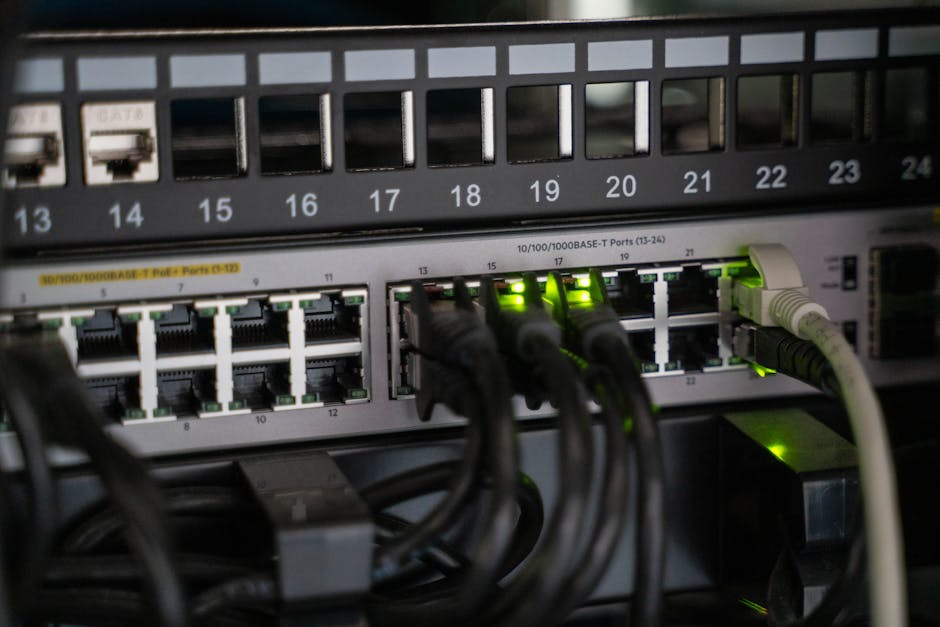
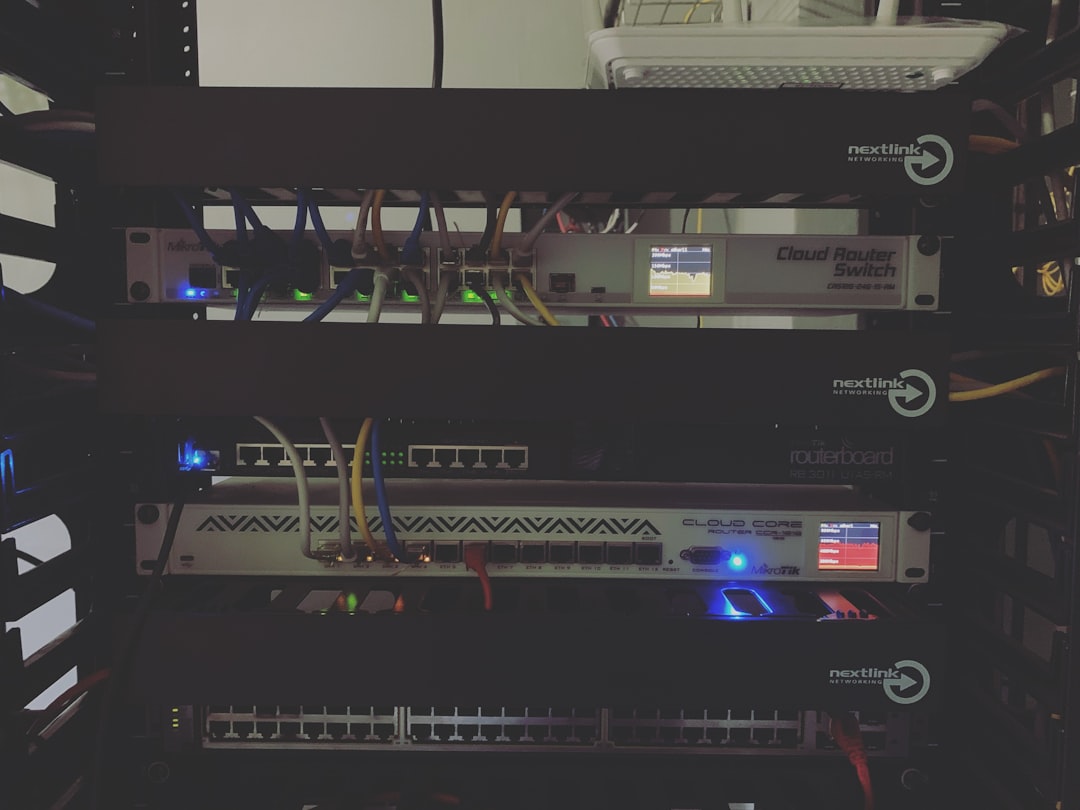
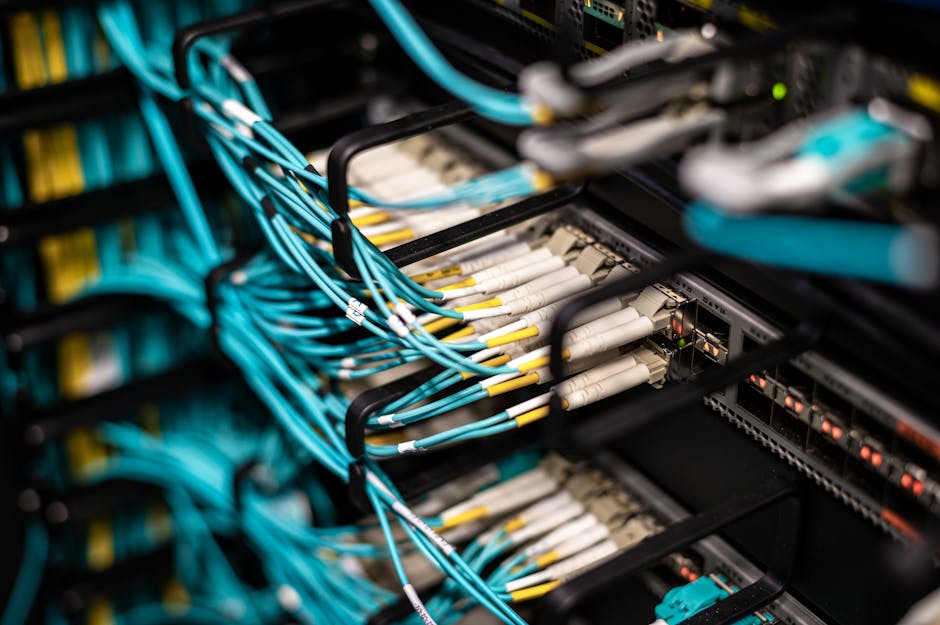
    • Networking: A used managed switch with SFP+ ports for 10GbE connectivity (like a used Cisco SG350X or Mikrotik CRS326) adds $100–$300 but transforms your lab’s capability.
    • UPS (Uninterruptible Power Supply): Non-negotiable for a proper homelab. A used APC Smart-UPS 1500VA can be found for $80–$150 and protects your hardware from power events.
    • Rack or shelving: Even a used 12U open-frame rack from Amazon or a local supplier runs $80–$200. Proper airflow management extends hardware life.
    • Replacement drives: Don’t trust the drives that come with used servers for long-term data. Budget for new SSDs or at minimum run a short SMART test and extended SMART test on every inherited drive.
    • Electricity: Run the math honestly. At 150W average consumption × 24/7 × $0.18/kWh, you’re looking at roughly $195/year per server. Two servers? Nearly $400 annually just in power.

    Realistic Alternatives If a Full Server Feels Like Too Much

    Not everyone needs a rack-mount behemoth, and that’s completely valid. Here’s how to think about right-sizing your homelab investment:

    Option 1 — Mini PC Cluster: In 2026, used Intel NUC 12/13 Pro units or Beelink EQ12 mini PCs offer surprisingly capable Proxmox nodes at 10–15W idle. Four of them in a cluster cost less than one enterprise server and barely register on your electricity bill. Perfect for learning Kubernetes or running lightweight services.

    Option 2 — Used Workstations Instead of Servers: A Dell Precision 7920 or HP Z8 workstation offers similar compute to an enterprise server, with dramatically lower noise and power draw, standard ATX parts, and consumer-friendlier management. Great middle ground.

    Option 3 — Hybrid Cloud Approach: Run your always-on low-power services locally (on a Pi 5 or mini PC), and use spot instances on AWS or Hetzner for burst compute. Hetzner’s dedicated server auction in particular offers incredible value for European users.

    The key question to ask yourself: What workloads do I actually need to run, and how often? If your heaviest use case is a weekend Plex transcoding session and occasional Docker containers, you might not need 256GB of RAM and 32 cores humming 24/7.

    Editor’s Comment : The used server homelab scene in 2026 is more accessible than ever, but the smartest homelabbers aren’t the ones with the biggest racks — they’re the ones who matched their hardware to their actual needs and electricity budget. Start with one used server, get comfortable with Proxmox or TrueNAS SCALE, and let your homelab grow organically. The learning curve is the real treasure here, not the spec sheet.


    📚 관련된 다른 글도 읽어 보세요

    태그: [‘used server homelab 2026’, ‘homelab setup tips’, ‘Dell PowerEdge homelab’, ‘Proxmox home server’, ‘enterprise server buying guide’, ‘homelab power consumption’, ‘self-hosted server 2026’]

  • 중고 서버 구매 홈랩 구성 팁 2026 — 비용 절반으로 나만의 데이터센터 만들기

    작년 말, 한 IT 커뮤니티에서 꽤 흥미로운 글을 봤어요. 월세 고시원에 살면서 중고 서버 두 대로 쿠버네티스 클러스터를 운영한다는 개발자의 이야기였는데, 댓글이 수백 개 달릴 만큼 반응이 뜨거웠습니다. 처음엔 ‘저거 전기세 폭탄 아냐?’ 싶었는데, 글을 다 읽고 나니 오히려 클라우드 비용을 줄이면서 실무급 인프라 경험까지 쌓는 꽤 합리적인 선택이라는 걸 알게 됐어요. 2026년 현재, 홈랩(Home Lab) 문화는 단순한 취미를 넘어 DevOps·클라우드 엔지니어 지망생들의 ‘실전 포트폴리오 공간’으로 빠르게 자리잡고 있습니다. 오늘은 중고 서버를 현명하게 골라 홈랩을 구성하는 구체적인 방법을 함께 살펴볼게요.

    used server rack homelab setup data center

    1. 중고 서버 시장 현황 — 얼마면 시작할 수 있을까?

    2026년 기준, 국내 중고 서버 시장은 꽤 풍성한 편이라고 봅니다. 기업들의 클라우드 전환 가속화로 온프레미스 장비가 대거 방출되고 있거든요. 대표적인 구매 채널인 중고나라, 번개장터, 옥션 비즈, 그리고 전문 중고 장비 업체(서버코리아, 에스엠비글로벌 등)를 기준으로 가격대를 정리하면 대략 이렇습니다.

    • Dell PowerEdge R620 / R630 (2소켓, Xeon E5-2600 v2~v4 계열): 8~15만 원 선. 입문용으로 가장 대중적인 선택이에요. RAM 64GB 기준입니다.
    • Dell PowerEdge R720 / R730 (2소켓, 스토리지 확장형): 15~30만 원. 3.5인치 베이 8개 이상이라 NAS 겸용 홈랩에 적합해요.
    • HP ProLiant DL380 Gen9 / Gen10: 20~45만 원. HP iLO 관리 인터페이스가 강점이고, 국내 기업 방출 물량이 많아 부품 수급이 쉬운 편입니다.
    • Supermicro 1U/2U (X10/X11 세대): 10~35만 원. 소음이 상대적으로 낮고 전력 효율이 좋아 주거 공간용으로 선호도가 높아지고 있어요.
    • Lenovo ThinkSystem SR650 (Gen1/Gen2): 40~80만 원. 비교적 최신 세대라 PCIe 4.0 지원, NVMe 캐싱 구성이 가능하다는 장점이 있습니다.

    전력 소비는 매우 중요한 변수예요. Xeon E5-2600 v3 계열 듀얼 CPU 구성 기준, 풀로드 시 약 200~350W를 소비합니다. 한국전력 주택용 전기요금(2026년 누진세 3단계 기준 약 280원/kWh)으로 계산하면, 하루 24시간 풀가동 시 월 약 4만~7만 원의 전기요금이 추가됩니다. 클라우드 VM 2~3개 운영 비용(월 10~20만 원)과 비교하면 여전히 경제적인 선택이라고 볼 수 있어요.

    2. 구매 전 반드시 확인해야 할 체크리스트

    중고 서버를 구매할 때 가장 큰 리스크는 ‘보이지 않는 결함’입니다. 특히 엔터프라이즈 장비는 개인이 수리하기 어려운 독점 부품이 많아서, 구매 전 다음 항목을 반드시 확인하는 게 좋아요.

    • POST(Power-On Self-Test) 정상 부팅 여부: 직거래라면 반드시 눈앞에서 켜보세요. 택배 구매라면 판매자에게 BIOS 화면 촬영 영상을 요청하는 게 합리적입니다.
    • iDRAC / iLO / IPMI 원격 관리 기능 활성화 여부: 이 기능이 없으면 서버 관리가 크게 불편해지고, 라이선스 활성화 비용이 추가로 발생할 수 있어요.
    • HDD/SSD 교체 이력 및 S.M.A.R.T 데이터: 스토리지는 소모품이에요. 파워워드 오류 카운트나 재할당 섹터 수치가 높으면 구매 후 바로 교체해야 합니다.
    • 팬(Fan) 소음 상태: 서버용 팬은 RPM이 매우 높아 가정에서 그냥 틀면 청소기 수준의 소음이 납니다. 팬 교체나 PWM 컨트롤 가능 여부를 확인하세요.
    • 전원 공급 장치(PSU) 이중화 여부 및 출력: 750W 이상 이중화 PSU가 달려 있는지 확인하고, 가정용 콘센트(최대 16A) 용량 내에서 운용 가능한지 계산해 봐야 해요.
    • RAID 컨트롤러 캐시 배터리(BBWC) 상태: 캐시 배터리가 죽으면 RAID 성능이 급락합니다. 별도 구매 시 2~5만 원이 추가로 들 수 있어요.

    3. 국내외 홈랩 커뮤니티 사례 — 이렇게들 쓰고 있어요

    해외에서는 Reddit의 r/homelab 커뮤니티가 가장 활발한 레퍼런스 공간입니다. 2026년 현재 약 72만 명의 구독자를 보유하고 있고, Dell R730xd 기반의 Proxmox VE 클러스터 구성이 압도적인 인기를 끌고 있어요. 특히 주목할 만한 건 “소음 저감 팬 모드” 커스텀 펌웨어 프로젝트인데, iDRAC의 팬 속도 임계값을 수동으로 조정해 소음을 일반 PC 수준으로 낮추는 방법이 공유되면서 ‘거실 홈랩’이 현실이 됐다는 평가를 받고 있습니다.

    국내에서는 클리앙 서버/NAS 게시판뽐뿌 서버포럼이 주요 커뮤니티예요. 최근에는 HP Gen10 서버에 TrueNAS Scale을 설치하고 Jellyfin 미디어 서버와 Nextcloud를 동시 운영하는 사례가 많이 보입니다. 한 유저는 R730 1대로 Proxmox 위에 VM을 12개 올려 GitLab, Jenkins, Harbor(컨테이너 레지스트리), ArgoCD까지 운영하며 실제 취업 면접에서 ‘직접 운영한 CI/CD 파이프라인’으로 어필했다는 후기를 남기기도 했어요.

    homelab proxmox kubernetes rack server wiring

    4. 2026년 추천 홈랩 소프트웨어 스택

    하드웨어를 샀다면 어떤 소프트웨어로 채울지도 중요합니다. 현재 홈랩 운영자들 사이에서 가장 검증된 스택이라고 볼 수 있는 조합을 소개할게요.

    • 하이퍼바이저: Proxmox VE 8.x — 무료이면서 KVM과 LXC 컨테이너를 동시에 지원하고, 웹 UI가 직관적이에요.
    • 스토리지: TrueNAS Scale (ZFS 기반) — 데이터 무결성 보장과 스냅샷 기능이 강력합니다.
    • 컨테이너 오케스트레이션: K3s (경량 쿠버네티스) — 풀 쿠버네티스 대비 메모리 사용량이 절반 이하라 홈랩 환경에 최적화되어 있어요.
    • 모니터링: Grafana + Prometheus 스택 — 서버 자원 사용률을 실시간으로 대시보드화할 수 있어요.
    • 네트워크 관리: pfSense 또는 OPNsense — VLAN 분리, VPN 서버 구성을 통해 보안 수준을 높일 수 있습니다.
    • 역방향 프록시: Traefik 또는 Nginx Proxy Manager — 내부 서비스에 도메인과 HTTPS를 붙이는 데 필수적이에요.

    5. 현실적인 시작 로드맵 — 단계별 접근이 중요해요

    한 번에 풀 구성으로 시작하려다 지쳐 포기하는 경우가 생각보다 많습니다. 단계를 나눠 접근하는 게 훨씬 지속 가능한 방법이라고 봐요.

    • 1단계 (예산 10~20만 원): Dell R620/R630 1대 구매 → Proxmox 설치 → VM 3~5개 기본 운영 연습.
    • 2단계 (예산 추가 10~15만 원): 10G 네트워크 카드(SFP+ NIC) 추가, 홈 라우터에 VLAN 설정, 내부 DNS 서버 구축.
    • 3단계 (예산 추가 20~30만 원): 스토리지 서버(R720 또는 별도 NAS) 추가 → iSCSI/NFS로 스토리지 분리 → 클러스터 구성 도전.
    • 4단계 (선택): K3s 또는 RKE2 쿠버네티스 클러스터 구성 → GitOps 파이프라인 연동 → 실제 포트폴리오 프로젝트 배포.

    에디터 코멘트 : 중고 서버 홈랩의 진짜 매력은 단순히 ‘저렴하게 서버를 쓴다’는 것보다, 실제로 부서지고 고쳐보는 경험에 있다고 생각해요. 클라우드 콘솔에서 클릭 몇 번으로 VM을 띄우는 것과, 직접 RAID 컨트롤러를 세팅하고 네트워크 케이블을 꽂으며 ping이 돌아오는 순간은 전혀 다른 감각을 줍니다. 물론 소음, 전기요금, 공간 문제는 현실적인 허들이에요. 시작이 망설여진다면 우선 R620 한 대, 20만 원 이내로 시작해 보는 걸 권합니다. 생각보다 금방 두 번째 서버를 들이게 될 거예요.


    📚 관련된 다른 글도 읽어 보세요

    태그: []

  • Smart Factory 3D Printing Automation in 2026: Real-World Case Studies That Are Changing Manufacturing Forever

    Picture this: a factory floor in 2026 where a single engineer oversees a network of machines that design, print, and assemble components — all without a single traditional mold or manual press. It sounds like something out of a sci-fi novel, but this is the operating reality for dozens of manufacturers who made the leap into smart factory 3D printing automation. I remember chatting with a production manager at an aerospace supplier last year who told me, “We cut our tooling lead time from 14 weeks to 4 days. I genuinely didn’t believe it until I watched it happen.” That kind of shift isn’t just operational — it’s philosophical.

    So today, let’s think through what’s actually happening on the ground, what the data tells us, and — crucially — what realistic adoption paths look like for businesses of all sizes.

    smart factory 3D printing automation robots manufacturing floor 2026

    Why 3D Printing + Smart Factory Automation Is a Match Made in Manufacturing Heaven

    At its core, a smart factory is a highly digitized, interconnected production facility that uses technologies like IoT sensors, AI-driven analytics, and robotics to self-optimize. When you layer in additive manufacturing (AM) — the technical term for 3D printing — you introduce a production method that is inherently flexible, low-waste, and geometry-agnostic. Traditional subtractive manufacturing carves away material; additive manufacturing builds up only what’s needed.

    The synergy here is powerful. Smart factory infrastructure feeds real-time data (temperature tolerances, stress test results, demand forecasts) directly into AM systems, which can then dynamically adjust print parameters or switch between product variants without retooling. This is sometimes called closed-loop manufacturing — a system where feedback constantly refines the output.

    The Numbers Behind the Transformation

    Let’s ground this in data, because the trends in 2026 are genuinely striking:

    • Global AM market size reached approximately $32.5 billion in 2025 and is projected to exceed $41 billion by end of 2026, according to Wohlers Associates’ latest annual report.
    • A McKinsey Global Institute analysis found that factories integrating 3D printing into automated production lines reported a 25–40% reduction in production costs for complex components over a 3-year adoption window.
    • The average tooling lead time for injection-molded parts historically sits at 8–16 weeks. Smart factories using AM-integrated automation have compressed this to 3–7 days for functional prototypes and short-run production.
    • Scrap material reduction is another headline number: AM processes in optimized smart factory settings generate up to 70% less waste compared to CNC machining for equivalent parts.
    • Labor productivity in AM-enabled smart factories has shown a 15–22% uplift in throughput per worker, largely because human roles shift from manual operation to oversight, quality control, and process design.

    These aren’t aspirational figures anymore — they’re being reported by companies that have moved past pilot programs into full-scale integration.

    Real-World Case Studies: From Korea to Germany to the U.S.

    Let’s look at some concrete examples, because theory only takes us so far.

    🇰🇷 South Korea — Hyundai Motor’s Asan Plant Integration
    Hyundai’s Asan facility has been a benchmark case in the Korean smart factory conversation. Since 2024, the plant has incorporated polymer and metal AM stations directly into its body parts testing workflow. Rather than outsourcing jig and fixture production, in-house 3D printing cells connected to the plant’s MES (Manufacturing Execution System) now produce custom assembly aids on demand. The result? A reported 31% reduction in fixture procurement costs and a measurable drop in line changeover time. Hyundai has publicly stated this model is being templated across two additional Korean plants through 2026.

    🇩🇪 Germany — Siemens’ Erlangen Energy Hub
    Siemens has long been a poster child for Industry 4.0, but their Erlangen facility took things further by integrating autonomous AM cells — essentially 3D printing robots that receive print jobs, load materials, run quality checks via in-process scanning, and flag exceptions without human input. By 2025, they reported that over 1,200 unique spare parts for turbine systems were being produced entirely on-demand through this system, eliminating legacy inventory warehousing for those SKUs. The cost saving from reduced inventory carrying alone was cited at approximately €4.2 million annually.

    🇺🇸 United States — GE Aerospace’s Additive Works Division
    GE Aerospace has arguably the most mature AM-to-production pipeline in the world. Their facility in Auburn, Alabama produces FAA-certified fuel nozzle tips using direct metal laser sintering (DMLS). What makes it smart factory-relevant is the integration layer: every printed component is tracked via embedded QR data, measured by in-line CT scanners, and the results are fed back into the AI model that governs print parameters. This self-correcting system has reduced the rejection rate for these nozzles from approximately 3.5% (in 2022) to under 0.8% by early 2026.

    metal 3D printing additive manufacturing aerospace turbine component smart factory

    What Technologies Are Driving This Integration in 2026?

    If you’re trying to understand what’s under the hood, here are the key enabling technologies working in concert:

    • Digital Twin Platforms: Virtual replicas of physical production processes allow engineers to simulate AM outcomes before printing begins, dramatically reducing failed runs.
    • AI-Powered Print Parameter Optimization: Machine learning models trained on thousands of print jobs can predict optimal layer thickness, support structures, and infill patterns for new geometries.
    • Multi-material AM Systems: 2026 has seen commercial viability of printers that switch between materials mid-print, enabling functionally graded components (e.g., rigid core with flexible outer layer) in a single pass.
    • In-Process Metrology: Embedded sensors and laser profilometers scan each printed layer in real time, catching deviations before they compound — this is critical for ISO/AS9100 compliance in aerospace and medical sectors.
    • Cloud-Connected MES Integration: AM cells that talk directly to the factory’s Manufacturing Execution System can be dynamically reprioritized based on live production demand, rather than running fixed job queues.

    Realistic Alternatives: Not Every Company Needs a GE-Scale Setup

    Here’s where I want to slow down and be honest with you, because a lot of coverage on this topic makes it sound like full smart factory 3D printing integration is an all-or-nothing proposition. It isn’t.

    If you’re running a mid-sized manufacturing operation or even a smaller contract shop, there are entry points that deliver real ROI without a multi-million-dollar overhaul:

    • Step 1 — Tooling and Fixtures First: Start by 3D printing your own jigs, fixtures, and assembly aids internally. This is the lowest-risk, highest-speed ROI path. You don’t need AM in your main production line — just a desktop or industrial printer in your tooling room connected to your CAD system.
    • Step 2 — Spare Parts On-Demand: Instead of maintaining a physical inventory of slow-moving spare parts, companies like Spare Parts 3D (a Singapore-based startup now operating in 14 countries) offer digital inventory platforms where qualified part files are stored and printed only when ordered. The capex is minimal if you partner rather than own.
    • Step 3 — Pilot Cell Approach: Carve out one production cell — even a single product line — and run a 6-month pilot integrating AM with your existing ERP/MES. Measure lead time, scrap rate, and cost. Let the data make the case for expansion.
    • Step 4 — Partner with AM Bureaus: If internal capital is constrained, outsourcing production runs to AM service bureaus (like Xometry, Materialise, or regional Korean/German equivalents) while you build internal expertise is entirely valid. This is a bridge, not a compromise.

    The point is: the smart factory 3D printing journey doesn’t require you to leap from zero to Siemens Erlangen. It requires you to take the next logical step from wherever you are today.

    Challenges Worth Acknowledging Honestly

    I’d be doing you a disservice if I only shared the wins. The adoption challenges are real:

    • Workforce reskilling is consistently cited as the #1 barrier. Operating AM in a smart factory context requires fluency in CAD, materials science, and data analytics — skillsets that traditional machinists and technicians need time and investment to develop.
    • Material certification remains a bottleneck in regulated industries. While aerospace and medical AM is growing fast, the qualification timeline for new materials under FAA, FDA, or ISO frameworks can still run 18–36 months.
    • Cybersecurity exposure increases as factory systems become more connected. A digital thread that runs from design file to print job to quality record is incredibly powerful — and an equally powerful attack surface if not properly secured.

    None of these are reasons to avoid the path. They’re reasons to plan for them deliberately.

    The manufacturing landscape in 2026 has made one thing unmistakably clear: the companies gaining competitive advantage aren’t necessarily the ones with the biggest budgets. They’re the ones willing to think systematically about where automation, digital integration, and additive manufacturing intersect with their specific operational pain points. That’s a thinking exercise available to any company, regardless of scale.

    Editor’s Comment : If I had to pick the single most important mindset shift for manufacturers exploring this space, it would be this — stop thinking of 3D printing as a prototyping tool and start thinking of it as a production strategy. The companies featured in these case studies didn’t just buy printers; they redesigned their information architecture around additive manufacturing. That’s the actual competitive moat. The printer is just the last step in a much more interesting digital journey.


    📚 관련된 다른 글도 읽어 보세요

    태그: [‘smart factory automation’, ‘3D printing manufacturing 2026’, ‘additive manufacturing case study’, ‘Industry 4.0 integration’, ‘digital twin manufacturing’, ‘smart factory technology’, ‘AM production automation’]

  • 스마트 팩토리 3D 프린팅 자동화 도입 사례 2026 – 제조업의 판을 바꾸는 기술 현장 분석

    경기도 안산의 한 중소 금형업체 대표님이 이런 말을 했다고 해요. “3D 프린터 들여놓기 전엔 시제품 하나 만드는 데 3주가 걸렸는데, 지금은 3일이면 됩니다.” 처음엔 반신반의했지만, 지금은 라인 전체가 디지털 제조 시스템으로 돌아가고 있다고 하죠. 이처럼 스마트 팩토리와 3D 프린팅의 결합은 더 이상 대기업만의 이야기가 아니에요. 2026년 현재, 이 흐름은 중소·중견 제조업체까지 빠르게 확산되고 있고, 단순 시제품 제작을 넘어 양산 자동화의 핵심 인프라로 자리잡고 있습니다.

    이번 글에서는 스마트 팩토리 내 3D 프린팅 자동화가 실제 어떤 방식으로 도입되고 있는지, 수치와 사례를 통해 함께 살펴보려 해요.

    smart factory 3D printing automation production line

    📊 본론 1 : 숫자로 보는 3D 프린팅 자동화의 현주소

    글로벌 시장조사기관 IDC에 따르면, 2026년 전 세계 산업용 3D 프린팅 시장 규모는 약 380억 달러(한화 약 51조 원)에 달할 것으로 추산됩니다. 2022년 대비 약 2.1배 성장한 수치예요. 특히 주목할 점은 스마트 팩토리 연계 자동화 3D 프린팅 솔루션의 비중이 전체 시장의 43%를 차지할 만큼 커졌다는 부분입니다.

    국내 상황도 비슷한 흐름이라고 봅니다. 산업통상자원부의 2026년 스마트 제조 혁신 보고서에 따르면, 국내 제조업체 중 3D 프린팅을 스마트 팩토리 공정에 연계한 비율은 2023년 11%에서 2026년 28%로 증가했어요. 불과 3년 만에 두 배 이상 오른 셈이죠.

    도입 효과도 구체적으로 드러나고 있어요.

    • 리드타임 단축: 기존 절삭 가공 대비 시제품 제작 기간 평균 68% 감소
    • 💰 비용 절감: 부품 재고 및 금형 비용 최대 40% 절감 (복잡 형상 부품 기준)
    • 🔧 불량률 감소: AI 기반 품질 모니터링과 연계 시 불량률 최대 30% 개선
    • 🌱 소재 낭비 절감: 적층 제조 방식 특성상 절삭 가공 대비 소재 사용량 약 50% 절약
    • 🤖 무인 운영 가능: 로봇 암(Robotic Arm)과 연계 시 24시간 무인 연속 인쇄 및 취출 작업 구현

    이 수치들이 단순히 인상적인 것을 넘어, 실제 투자 회수(ROI) 측면에서도 평균 18~24개월 내 손익분기점을 넘기는 사례가 늘고 있다는 점이 의미심장합니다.

    industrial additive manufacturing robotic arm smart production

    🌍 본론 2 : 국내외 실제 도입 사례 들여다보기

    사례를 직접 살펴보면 기술의 실체가 훨씬 선명하게 보이는 것 같아요.

    🇩🇪 BMW 뮌헨 공장 – 금속 AM과 MES 시스템의 통합

    BMW는 뮌헨 공장에 MES(Manufacturing Execution System)와 금속 적층 제조(Metal AM) 장비를 통합한 자동화 셀을 운영하고 있어요. 여기서 핵심은 설계 데이터(CAD/CAM)가 MES에 자동으로 전달되어 별도의 수작업 없이 인쇄→후처리→품질 검사→조립 라인 투입까지 이어지는 엔드 투 엔드(End-to-End) 자동화가 구현된다는 점입니다. BMW는 이 시스템을 통해 맞춤형 소량 부품의 납기를 기존 대비 최대 80% 단축했다고 밝혔어요.

    🇺🇸 GE 에어로스페이스 – 항공 부품 양산 자동화

    GE 에어로스페이스는 항공 엔진 연료 노즐 부품을 3D 프린팅으로 양산하는 대표적인 사례예요. 기존에는 20여 개의 별도 부품을 용접·조립해야 했지만, 금속 3D 프린팅 도입 후 단일 부품으로 통합(Parts Consolidation) 생산이 가능해졌습니다. 무게는 25% 줄고, 내구성은 오히려 5배 이상 향상됐다고 해요. 2026년 현재는 AI 기반 결함 탐지 시스템까지 연계해 완전 자동 품질보증 라인을 구축했다고 봅니다.

    🇰🇷 현대모비스 – 국내 완성차 부품사의 스마트 팩토리 전환

    현대모비스는 충주 스마트 팩토리 거점에 폴리머 기반 SLS(선택적 레이저 소결) 방식의 3D 프린팅 셀을 도입했어요. 이 공장에서는 자율주행 센서 하우징 및 내장재 시제품을 디지털 트윈 환경과 연계해 실시간으로 설계를 검증하고 즉시 출력하는 방식을 사용하고 있습니다. 협력 중소업체들과 클라우드 기반 설계 데이터 공유 플랫폼까지 연동해 공급망 전체가 디지털로 이어지는 구조를 만들어가고 있다는 점이 인상적이에요.

    🇰🇷 경북 구미 뿌리산업 클러스터 – 중소기업형 공유 스마트 팩토리

    모든 사례가 대기업인 것은 아닙니다. 구미 스마트 뿌리기술센터에서는 개별 중소기업이 도입하기 어려운 고가의 산업용 금속 프린터를 공유 팩토리 형태로 운영하고 있어요. 입주 기업들은 월정액 형태로 장비를 사용하고, 클라우드 기반 MES로 생산을 관리합니다. 초기 투자 비용 부담을 줄이면서 스마트 제조를 경험할 수 있는 현실적인 모델이라고 봅니다.

    ✅ 결론 : 지금 이 기술, 어떻게 접근해야 할까요?

    스마트 팩토리와 3D 프린팅 자동화는 분명 막대한 가능성을 가진 기술이에요. 하지만 모든 제조 현장에 무조건 적합하다고는 할 수 없습니다. 대량의 단순 부품 생산에는 여전히 전통적인 사출·절삭 가공이 유리할 수 있고, 도입 비용과 운영 인력에 대한 현실적인 고민이 선행되어야 해요.

    제가 보기엔, 2026년 현재 가장 현명한 접근은 ‘전면 교체’가 아닌 ‘하이브리드 통합’인 것 같아요. 기존 생산 라인의 병목 구간이나 복잡 형상 부품 공정에 선택적으로 3D 프린팅 셀을 도입하고, 이를 기존 MES·ERP 시스템과 연계하는 방식이 리스크를 줄이면서도 효과를 극대화하는 전략이라고 봅니다. 구미의 공유 팩토리 모델처럼, 정부 지원 클러스터나 스마트 제조 혁신센터를 통해 먼저 테스트해보는 것도 훌륭한 출발점이 될 수 있어요.

    에디터 코멘트 : 기술 도입을 고민하는 중소 제조업체라면, 우선 한국스마트제조산업협회(KOSMA)나 KIAT(한국산업기술진흥원)의 스마트 공장 지원 사업을 먼저 살펴보시길 권해드려요. 2026년에도 정부 매칭 지원금이 상당 규모로 편성돼 있고, 컨설팅에서 장비 도입까지 단계적으로 지원받을 수 있는 경로가 열려 있습니다. 기술이 아무리 좋아도 내 현장에 맞게 설계된 도입 전략이 없으면 빛을 발하기 어렵다는 점, 꼭 기억해 두세요.


    📚 관련된 다른 글도 읽어 보세요

    태그: [‘스마트팩토리’, ‘3D프린팅자동화’, ‘적층제조’, ‘스마트제조’, ‘디지털트윈’, ‘제조업혁신’, ‘산업용3D프린팅’]

  • Mini PC Home Server DIY Guide 2026: Best Builds, Real Costs, and Smarter Alternatives

    A couple of years ago, a friend of mine — a web developer who works remotely from a small apartment — was paying nearly $40 a month for cloud storage and a VPS just to run a personal Git repo, a media server, and automated backups. Then he picked up a used mini PC for under $150, spent a weekend tinkering, and hasn’t paid a cloud subscription since. That story isn’t unique anymore. In 2026, the mini PC home server scene has genuinely matured into one of the smartest DIY lifestyle upgrades you can make — whether you’re a techie or a curious beginner who just wants control over their own data.

    Let’s think through this together: what makes a mini PC a good home server, which specific builds are worth your money right now, and — critically — when does it not make sense so we can save you from an expensive mistake.

    mini PC home server setup desk 2026 DIY

    Why 2026 Is Actually the Sweet Spot for Mini PC Home Servers

    The timing here is genuinely interesting. Mini PC hardware has hit a performance-per-dollar inflection point. The N-series Intel processors (N100, N200, N305) and AMD Ryzen Embedded chips that were considered “budget” in 2023–2024 are now extremely mature — meaning used units are flooding the secondhand market while new units have dropped in price. At the same time, software ecosystems like Proxmox VE 8.x, TrueNAS Scale, and Home Assistant OS have become dramatically easier to install and maintain. You don’t need to be a Linux wizard anymore.

    Here’s a quick data snapshot to ground this conversation:

    • Average power draw of a mini PC home server: 8–18W idle (vs. 60–120W for a full ATX tower). At average U.S. electricity rates (~$0.17/kWh in 2026), that’s roughly $10–$26/year in electricity.
    • Entry-level builds start around $120–$180 (used mini PC + RAM + SSD).
    • Mid-tier builds with NAS capability and virtualization: $280–$450.
    • Comparable cloud costs (2TB storage + basic VPS + media streaming service): $50–$90/month, or $600–$1,080/year.
    • Break-even point on a $300 build vs. cloud subscriptions: typically 4–7 months.

    The Best Mini PC Picks for a Home Server in 2026

    Let’s break this down by use case, because the “best” build depends entirely on what you want to run.

    🥇 Budget Pick — Intel N100-based Mini PCs (e.g., Beelink EQ12, Trigkey G5)
    These are the workhorses of the budget home server world right now. The N100 chip is a surprisingly capable 4-core processor with a 6W TDP. It handles Jellyfin media streaming (including hardware-accelerated transcoding via Intel Quick Sync), Pi-hole network ad-blocking, Nextcloud personal cloud, and lightweight Docker containers with ease. You can typically find these new for $150–$200 with 16GB RAM and a 500GB SSD included. Add a USB 3.2 external drive for bulk storage and you’re genuinely set.

    🥈 Mid-Range Pick — AMD Ryzen 7 5825U / Intel Core i5-12th Gen Mini PCs (e.g., Minisforum UM590, Beelink SER6)
    If you want to run multiple virtual machines, a home automation stack, a VPN server, and a media server simultaneously, you need more headroom. These machines typically run $280–$380 and support up to 64GB RAM. They’re also well-suited for running Proxmox with several lightweight VMs, or acting as a small Kubernetes node if you’re learning DevOps at home.

    🥉 NAS-Focused Pick — Devices with Dual or Quad 2.5GbE + M.2 + SATA (e.g., Topton N5105 boards, Minisforum MS-01)
    If your primary goal is network-attached storage with redundancy (RAID), look at mini PCs or mini-ITX boards designed with multiple SATA ports or M.2 slots. The Minisforum MS-01 in particular has become a cult favorite in 2026 for its dual 2.5GbE + dual 10GbE options and three M.2 slots — all in a compact chassis. Expect to pay $400–$550 for the unit alone, plus drives.

    Real-World Examples: How People Are Actually Using These

    It’s one thing to spec a build on paper. Let’s look at what real users are running in 2026.

    South Korea (domestic example): The Korean home server hobbyist community — active on platforms like clien.net and ppomppu.co.kr — has shown a strong trend toward N100 mini PCs paired with Synology-style software stacks built on TrueNAS Scale. Many users run these as a replacement for expensive Synology NAS units, noting that a $180 N100 mini PC with a 4TB external drive outperforms a $300 Synology DS223 for most home use cases while offering far more flexibility.

    International examples: The r/HomeServer and r/selfhosted communities on Reddit (now partially migrated to Lemmy-based federated forums in 2026) consistently highlight a few standout use cases:

    • Running Immich (open-source Google Photos alternative) on an N100 mini PC — preserving family photos locally with facial recognition and mobile sync.
    • Vaultwarden (self-hosted Bitwarden) for password management — security-conscious users in Germany and Japan especially favor this.
    • Paperless-ngx for document scanning and OCR — popular among small business owners in the U.S. and Australia who want a private document archive.
    • Home automation hubs running Home Assistant with Zigbee2MQTT — replacing subscription-based smart home platforms entirely.
    • Personal VPN gateway using WireGuard, allowing secure remote access to home networks while traveling.
    home server rack mini PC Jellyfin Nextcloud Docker containers

    Software Stack Recommendations for 2026

    The hardware is only half the story. Here’s what the community consensus looks like for software in 2026:

    • Proxmox VE 8.3+ — Hypervisor for running multiple VMs and LXC containers. Best if you want to experiment with different OSes.
    • Debian 12 “Bookworm” + Docker + Portainer — Simpler, container-first approach. Great for beginners who just want to run apps.
    • TrueNAS Scale 24.10+ — Purpose-built for NAS/storage with a polished UI. Excellent ZFS support for data integrity.
    • Casaos — A newer, extremely beginner-friendly home server OS with a beautiful dashboard. Ideal if you want a “just works” experience.
    • Home Assistant OS — If smart home automation is your primary goal, this is still the gold standard.

    Realistic Alternatives: When a Mini PC Server Isn’t the Right Move

    Okay, let’s be honest with ourselves here — because I’d rather save you time and money than sell you on a hobby you’ll abandon in three months.

    Consider a dedicated NAS appliance instead if: You primarily need storage and don’t want to manage a Linux system. A Synology DS423+ or QNAP TS-464 offers a polished, largely maintenance-free experience with excellent mobile apps. You’ll pay more upfront, but the time cost is lower.

    Stick with selective cloud services if: You only need one or two things (say, just cloud backup or just a password manager). Paying $3/month for Bitwarden Premium is vastly simpler than setting up a home server just for that. The home server math works best when you’re consolidating multiple cloud services.

    Consider a Raspberry Pi 5 if: Your workload is truly minimal — Pi-hole, a simple VPN, and basic home automation. A Pi 5 at $80 draws just 3–5W and handles these tasks elegantly. The mini PC advantage kicks in when you need x86 compatibility, hardware transcoding, or more RAM.

    Think carefully about your ISP situation: If your home internet connection is unstable or your ISP blocks inbound ports (common with mobile broadband or some cable providers), running services that you access remotely becomes complicated. Solutions like Cloudflare Tunnel exist to work around this, but it adds complexity.

    The bottom line is this: a mini PC home server in 2026 is genuinely one of the most cost-effective, empowering tech projects you can take on — but it’s a hobby that rewards curiosity and patience. If you love tinkering, the learning curve pays dividends in both savings and skills. If you just want things to work silently in the background, factor in the setup time honestly.

    Editor’s Comment : The mini PC home server scene in 2026 has crossed a threshold where the barrier to entry is low enough for curious non-experts, yet the ceiling is high enough to keep experienced homelabbers engaged for years. My honest suggestion? Start with a $150 N100 mini PC, install CasaOS, and run Nextcloud and Jellyfin for a month. If you find yourself logging in just to explore new apps rather than because you have to — you’ve caught the bug, and it’s a very productive one to have.

    태그: [‘mini PC home server 2026’, ‘DIY home server guide’, ‘self-hosted cloud setup’, ‘Proxmox home lab’, ‘Jellyfin Nextcloud setup’, ‘N100 mini PC server’, ‘homelab beginner guide’]


    📚 관련된 다른 글도 읽어 보세요

  • 미니 PC 홈서버 DIY 추천 2026 – 전기세 아끼면서 나만의 서버 만드는 법

    얼마 전 지인 한 분이 이런 말을 하더라고요. “넷플릭스 끊고 내 NAS에 다 올려놓으니까 월 구독료가 확 줄었어.” 처음엔 그냥 너드(Nerd)들의 취미 정도로 여겼는데, 막상 따라 해보니 생각보다 진입 장벽이 낮고, 무엇보다 한 번 구축하면 몇 년은 우려먹을 수 있다는 게 매력이더라고요. 2026년 현재, 미니 PC 시장은 손바닥만 한 크기에 데스크탑 못지않은 성능을 내는 제품들이 쏟아지고 있어요. 이번 글에서는 홈서버 DIY에 처음 도전하는 분들도 이해할 수 있게, 기기 선택 기준부터 실제 운영 팁까지 함께 살펴보려 합니다.

    mini PC home server setup desk 2026

    📊 왜 지금 미니 PC 홈서버인가? – 숫자로 보는 현실

    홈서버 구축의 핵심 관심사는 결국 비용 대비 효용이라고 봐요. 2026년 기준으로 시장 상황을 간단히 정리하면 이렇습니다.

    • 전력 소비: 일반 타워형 PC(평균 150~300W) 대비 미니 PC는 유휴 시 6~15W 수준. 24시간 가동 기준 월 전기요금 차이가 약 1만 5천 원~3만 원에 달한다고 봅니다.
    • 구매 비용: 국내 유통 중인 Intel N100 / N305 탑재 미니 PC는 15만~25만 원대, AMD Ryzen 7840HS 탑재 고성능 모델은 35만~55만 원대에 형성돼 있어요.
    • 클라우드 스토리지 대체 효과: 구글 원 2TB 플랜 기준 연 13만 원 이상. 8TB HDD 한 개(약 20만 원)를 연결하면 2년 안에 비용 회수가 가능한 셈이에요.
    • 소음·공간: 대부분 0.5~1L 내외의 초소형 폼팩터로, 공유기 옆에 나란히 두어도 위화감이 없어요.

    🖥️ 2026년 홈서버용 미니 PC 추천 라인업

    아래 모델들은 실제 커뮤니티(클리앙, 국내 홈서버 디스코드, Reddit r/homelab)에서 반복적으로 언급되는 기기들을 기준으로 정리한 것이에요. 어디까지나 참고용이라는 점을 먼저 밝혀둡니다.

    • Beelink EQ12 Pro (Intel N300) – 입문용 최강자

      TDP 6W의 초저전력 N300 칩셋에 최대 16GB DDR5 RAM 구성 가능. Proxmox VE나 Debian 기반 홈 어시스턴트(Home Assistant OS) 설치에 아주 잘 어울립니다. 가격대는 약 18만~22만 원.

    • MINISFORUM UM890 Pro (Ryzen AI HX 370) – 중고급 올라운더

      2026년 현재 AMD의 Ryzen AI 계열 탑재 미니 PC 중 가성비 논의가 가장 활발한 모델이에요. NPU(신경망처리장치)까지 탑재되어 있어 로컬 AI 추론(Ollama, LM Studio 등)을 홈서버에서 직접 돌리고 싶은 분들에게 현실적인 선택지가 될 것 같아요. 가격은 약 45만~55만 원대.

    • GMKtec NucBox G3 Plus (Intel Core Ultra 5 125H) – 가상화 특화

      Thunderbolt 4 포트와 2.5GbE 이더넷을 동시에 지원해, VM(가상머신)을 여러 개 올리면서 네트워크 대역폭도 챙기고 싶은 분들에게 적합해 보입니다.

    • Raspberry Pi 5 (8GB) – 초경량 사이드카

      단독 홈서버보다는 Pi-hole(광고 차단 DNS), WireGuard VPN, Zigbee2MQTT 같은 경량 서비스 전용으로 분리해서 쓰는 형태가 대세예요. 소비전력이 5W 내외라 연중 켜놓아도 전기세 부담이 거의 없다는 점이 인상적입니다.

    Beelink mini PC proxmox home lab server rack

    🌐 국내외 홈서버 DIY 트렌드 – 어떻게 활용하고 있을까?

    해외에서는 Reddit의 r/homelabr/selfhosted 커뮤니티를 중심으로 ‘탈(脫)클라우드’ 움직임이 2024년 이후 꾸준히 확산되고 있어요. 특히 미국의 일부 클라우드 서비스들이 무료 플랜을 축소하거나 가격을 인상한 뒤, 자체 호스팅(Self-hosting)에 눈을 돌리는 사용자가 눈에 띄게 늘었다고 봅니다.

    국내에서도 비슷한 흐름이에요. 클리앙 ‘나만의공간’ 게시판이나 SLR클럽 IT 포럼을 보면, 과거에는 시놀로지(Synology) 같은 전용 NAS를 구입하던 분들이 이제는 미니 PC에 TrueNAS Scale이나 Proxmox를 직접 올려 NAS + 미디어서버(Jellyfin) + VPN(WireGuard) + 홈 오토메이션(Home Assistant)을 한 대로 통합 운영하는 사례가 늘고 있어요. 전용 NAS 대비 확장성이 월등하고, 비슷한 가격에 훨씬 높은 스펙을 얻을 수 있다는 게 이유인 것 같습니다.

    🔧 홈서버 구축 시 꼭 챙겨야 할 것들

    • OS 선택: 단일 서비스라면 Ubuntu Server 24.04 LTS, 복수의 서비스를 가상화로 분리하고 싶다면 Proxmox VE 8.x가 현재 가장 안정적인 선택이에요.
    • 스토리지 구성: 미니 PC 내장 M.2 SSD는 OS용으로만 쓰고, 데이터는 USB 3.2 Gen2 또는 Thunderbolt 연결 외장 HDD/SSD로 분리하는 걸 권장합니다. RAID 구성이 어렵더라도 3-2-1 백업 원칙(로컬 2벌 + 오프사이트 1벌)은 꼭 지키는 게 좋다고 봐요.
    • 네트워크: 공유기의 포트포워딩보다는 Cloudflare Tunnel이나 Tailscale 같은 Zero Trust 방식의 원격 접속을 고려해 보세요. 보안 측면에서 훨씬 안전하다고 봅니다.
    • UPS(무정전 전원 장치): 갑작스러운 정전으로 인한 파일 시스템 손상을 막으려면 소형 UPS 하나쯤 연결해 두는 게 현명해요. 2만~5만 원대 소형 UPS도 충분한 역할을 합니다.
    • 발열 관리: 미니 PC는 냉각 설계가 타이트한 편이에요. 24시간 구동 시 팬 속도 설정과 주기적인 먼지 청소가 수명에 직접적인 영향을 준다고 봐요.

    💡 어떤 서비스를 올려볼까? – 인기 셀프호스팅 앱 모음

    • Jellyfin – 넷플릭스 대체 미디어 서버 (완전 무료 오픈소스)
    • Nextcloud – 구글 드라이브 대체 파일·캘린더·연락처 동기화
    • Vaultwarden – Bitwarden 호환 비밀번호 관리자
    • Home Assistant – 스마트홈 허브 (애플 홈킷, 구글 홈 연동 가능)
    • Ollama + Open WebUI – 로컬 LLM 추론 환경 (인터넷 없이 AI 챗봇 운영)
    • Immich – 구글 포토 대체 사진 라이브러리 (얼굴 인식 포함)
    • Pi-hole / AdGuard Home – DNS 레벨 광고 차단

    🧭 결론 – 어디서 시작하면 좋을까요?

    처음 홈서버에 도전하는 분이라면 Beelink EQ12 Pro + TrueNAS Scale 또는 Proxmox VE 조합을 가장 현실적인 출발점으로 추천하고 싶어요. 투자 비용이 20만 원 초반대로 낮고, 커뮤니티 문서가 풍부하며, 나중에 업그레이드하거나 역할을 분리할 때도 유연하게 대처할 수 있거든요.

    로컬 AI나 가상화에 관심 있는 분이라면 UM890 Pro 같은 Ryzen AI 계열 모델을 처음부터 선택하는 것도 나쁘지 않다고 봅니다. 처음엔 다소 과한 스펙처럼 느껴져도, 사용하다 보면 리소스가 항상 부족하게 느껴지는 게 홈서버의 특성이거든요.

    중요한 건 완벽한 구성을 기다리기보다 일단 시작해 보는 것인 것 같아요. 홈서버는 점진적으로 키워나가는 취미에 가깝고, 그 과정 자체에서 배우는 게 정말 많거든요.

    에디터 코멘트 : 저도 처음엔 라즈베리 파이 하나로 Pi-hole만 돌리다가, 어느 순간 Jellyfin을 올리고, 그다음엔 Nextcloud, 그리고 결국 미니 PC 한 대로 싹 통합하게 됐어요. 홈서버의 가장 무서운 점은 한 번 맛들이면 계속 확장하게 된다는 거예요. 그러니 처음부터 너무 작게 시작하지 않는 게 오히려 현명할 수도 있다는 걸, 반쯤은 농담처럼, 반쯤은 진담으로 전하고 싶습니다. 😄

    태그: [‘미니PC홈서버’, ‘홈서버DIY’, ‘셀프호스팅’, ‘미니PC추천2026’, ‘Proxmox’, ‘NAS대체’, ‘홈랩구축’]


    📚 관련된 다른 글도 읽어 보세요

  • Additive Manufacturing in Aerospace: Real-World Applications & Quality Validation in 2026

    Picture this: it’s 2019, and an engineer at a major aerospace firm is staring at a titanium bracket that took 14 weeks to machine from a solid billet — and they’ve just been told the design needs to change. Fast forward to today in 2026, and that same engineer is watching a revised part emerge from a powder bed fusion printer in under 48 hours, ready for a digital quality certificate. That’s not a dream scenario anymore. It’s Tuesday at dozens of facilities worldwide.

    Additive manufacturing (AM) — more commonly known as 3D printing in industrial circles — has genuinely matured into a production-grade technology for aerospace components. But let’s be honest: the hype cycle hit this space hard, and plenty of teams have been burned by jumping in without understanding the quality validation piece. So today, let’s think through this together — what’s actually working, where the numbers live, and how you can realistically approach AM if you’re in this space.

    aerospace 3D printed titanium bracket powder bed fusion manufacturing facility 2026

    Why Aerospace and Additive Manufacturing Are Such a Natural Fit

    Aerospace has always been the industry where the phrase “every gram matters” is literal, not metaphorical. Reducing weight by even a few kilograms on a commercial aircraft can save hundreds of thousands of dollars in fuel over a decade of service life. AM — specifically techniques like Selective Laser Melting (SLM) and Electron Beam Melting (EBM) — enables what engineers call topology optimization: designing a part to have material only exactly where structural loads demand it, resulting in organic-looking geometries that are mechanically superior yet dramatically lighter than their machined equivalents.

    According to industry data compiled through early 2026, the global aerospace AM market is valued at approximately $4.8 billion USD, up from roughly $2.1 billion in 2021. That’s not just bracket prototypes — we’re talking certified flight hardware. GE Aviation’s LEAP engine fuel nozzle, produced via direct metal laser sintering (DMLS), remains the flagship success story: one printed part replaced an assembly of 20 separate welded components, reducing weight by 25% and increasing durability by a factor of five. By 2026, GE and its joint ventures have produced over 150,000 of these nozzles cumulatively.

    Key Material Families Dominating Aerospace AM in 2026

    • Titanium alloys (Ti-6Al-4V): The workhorse for structural components — brackets, hinges, and duct supports. Excellent strength-to-weight ratio and corrosion resistance. EBM processes are preferred for large titanium parts due to reduced residual stress.
    • Nickel superalloys (Inconel 718, 625): Essential for high-temperature applications like turbine components, combustion chambers, and exhaust structures. These materials would be nightmarishly difficult to machine traditionally.
    • Aluminum alloys (AlSi10Mg, Scalmalloy): Increasingly used for non-structural interior components and brackets where cost efficiency matters. Scalmalloy, developed by Airbus’s APWorks subsidiary, has become a go-to for ultra-light structural applications.
    • High-performance polymers (PEEK, ULTEM 9085): Primarily for interior cabin components and non-structural ducting, certified under FAR/CS 25 flammability standards.
    • Refractory metals (Tungsten, Molybdenum): Niche but growing — used in thermal protection and radiation shielding for next-generation spacecraft.

    Real-World Application Cases: Domestic and International Examples

    Let’s look at who’s actually doing this at scale and what the results look like.

    Boeing (USA) — 787 Dreamliner Titanium Parts: Boeing has been certifying AM titanium components for the 787 since the early 2020s. By 2026, the company reports over 60,000 AM parts flying across its commercial and defense fleet. One notable case is a titanium door hinge fitting that was previously a 32-piece assembly. The printed version is a single monolithic component, 41% lighter, with lead times cut from 22 weeks to under 3 weeks. The cost savings per aircraft over a production run are estimated at over $2 million USD when amortized.

    Airbus (Europe) — Bionic Partition and Cabin Structures: Airbus’s partnership with Autodesk produced the now-famous “bionic partition” — an A320 cabin divider designed using generative algorithms and printed via SLM. It’s 45% lighter than the conventional version. More recently, Airbus’s A350 program has integrated AM brackets into primary structure with full EASA certification, a milestone that took years of qualification work but is now a repeatable process.

    Korea Aerospace Industries (KAI) — KF-21 Boramae Fighter Program: On the domestic front in South Korea, KAI has been quietly but steadily integrating AM into the KF-21 Boramae fighter development program. By 2026, KAI has validated AM processes for non-critical structural brackets and hydraulic manifolds, using SLM-produced Inconel 718 parts. Their quality validation pipeline — developed in collaboration with the Korea Research Institute of Standards and Science (KRISS) — uses a combination of CT scanning and digital twin comparison to certify each part batch.

    SpaceX (USA) — Raptor Engine Components: SpaceX has arguably pushed the most aggressive AM adoption in rocketry. The Raptor engine, powering Starship, uses dozens of AM-produced components including turbopump housings and injector manifolds. SpaceX’s philosophy of in-house qualification — rather than waiting for external certification bodies — has been controversial but effective, enabling iteration cycles impossible in traditional aerospace supply chains.

    Safran (France) — Landing Gear and Nacelle Systems: Safran has deployed AM across multiple product lines. Their AM-produced nacelle components for the CFM RISE program (targeting 20% fuel reduction by the late 2020s) represent some of the most complex thermally-loaded printed parts yet certified in commercial aviation.

    aerospace additive manufacturing quality inspection CT scanning digital twin validation lab

    The Quality Validation Challenge: Where Most Teams Stumble

    Here’s the part most glossy brochures skip over — AM quality validation in aerospace is genuinely complex, and getting it wrong is catastrophic. Let’s break down the current best-practice framework as it stands in 2026.

    The core issue is that AM parts don’t fail the way machined parts fail. Porosity (tiny internal voids), residual stress from rapid thermal cycling, and anisotropic material properties (strength varying by print direction) are failure modes that require different inspection approaches entirely.

    Non-Destructive Testing (NDT) methods now standard in aerospace AM:

    • Industrial CT Scanning: The gold standard. Micro-CT at 5-10 micron resolution can detect internal porosity, delamination, and geometric deviations in complex geometries that X-ray simply can’t reach. Cost per scan has dropped significantly — in 2026, automated CT lines for AM batch inspection are commercially available from providers like Zeiss and Nikon Metrology.
    • Computed Tomography + Digital Twin Comparison: The really exciting development of the last two years. A digital twin of the “ideal” part is generated from the design CAD, and CT data of the actual printed part is algorithmically compared against it. Deviations above tolerance thresholds trigger automated rejection flags. This is now an NADCAP-recognized process for qualifying AM suppliers.
    • Acoustic Resonance Testing (ART): A faster, cheaper complement to CT — essentially using the vibrational “fingerprint” of a part to detect structural anomalies. Think of it as listening to a wine glass to hear if it’s cracked, but for turbine blades.
    • In-Process Monitoring: The frontier right now. High-speed cameras and thermal imaging embedded inside the build chamber can flag layer-by-layer anomalies during printing, potentially catching problems before you’ve even finished a build. Companies like Sigma Labs and Additive Assurance have systems commercially deployed in aerospace AM cells.

    From a standards perspective, the landscape has matured considerably. AS9100 Rev D (the aerospace quality management standard) now includes specific AM process control requirements. SAE’s AMS7000 series specifically addresses AM metal materials and processes. In Europe, EASA’s CM-S-010 guidance on AM continues to be updated, with the 2025 revision adding specific requirements for in-process monitoring data retention.

    Realistic Alternatives and Entry Points for Different Teams

    Not every organization is GE or SpaceX. So let’s be practical — if you’re approaching AM for aerospace components in 2026, here’s how to think about your entry point based on where you actually are:

    If you’re a Tier-2/Tier-3 supplier just starting out: Don’t start with flight-critical structure. Begin with tooling, jigs, and fixtures — these have lower certification burdens and let your team build process familiarity. Many successful AM programs started by replacing $50,000 machined assembly jigs with $3,000 printed equivalents. The ROI is immediate and visible, building internal confidence.

    If you’re a mid-size manufacturer with some AM experience: Target non-structural cabin components (Class 1 parts under FAA order 8110.49). The flammability certification path is well-established, and the design freedom AM enables for complex duct routing and bracket consolidation in cabins is immediately valuable.

    If you’re an R&D team at an OEM: Invest now in in-process monitoring infrastructure. The regulatory trajectory is clearly moving toward mandating process data retention for certified AM parts. Getting ahead of this puts you in a vastly better qualification position in two to three years.

    One thing I’d strongly caution against: treating AM as a drop-in replacement for machining without redesigning the part. The phrase is overused but true — design for additive manufacturing (DfAM) is a real discipline. A part optimized for machining printed as-is often performs worse and costs more than just machining it. The value unlocks when you redesign for AM’s unique capabilities: internal channels, topology optimization, part consolidation.

    Editor’s Comment : What genuinely excites me about aerospace AM in 2026 isn’t the headline numbers — it’s the quiet maturation of the quality validation ecosystem. Five years ago, the bottleneck to deployment wasn’t the printing technology itself; it was the inability to certifiably prove the part met spec. That bottleneck is dissolving rapidly, and the teams that will win the next decade are those investing as seriously in their inspection and digital twin infrastructure as in their printers. The machines are commoditizing. The certified, data-driven process around them? That’s the real competitive moat.

    태그: [‘aerospace additive manufacturing 2026’, ‘3D printed aerospace components’, ‘AM quality validation aerospace’, ‘SLM EBM titanium aerospace parts’, ‘aerospace NDT CT scanning’, ‘NADCAP additive manufacturing’, ‘topology optimization aerospace’]


    📚 관련된 다른 글도 읽어 보세요

  • 항공우주 부품 적층 제조(3D 프린팅) 적용 사례와 품질 검증 방법 완벽 정리 [2026년 최신]

    몇 년 전, 한 항공기 엔진 제조사의 엔지니어가 이런 말을 했다고 해요. “우리가 지금 만드는 부품의 절반은, 10년 전엔 물리적으로 만들 수 없는 형상이었다.” 처음엔 과장된 이야기처럼 들렸지만, 실제로 적층 제조(Additive Manufacturing, AM) 기술이 항공우주 산업에 스며든 속도를 보면 그 말이 전혀 허풍이 아님을 알 수 있어요. 티타늄 합금으로 만든 위성 브래킷, 니켈 초합금으로 출력한 터빈 블레이드… 2026년 현재, 항공우주 적층 제조 시장은 단순한 프로토타입 제작 도구를 훌쩍 넘어, 비행 인증 부품(flight-certified parts)을 양산하는 핵심 공정으로 자리잡았습니다.

    하지만 ‘출력하면 끝’이 아니라는 게 이 분야의 진짜 어려움이라고 봅니다. 항공우주 부품 하나의 결함이 수백 명의 안전과 직결되는 만큼, 품질 검증(Quality Verification)과 인증(Certification) 프로세스가 제조 기술 자체만큼이나 중요하거든요. 오늘은 최신 적용 사례와 함께 어떻게 신뢰성을 확보하는지까지 함께 살펴볼게요.


    📊 숫자로 보는 항공우주 적층 제조 시장 규모와 성장률

    먼저 시장 데이터부터 짚어보는 게 좋을 것 같아요. 글로벌 시장조사 기관들에 따르면, 2026년 기준 항공우주 분야 적층 제조 시장 규모는 약 68억~72억 달러 수준으로 추정됩니다. 2021년 대비 연평균 성장률(CAGR)이 약 19~21%에 달하는 수치예요.

    특히 주목할 만한 지표들을 정리해 보면 이렇습니다.

    • 소재별 비중: 티타늄(Ti-6Al-4V) 합금이 전체 항공우주 AM 소재 사용량의 약 38%를 차지하며 1위. 그 뒤를 니켈 초합금(Inconel 625, 718 등)이 27%로 추격 중이에요.
    • 공정별 비중: 금속 분말 적층 방식인 레이저 분말 소결(L-PBF, Laser Powder Bed Fusion)이 약 44%로 가장 많이 쓰이고, 지향성 에너지 증착(DED, Directed Energy Deposition)이 대형 구조 부품 수리·제작에 쓰이며 23% 수준을 차지합니다.
    • 비용 절감 효과: GE Aerospace의 LEAP 엔진용 연료 노즐 적층 제조 사례에서는 기존 대비 부품 수를 20개에서 1개로 통합(consolidation)하여 약 25% 비용 절감중량 25% 감소를 동시에 달성한 바 있어요.
    • 납기 단축: 복잡한 항공 구조물의 경우 전통 가공 대비 납기를 최대 70% 단축한 사례가 보고되고 있습니다.
    • 인증 부품 수: FAA(미국 연방항공청)와 EASA(유럽항공안전청)가 승인한 비행 인증 AM 부품은 2026년 기준 전 세계적으로 10만 개 이상이 운용 중인 것으로 추정돼요.

    이 숫자들이 단순히 ‘기술이 발전했다’는 선언이 아니라, 실제 제조 현장의 패러다임이 전환되고 있다는 증거라고 봅니다.

    aerospace additive manufacturing metal 3D printing turbine component factory

    🚀 국내외 주요 적용 사례 — 어디까지 왔을까?

    ① GE Aerospace — LEAP 엔진 연료 노즐 (해외 대표 사례)

    적층 제조 항공 사례의 ‘교과서’로 자주 언급되는 케이스예요. CFM International의 LEAP 엔진에 탑재된 연료 노즐은 코발트-크롬 합금(Co-Cr)을 사용한 L-PBF 방식으로 제조됩니다. 2026년 현재까지 누적 생산량이 10만 개를 상회하며, GE는 이를 “역사상 가장 많이 비행한 금속 AM 부품

    태그: []


    📚 관련된 다른 글도 읽어 보세요

  • Small Home Server Hardware Guide 2026: Cut Your Electricity Bill Without Sacrificing Performance

    A few months ago, a friend of mine excitedly told me he’d set up a home server for media streaming, file backups, and running a few self-hosted apps. Six weeks later, he called back — not so excitedly — after seeing his electricity bill had jumped by nearly $40 a month. Sound familiar? Here’s the thing: that spike wasn’t inevitable. It was a hardware selection problem, and it’s one we can absolutely solve together.

    Whether you’re building your first home server or reconsidering your current setup, choosing the right low-power hardware is the single biggest lever you have over long-term running costs. Let’s dig into the numbers and the options.

    small home server setup low power mini PC 2026

    Why Power Consumption Matters More Than You Think

    Let’s do some quick math that most hardware review sites skip. A home server typically runs 24/7, so even small wattage differences compound dramatically over a year.

    • A standard desktop repurposed as a server (60–120W idle): At 80W average and a U.S. average electricity rate of ~$0.17/kWh in 2026, that’s roughly $119/year just idling.
    • A mid-range NAS device (15–25W idle): At 20W average, you’re looking at about $30/year — a savings of nearly $90 annually.
    • An ARM-based SBC like a Raspberry Pi 5 or Orange Pi 5 Plus (5–10W): At 8W average, you’re spending roughly $12/year on electricity. That’s almost negligible.

    Over five years, choosing a 10W device over an 80W device saves you around $500+ — enough to buy entirely new hardware and still have money left over. The math is hard to argue with.

    The Hardware Categories Worth Considering in 2026

    Let’s walk through the realistic tiers of small home server hardware, ranked by power efficiency:

    Tier 1 — ARM Single-Board Computers (SBCs): 5–12W
    Devices like the Raspberry Pi 5 (launched late 2023, still a top pick in 2026), the Orange Pi 5 Plus, and the newer Rock 5C offer surprisingly capable performance for light-duty server tasks. They’re ideal for Pi-hole DNS filtering, lightweight NAS, Nextcloud personal cloud, or Home Assistant smart home control. The tradeoff? Limited PCIe bandwidth and less raw CPU power for transcoding video.

    Tier 2 — Low-Power x86 Mini PCs: 10–25W idle
    This is where the market has exploded in 2026. Devices built around Intel N100, N200, or AMD Ryzen 7840HS platforms — like the Beelink EQ12, Minisforum MS-01, or ASUS NUC 14 — hit a sweet spot. They idle at 10–18W but can run full Linux server stacks, handle hardware-accelerated Plex or Jellyfin transcoding, and still support multiple NVMe/SATA drives. For most people reading this, this is the sweet spot tier.

    Tier 3 — Dedicated NAS Appliances: 15–30W
    Brands like Synology (DS923+ and newer), QNAP, and Terramaster offer purpose-built NAS units optimized for storage workloads. They’re power-efficient for what they do, come with polished software ecosystems, and support drive spin-down features that can push effective consumption even lower. The downside is that they’re less flexible for running arbitrary applications compared to a general-purpose mini PC.

    Tier 4 — Repurposed Office PCs (Thin Clients): 10–30W
    This is a popular budget path globally. Devices like the HP EliteDesk 800 G3 Mini or Dell OptiPlex Micro (refurbished) can be found for $50–$120 and consume surprisingly modest power for their Intel Core i5/i7 performance. The Korean and Japanese home server communities (known locally as “홈서버” enthusiasts and ニコニコ技術部 tinkerers) have embraced thin clients heavily due to their low acquisition cost paired with decent energy profiles.

    mini PC Intel N100 home server low power electricity comparison chart

    Real-World Examples: How Enthusiasts Are Doing It

    In South Korea’s active 홈서버 (home server) community — particularly on platforms like Naver Café and DC Inside’s hardware boards — the Beelink EQ12 with an Intel N100 processor has become a consensus favorite for 2026 builds. Users report consistent 8–14W idle consumption running TrueNAS Scale with two HDDs, which aligns well with the theoretical specs.

    In Germany, where electricity prices remain among Europe’s highest at roughly €0.31/kWh, home lab enthusiasts on the Heimnetz Forum have largely pivoted away from older Xeon-based repurposed servers toward Raspberry Pi clusters and N100 mini PCs specifically due to energy costs. One frequently cited build runs a 3-node Pi 5 cluster for about €18/year total in electricity — hosting file sync, VPN, and monitoring dashboards.

    In Japan, the “省電力サーバー” (low-power server) niche has a long tradition, and the Synology DS224+ paired with WD Red drives in spin-down mode is a go-to recommendation for users who prioritize storage reliability over compute flexibility.

    Drive Selection: The Hidden Power Drain

    Don’t overlook storage. Hard drives are often the second-largest power consumer in a home server after the CPU/motherboard.

    • 3.5″ HDDs: 5–8W active, 0.5–1.5W standby. Great for capacity, but keep spin-down enabled.
    • 2.5″ HDDs: 1.5–3W active. Good balance for moderate storage needs.
    • SSDs (SATA or NVMe): 2–5W active, under 1W idle. Fast and efficient, but cost-per-TB remains higher. Ideal for the OS and app data; use HDDs for bulk storage.
    • CMR vs SMR HDDs: CMR (Conventional Magnetic Recording) drives like WD Red Plus or Seagate IronWolf are preferred for NAS use due to better performance under mixed read/write workloads — SMR drives can throttle severely during writes, causing higher sustained power use during those periods.

    Software Optimizations That Reinforce Hardware Choices

    Hardware alone doesn’t tell the full story. A few software strategies can meaningfully reduce consumption regardless of which tier you choose:

    • CPU frequency scaling: On Linux-based servers, using the powersave governor keeps the CPU at lower frequencies during low-load periods.
    • Drive spin-down: Configure HDD spin-down after 20–30 minutes of inactivity using hdparm or your NAS OS’s built-in settings.
    • Wake-on-LAN (WoL): For servers you don’t need running 24/7, configure WoL so the machine sleeps and wakes only when needed.
    • Container-based workloads: Running services in Docker or Podman is generally more resource-efficient than spinning up full VMs, keeping CPU usage — and therefore power draw — lower at idle.

    Realistic Alternatives Based on Your Situation

    Not every situation calls for a full home server build. Here’s how to think through the right choice for where you actually are:

    • Just need file backups and cloud sync? A Synology 2-bay NAS + 2 HDDs does this elegantly at under $250 total upfront and ~$30/year in electricity. No Linux knowledge required.
    • Want to learn self-hosting and experiment? Start with a Raspberry Pi 5 (about $80) and a USB SSD. You’ll spend almost nothing on electricity while you figure out what you actually need.
    • Running Plex/Jellyfin with hardware transcoding? You need at least an N100 or N200 mini PC for Intel Quick Sync support. ARM devices still struggle with H.265 4K hardware transcoding in 2026.
    • Deep home automation + multiple services? The Minisforum MS-01 or similar 25–35W mini PC gives you serious flexibility with enterprise-grade NIC options, all at a fraction of the power of a tower build.

    The honest truth is that there’s no single “best” home server — but there is almost always a smarter hardware choice than a repurposed gaming PC or desktop tower running 24/7. The energy math alone makes the case.

    Editor’s Comment : Building a home server is genuinely one of the most satisfying tech projects you can do in 2026 — but I’ve seen too many people sabotage the experience by starting with hardware that was “free” or “already around the house,” only to abandon the whole project after a few brutal electricity bills. Think of the hardware decision not just as a tech choice but as a subscription cost decision. A $150 investment in an efficient mini PC often pays for itself within 18 months compared to running that old desktop, and you’ll actually enjoy the system rather than resenting the power meter. Start small, measure your actual consumption with a smart plug, and scale deliberately. Your future self — and your electricity bill — will thank you.

    태그: [‘home server electricity cost 2026’, ‘low power mini PC home server’, ‘small home server hardware guide’, ‘NAS power consumption comparison’, ‘Intel N100 home server build’, ‘Raspberry Pi server vs NAS’, ‘self-hosted server energy savings’]


    📚 관련된 다른 글도 읽어 보세요

  • 소형 홈서버 전기세 절약, 하드웨어 선택이 90%를 결정합니다 [2026년 최신 가이드]

    작년 말, 친구 한 명이 NAS 서버를 처음 구축하고 나서 전기요금 고지서를 보고 깜짝 놀랐다는 이야기를 들었어요. “그냥 파일 저장용인데 한 달에 2만 원 넘게 나온다”고 하더군요. 알고 보니 구형 데스크톱 메인보드에 하드디스크를 4개 달아서 24시간 돌리고 있었던 거였어요. 소형 홈서버가 ‘소형’이라는 이름을 달고 있어도, 하드웨어 선택을 잘못하면 절대로 소형 전기세가 나오지 않는다는 걸 그 친구 덕분에 다시 한번 실감하게 됐습니다.

    2026년 현재, 전기요금은 꾸준히 인상 기조를 유지하고 있고, 홈서버·NAS를 직접 구축하는 분들이 늘어나면서 ‘어떻게 하면 성능은 유지하면서 전력 소비를 줄일 수 있는가’에 대한 관심도 함께 높아지고 있어요. 오늘은 소형 홈서버의 전기세를 실질적으로 줄이는 하드웨어 선택 기준을 수치와 함께 정리해 보려고 합니다.

    small home server hardware low power setup

    📊 먼저 숫자로 보는 전력 소비의 현실

    홈서버의 전력 소비를 이야기할 때 가장 중요한 단위는 TDP(Thermal Design Power, 열설계전력)와 실측 소비전력(Watt)입니다. TDP는 최대 발열을 기준으로 한 수치이기 때문에, 실제 유휴(Idle) 상태의 소비전력은 훨씬 낮을 수 있어요. 하지만 홈서버는 대부분의 시간을 유휴 상태로 보내기 때문에, 유휴 전력이 낮은 플랫폼을 선택하는 것이 핵심이라고 봅니다.

    간단히 비교해 볼게요. 연간 전기요금은 1kWh당 약 150원(2026년 한국전력 평균 가정용 기준)으로 계산합니다.

    • 구형 데스크톱 CPU (예: Intel Core i5 6세대 + ATX 메인보드): 유휴 소비전력 약 50~70W → 연간 약 65,700원~92,000원
    • Intel N100 기반 미니 PC 또는 보드: 유휴 소비전력 약 6~10W → 연간 약 7,884원~13,140원
    • ARM 기반 SBC (Raspberry Pi 5, Orange Pi 5 등): 유휴 소비전력 약 3~5W → 연간 약 3,942원~6,570원
    • 상업용 NAS 전용 보드 (Realtek RTD1619B 탑재 제품 등): 유휴 소비전력 약 8~15W → 연간 약 10,512원~19,710원

    단순 수치로만 봐도 구형 데스크톱과 저전력 플랫폼 사이에는 연간 5만~8만 원 이상의 차이가 날 수 있어요. 5년이면 25만~40만 원이니, 하드웨어 비용을 회수하고도 남는 셈이라고 봅니다.

    🔩 전기세를 결정짓는 핵심 부품 4가지

    홈서버의 전력 소비는 단순히 CPU 하나로 결정되지 않아요. 실제로 소비전력에 영향을 주는 부품을 하나씩 짚어볼게요.

    1. CPU / SoC 플랫폼
    2026년 현재 소형 홈서버에서 가장 효율이 뛰어난 선택지는 Intel N시리즈(N100, N305)AMD 라이젠 임베디드, 그리고 ARM 기반 SoC로 좁혀진다고 봐요. 특히 Intel N100은 단일 코어 성능과 전력 효율의 균형이 좋아서 가벼운 파일 서버, Jellyfin 미디어 서버, Pi-hole 등의 용도에 탁월합니다. 반면 Plex 트랜스코딩처럼 GPU 가속이 필요한 작업이라면 Intel 내장 GPU(iGPU)의 QSV(Quick Sync Video) 지원 여부도 함께 확인해야 해요.

    2. 저장장치 (HDD vs SSD vs HDD 혼용)
    HDD는 스핀들 모터가 돌아가는 동안 단일 디스크당 5~8W를 소비합니다. 4베이 NAS에 HDD를 4개 달면 스토리지만으로도 20~32W가 추가되는 거예요. 반면 2.5인치 SSD는 0.5~2W 수준이고, M.2 NVMe SSD는 활성 상태에서 3~5W, 유휴 시 0.5~1W 수준입니다. OS 드라이브는 SSD로, 대용량 데이터는 HDD 스핀다운(Spin-down) 기능을 적극 활용하는 전략이 현실적인 절충안이라고 봅니다.

    3. 전원공급장치(PSU) 또는 파워 어댑터
    ATX 파워서플라이는 낮은 부하율에서 효율이 급격히 떨어져요. 500W PSU를 10W 부하로 사용하면 효율이 60%대로 떨어질 수 있습니다. 소형 홈서버에는 가능하면 외부 DC 어댑터(피코 PSU + 어댑터 조합) 또는 전용 파워 어댑터를 쓰는 것이 효율 면에서 훨씬 유리해요. 피코 PSU는 90% 이상의 효율을 저부하에서도 유지합니다.

    4. 네트워크 인터페이스 카드(NIC) 및 주변기기
    2.5GbE NIC는 1GbE 대비 소비전력이 약간 높지만 체감 차이는 크지 않아요. 오히려 USB 장치나 불필요한 PCIe 카드가 켜진 채로 방치되는 경우가 전력 낭비의 주요 원인인 경우가 많습니다. 필요 없는 포트와 장치는 BIOS에서 비활성화하는 습관이 중요하다고 봐요.

    low power NAS mini PC energy efficiency comparison

    🌍 국내외 실제 구축 사례로 보는 전략

    해외 커뮤니티인 Reddit r/homelabServeTheHome 포럼에서는 2025~2026년 기준으로 Intel N100 기반의 미니 PC(예: Beelink EQ12, CWWK N100 보드)를 활용한 저전력 홈서버 구축이 대세로 자리잡았다는 걸 쉽게 확인할 수 있어요. 실측 유휴 전력 6~8W를 달성하면서도 Docker, Samba, Jellyfin을 동시에 구동하는 사례가 많이 공유되고 있습니다.

    국내에서도 클리앙, 뽐뿌 등의 커뮤니티에서 “N100 NAS 전기세 실측” 관련 글이 꾸준히 올라오고 있어요. 대부분의 사용자들이 유휴 시 전력 소비계(스마트 플러그 TP-Link Tapo P115 기준)로 측정했을 때 7~12W 수준을 보고하고 있으며, 월 전기요금 추가분이 1,500원~2,000원 내외라는 결과를 보여주고 있습니다. 이는 상업용 NAS 제품(시놀로지 DS423+ 기준 유휴 20~25W)과 비교해도 꽤 경쟁력 있는 수치예요.

    반면, Raspberry Pi 5 기반 구성은 전력 소비는 가장 낮지만 USB 3.0을 통한 HDD 연결 시 불안정성x86 소프트웨어 호환성 문제가 아직 완전히 해소되지 않아, 범용 홈서버보다는 특정 경량 서비스(Pi-hole, Home Assistant 등) 전용으로 활용하는 것이 더 현실적인 것 같습니다.

    ✅ 2026년 기준 전기세 절약 홈서버 하드웨어 선택 체크리스트

    • CPU/SoC는 TDP 15W 이하, 유휴 전력 10W 이하를 목표로 선택할 것
    • OS 드라이브는 반드시 SSD(가급적 M.2 SATA 또는 NVMe)로 구성할 것
    • 대용량 HDD는 스핀다운 기능 활성화, 접근 없을 때 자동으로 대기 모드 전환 설정 필수
    • 전원은 피코 PSU + DC 어댑터 조합 또는 전용 외부 어댑터 사용 권장
    • 불필요한 USB 장치, 미사용 SATA 포트, 추가 NIC는 BIOS에서 비활성화
    • 스마트 플러그(Tapo, 샤오미 등)로 실제 소비전력 모니터링 습관화
    • 가능하다면 ECC 지원 여부하드웨어 트랜스코딩 지원(QSV, NVENC 등)도 함께 고려할 것

    💡 결론 및 현실적인 대안

    소형 홈서버의 전기세는 단순히 “작은 기계니까 적게 나오겠지

    태그: []


    📚 관련된 다른 글도 읽어 보세요