Author: likevinci

  • Building a Home Lab Kubernetes Cluster in 2026: A Practical Guide From Rack to Running Pods

    A couple of years ago, a friend of mine — a backend developer who spent his weekdays deploying microservices on managed cloud platforms — told me he felt like he was “driving a car he didn’t own.” He could press the gas and the brakes, but he had absolutely no idea what was happening under the hood. So one weekend, he hauled three old mini-PCs out of a closet, slapped Ubuntu on all of them, and started building a home lab Kubernetes cluster from scratch. Six months later, he’d debugged more networking issues than most cloud engineers see in a year — and he finally understood what was actually happening when he typed kubectl apply.

    That story resonates with a lot of us in 2026. With cloud costs continuing to climb and the demand for platform engineering skills skyrocketing, building your own home lab Kubernetes cluster isn’t just a fun weekend project anymore — it’s a legitimate career investment and a cost-saving strategy rolled into one. Let’s think through this together, step by step.

    home lab kubernetes cluster mini PC rack setup 2026

    Why Bother With a Home Lab in 2026?

    Fair question. Managed Kubernetes services like GKE, EKS, and AKS are more polished than ever. But here’s the thing — they abstract away the exact layers that hiring managers and senior architects want you to understand. According to the 2026 CNCF Annual Survey, over 68% of organizations now expect DevOps and platform engineers to have hands-on experience with bare-metal or self-managed Kubernetes configurations, up from 51% just three years prior.

    Beyond career value, the economics make sense too. Running a modest 3-node cluster at home consumes roughly 60–120W of power depending on your hardware. At average U.S. electricity rates of around $0.16/kWh in early 2026, that’s approximately $8–$17/month — compared to $150–$400/month for an equivalent managed Kubernetes setup in the cloud.

    Hardware: What You Actually Need (And What You Don’t)

    Let’s be realistic here. You don’t need a server rack with blinking lights to get started. Here’s a breakdown of practical hardware tiers:

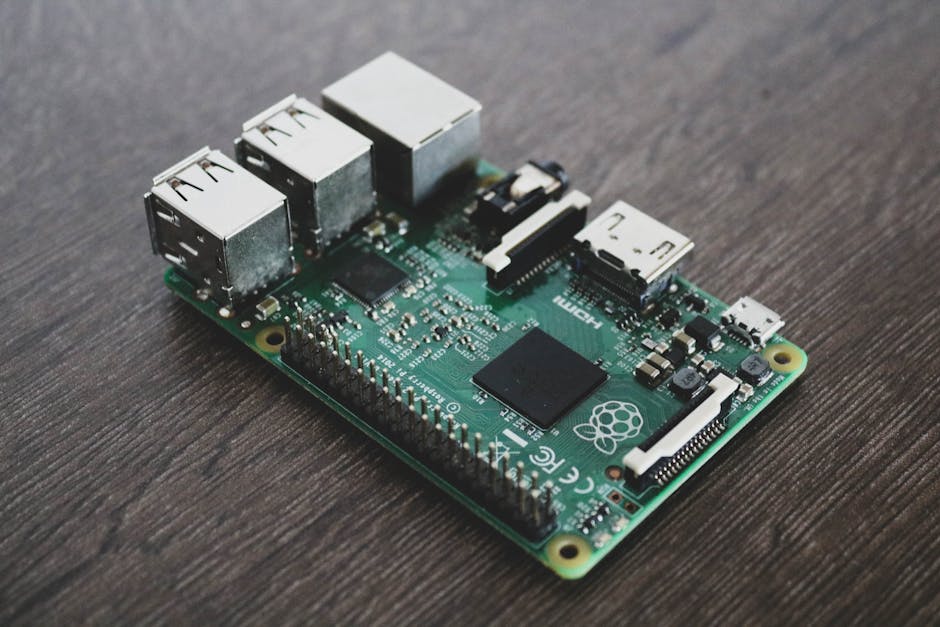
    • Entry Level (Under $300 total): Three Raspberry Pi 5 units (8GB RAM each). Perfect for learning the fundamentals — scheduling, pod networking, storage classes. ARM architecture does add occasional compatibility quirks, but in 2026, most container images ship multi-arch builds by default.
    • Mid Range ($400–$800 total): Three mini-PCs like the Beelink SER7 or Intel NUC 14 with 16–32GB RAM each. This is the sweet spot for most home labbers. x86_64 architecture means near-zero compatibility headaches, and you can realistically run workloads like Prometheus, Grafana, ArgoCD, and a handful of microservices simultaneously.
    • Power User ($1,000+): Refurbished enterprise nodes (e.g., Dell PowerEdge R630 or HPE ProLiant DL380) sourced from eBay or secondary markets. Overkill for most, but if you’re simulating production-grade scenarios — multi-zone HA, large-scale RBAC, or storage operator testing — this is where things get genuinely interesting.

    Software Stack: Choosing Your Kubernetes Distribution

    This is where people often over-engineer things. In 2026, the home lab community has largely converged around a few battle-tested options:

    • K3s (by Rancher/SUSE): Lightweight, fast to bootstrap, and now at v1.30+. Ideal if your nodes have limited RAM. Comes with Traefik as a default ingress controller and uses SQLite by default (though etcd is supported). This is my personal recommendation for beginners.
    • kubeadm: The “standard” path. More steps, more learning, more control. If you want to deeply understand certificate management, control plane setup, and CNI plugin integration, go this route. It mirrors what you’d configure in a self-managed production environment.
    • Talos Linux: An immutable, API-driven OS designed specifically for Kubernetes nodes. Popular in the homelab community as of 2025–2026 because it removes SSH entirely and enforces security-first principles. Has a steeper learning curve but teaches you modern GitOps-aligned infrastructure patterns.

    Networking: The Part Everyone Underestimates

    Here’s an honest truth: networking will give you the most headaches and teach you the most. Your home router likely sits behind NAT, your nodes need a flat network to communicate, and you’ll need to decide on a CNI (Container Network Interface) plugin before your first pod can even talk to another pod.

    Popular CNI choices for home labs in 2026:

    • Flannel: Simple, works out of the box, good for learning. Limited observability.
    • Calico: Adds NetworkPolicy enforcement and BGP routing support. Great for simulating real-world security configurations.
    • Cilium: eBPF-based, offers deep observability and is increasingly the default choice in production environments. It’s more resource-intensive but worth learning given its industry momentum.

    For ingress, consider pairing MetalLB (a bare-metal load balancer implementation) with NGINX Ingress Controller or Traefik. MetalLB assigns real IP addresses from a pool you define on your home network, letting your services behave like they have real load balancer IPs — which is something cloud providers give you automatically but home lab users have to wire up manually.

    kubernetes networking diagram CNI cilium metallb home lab

    Real-World Examples: How Others Are Doing It

    The global home lab community is more active than ever in 2026. On platforms like Reddit’s r/homelab and r/kubernetes, as well as the CNCF Slack workspace, you’ll find engineers from Seoul to São Paulo sharing their setups. A few notable patterns:

    Japan & South Korea: Engineers in these markets, where apartment living limits physical space, have gravitated strongly toward the Raspberry Pi and mini-PC routes. Many Korean developers run full GitOps pipelines (ArgoCD + Flux) on sub-$500 clusters as part of portfolio projects for job applications at major tech firms like Kakao, Naver, and LINE.

    Europe: German and Dutch homelab enthusiasts, often hardware-privacy-conscious, are using Talos Linux + Cilium stacks and treating their clusters as personal data sovereignty platforms — running Nextcloud, Bitwarden, and self-hosted AI inference endpoints (via Ollama or vLLM) on the same cluster.

    United States: The r/homelab community skews toward mid-range mini-PC builds, with ArgoCD-based GitOps being the dominant workflow pattern. Many use their clusters as sandboxes to prep for CKA (Certified Kubernetes Administrator) and CKS (Certified Kubernetes Security Specialist) exams.

    Step-by-Step: A Minimal Viable Cluster Checklist

    • ✅ Flash Ubuntu 24.04 LTS (or Talos) on all nodes
    • ✅ Assign static IPs via DHCP reservation on your router
    • ✅ Disable swap on all nodes (swapoff -a and update /etc/fstab)
    • ✅ Install a container runtime — containerd is the standard in 2026 (Docker Engine as CRI is deprecated)
    • ✅ Bootstrap the control plane with kubeadm init or k3sup
    • ✅ Join worker nodes using the token generated during init
    • ✅ Install your CNI plugin of choice
    • ✅ Deploy MetalLB and configure an IP address pool
    • ✅ Install an ingress controller
    • ✅ Deploy a test workload (e.g., a simple NGINX deployment with a Service and Ingress)
    • ✅ Set up Prometheus + Grafana for observability

    Realistic Alternatives If a Full Cluster Feels Like Too Much

    Look, not everyone has the time or budget to build a three-node cluster right now, and that’s completely valid. Here are some honest alternatives:

    • Single-node K3s or kind (Kubernetes IN Docker): You can run a fully functional single-node Kubernetes environment on a laptop or desktop. It won’t teach you multi-node scheduling or HA failover, but it’s excellent for learning YAML manifests, Helm charts, and basic workload management.
    • Killercoda or Play With Kubernetes: Free browser-based environments that give you a temporary multi-node cluster. Great for exam prep or quick experimentation without any hardware investment.
    • A single cloud VM: A $10–$15/month VPS (like a Hetzner CX22 or DigitalOcean Droplet) running K3s is a middle ground — real infrastructure, low cost, accessible from anywhere. Not as hands-on as a home lab but more “real” than a browser sandbox.

    The key insight here: start where you are. A working single-node cluster you actually use is infinitely more valuable than a three-node cluster you gave up on after the first networking error.

    Editor’s Comment : Building a home lab Kubernetes cluster in 2026 is one of those rare activities where the difficulty IS the point. Every CNI misconfiguration, every failed node join, every mysterious pod-pending state is a lesson that a managed cloud service would have silently fixed for you — and quietly charged you for. Whether you’re doing it for career growth, cost savings, or pure curiosity, the act of building something you genuinely own and understand is deeply satisfying. Start small, break things on purpose, and keep a notes document of every error you solved. That document will be worth more in interviews than any certification.

    태그: [‘kubernetes home lab’, ‘k8s cluster setup 2026’, ‘self-hosted kubernetes’, ‘K3s tutorial’, ‘home lab networking’, ‘DevOps career skills’, ‘bare metal kubernetes’]


    📚 관련된 다른 글도 읽어 보세요

  • 홈랩 쿠버네티스 클러스터 구축 실전 2026 — 라즈베리파이부터 미니PC까지 완전 정복

    작년 말, 지인 한 명이 퇴근 후 책상 위에 라즈베리파이 4대를 줄지어 놓고 밤새 터미널을 두드리다가 결국 새벽 3시에 “드디어 파드가 떴다!”는 메시지를 보내왔어요. 그 순간의 짜릿함은 클라우드 콘솔에서 버튼 하나 누르는 것과는 차원이 다른 성취감이라고 했죠. 홈랩 쿠버네티스(Kubernetes)는 단순한 취미를 넘어서, 2026년 현재 DevOps 역량을 실전으로 쌓으려는 엔지니어들에게 가장 현실적인 학습 환경으로 자리 잡고 있는 것 같습니다. 그렇다면 어떤 하드웨어로, 어떤 구성으로 시작해야 할까요? 함께 하나씩 풀어봐요.

    home lab kubernetes cluster raspberry pi mini pc setup

    1. 왜 지금 홈랩 쿠버네티스인가 — 비용과 학습 효율의 교차점

    퍼블릭 클라우드(AWS EKS, GKE 등)에서 쿠버네티스 클러스터를 운영하면 워커 노드 3대 기준 월 최소 $150~$300 (약 20~40만 원) 수준의 비용이 발생합니다. 반면 홈랩 환경은 초기 하드웨어 투자 후 전기료만 부담하면 돼요. 2026년 기준 국내 가정용 전기 요금 단가를 고려하면, 미니PC 3대로 구성한 클러스터의 월 전기 요금은 약 8,000~15,000원 수준으로 추산됩니다.

    학습 측면에서도 홈랩은 압도적으로 유리합니다. 클라우드 환경은 이미 수많은 부분이 추상화되어 있어서 네트워크 레이어, 스토리지 프로비저닝, 로드밸런서 구성 같은 핵심 개념을 직접 경험하기 어렵거든요. 반면 온프레미스(on-premises) 홈랩에서는 CNI(Container Network Interface) 플러그인 선택부터 MetalLB를 이용한 베어메탈 로드밸런서 구성까지 모든 레이어를 손으로 직접 만져볼 수 있는 것이 가장 큰 장점이라고 봅니다.

    2. 하드웨어 선택 가이드 — 라즈베리파이 vs 미니PC, 2026년 현황

    2026년 현재 홈랩 빌더들이 가장 많이 선택하는 하드웨어 조합을 구체적으로 살펴볼게요.

    • 라즈베리파이 5 (8GB 모델) — 국내 공식 유통가 기준 약 12~14만 원 선. ARM64 아키텍처이므로 컨테이너 이미지 호환성을 반드시 확인해야 해요. 소음이 없고 전력 소비가 5~10W 수준으로 매우 낮아 클러스터 노드 4~6대 구성에 이상적입니다.
    • 인텔 N100 기반 미니PC (예: Beelink EQ12, MINISFORUM UN100L) — 가격은 15~22만 원 수준. x86_64 아키텍처라 이미지 호환 문제가 없고, 16GB RAM 업그레이드가 가능해서 실제 프로덕션과 유사한 워크로드를 돌리기에 적합합니다. 소비 전력은 10~20W 정도예요.
    • 구형 씽크패드 / 중고 노트북 — 예산이 빠듯하다면 10만 원 이하 중고 노트북도 충분히 쿠버네티스 노드로 활용 가능합니다. 단, 발열 관리와 배터리 제거 여부를 검토해야 해요.
    • NUC 계열 (Intel NUC 13 Pro 또는 후속 모델) — 성능은 최상급이지만 30만 원을 훌쩍 넘기 때문에, 학습 목적보다는 어느 정도 경험을 쌓은 후 업그레이드 경로로 고려하는 게 현실적이라고 봅니다.

    3. 소프트웨어 스택 — 2026년 표준 홈랩 구성

    설치형 쿠버네티스 배포판도 꽤 선택지가 많아졌어요. 상황에 맞게 고르는 것이 중요합니다.

    • k3s (Rancher Labs) — 홈랩 입문자에게 가장 추천하는 경량 쿠버네티스 배포판이에요. 바이너리 하나로 설치되고, 라즈베리파이처럼 리소스가 제한된 환경에서도 안정적으로 동작합니다.
    • kubeadm + containerd — 업스트림 쿠버네티스를 직접 설치하는 방식으로, 실제 엔터프라이즈 환경과 가장 유사한 경험을 제공해요. 설정 파일 하나하나를 직접 다루게 되니 학습 깊이가 다릅니다.
    • Talos Linux — 2026년 들어 홈랩 커뮤니티에서 빠르게 주목받고 있는 이뮤터블(immutable) OS 기반 쿠버네티스 플랫폼이에요. 쿠버네티스 전용 OS라서 SSH조차 없고 API로만 관리하는 방식인데, 보안 측면에서 매우 흥미로운 접근이라고 봅니다.
    • CNI 플러그인: Flannel → Cilium 전환 트렌드 — 예전에는 Flannel이나 Calico가 대세였지만, 2026년에는 eBPF 기반의 Cilium이 홈랩에서도 표준처럼 자리 잡고 있어요. 네트워크 정책과 가시성(observability) 측면에서 월등합니다.
    • 스토리지: Longhorn 또는 Rook-Ceph — 로컬 스토리지를 쿠버네티스 PersistentVolume으로 분산 관리해주는 솔루션이에요. 홈랩 규모에서는 Longhorn이 설치와 관리가 훨씬 간편합니다.
    • GitOps: Flux v2 또는 ArgoCD — 클러스터 상태를 Git 레포지토리로 선언적으로 관리하는 GitOps 방식은 홈랩에서도 충분히 실습할 수 있어요. 한 번 익혀두면 실무에서 그대로 활용할 수 있는 역량이 됩니다.
    kubernetes home lab network diagram cilium gitops argocd dashboard

    4. 국내외 홈랩 커뮤니티 사례 — 실제로 어떻게 쓰고 있나

    해외에서는 Reddit의 r/homelabr/kubernetes 커뮤니티가 홈랩 쿠버네티스의 성지로 통하는데요, 수백 명의 사용자가 자신만의 클러스터 구성을 공유하고 있어요. 특히 “Flux + Renovate Bot” 조합으로 모든 헬름 차트(Helm chart) 업데이트를 자동화한 사례가 큰 화제가 됐는데, 이를 따라한 구성이 GitHub에서 수천 개의 스타를 받기도 했습니다.

    국내에서도 상황은 비슷해요. 2026년 현재 CNCF Korea 커뮤니티나 각종 DevOps 스터디 그룹에서 홈랩 기반 쿠버네티스 실습이 표준 커리큘럼처럼 자리 잡고 있는 것 같습니다. 특히 CKA(Certified Kubernetes Administrator)CKS(Certified Kubernetes Security Specialist) 자격증 준비 과정에서 홈랩을 적극 활용하는 추세가 뚜렷합니다. 클라우드 기반 연습 환경은 시간 제한이 있고 비용이 발생하지만, 홈랩은 언제든 마음껏 클러스터를 부수고 다시 세울 수 있으니까요.

    5. 실전 구축 시 자주 겪는 난관과 해결 전략

    • 베어메탈 로드밸런서 문제 — 클라우드 환경과 달리 홈랩에는 LoadBalancer 타입 서비스를 처리해줄 주체가 없어요. MetalLB를 Layer 2 모드로 설치하면 가정 내 공유기가 할당해주는 IP 대역 안에서 로드밸런서 IP를 할당받을 수 있습니다.
    • DNS 관리 — 내부 서비스에 도메인을 붙이고 싶다면 Pi-hole + CoreDNS 커스텀 설정 조합이 정석이에요. 아니면 Ingress + cert-manager + Let’s Encrypt 조합으로 실제 도메인과 TLS 인증서까지 구성해보는 것도 실력 향상에 큰 도움이 됩니다.
    • 노드 재부팅 후 클러스터 복구 — 정전이나 재부팅 시 etcd 데이터가 손상되는 경우가 간혹 있어요. etcd 스냅샷을 주기적으로 떠두는 습관을 들이는 것이 좋고, k3s라면 SQLite 기반 경량 데이터스토어를 사용해서 이 문제가 상대적으로 덜합니다.
    • ARM64 이미지 미지원 문제 — 라즈베리파이 환경에서 특정 오픈소스 툴이 ARM64 이미지를 제공하지 않는 경우가 아직 있어요. QEMU 에뮬레이션 레이어를 사용하면 억지로 돌릴 수는 있지만 성능 저하가 심합니다. 가급적 멀티 아키텍처 이미지를 지원하는 프로젝트를 선택하는 것이 현실적인 접근이라고 봅니다.

    결론 — 시작은 단순하게, 확장은 점진적으로

    홈랩 쿠버네티스를 처음 시작하는 분들에게 가장 권하고 싶은 것은 “일단 작게 시작하는 것

    태그: []


    📚 관련된 다른 글도 읽어 보세요

  • Aerospace Additive Manufacturing in 2026: How 3D Printing Is Quietly Revolutionizing the Sky

    Picture this: a commercial aircraft is grounded at a remote airport in 2026 because of a cracked titanium bracket — a part that would normally take weeks to source and ship. But instead of waiting, the maintenance crew uploads a certified digital file to an on-site metal 3D printer, and within hours, a flight-ready replacement is in hand. This isn’t science fiction anymore. It’s the direction the aerospace industry is sprinting toward, and the pace of innovation in additive manufacturing (AM) for aerospace components has genuinely shifted into a higher gear this year.

    Let’s think through what’s actually happening in this space — the data, the real-world examples, and honestly, what it all means for manufacturers, engineers, and even curious travelers who sit in those flying machines.

    aerospace 3D printing metal component titanium aircraft manufacturing 2026

    Why Additive Manufacturing Is a Big Deal for Aerospace (With Real Numbers)

    Aerospace has always been the ultimate stress test for manufacturing. Parts need to be lighter than air (almost literally), stronger than steel, and certified to tolerances that would make a watchmaker nervous. So when additive manufacturing started creeping into this space, the industry watched with a mixture of excitement and skepticism.

    By early 2026, that skepticism has largely been replaced by strategic investment. Here’s what the data tells us:

    • Market size surge: The global aerospace AM market is projected to exceed $5.8 billion USD in 2026, up from roughly $3.4 billion in 2022 — a compound annual growth rate hovering around 14%, according to recent aerospace industry analyses.
    • Weight reduction wins: GE Aerospace’s LEAP engine fuel nozzle — one of the most famous AM success stories — reduced part count from 20 components to 1, cutting weight by 25% and improving durability by a factor of 5. This benchmark still guides new development programs in 2026.
    • Material evolution: Beyond titanium alloys (Ti-6Al-4V remains the workhorse), we’re now seeing certified builds in nickel superalloys like Inconel 718, aluminum-lithium composites, and even ceramic matrix composites (CMCs) entering qualification phases for hot-section turbine components.
    • Build speed breakthroughs: Directed Energy Deposition (DED) systems in 2026 are depositing material at rates up to 10 kg/hour for large structural components — a dramatic leap from the sub-1 kg/hour rates typical just five years ago.
    • Certification momentum: The FAA and EASA have both expanded their AM-specific airworthiness frameworks in 2025–2026, with over 500 additively manufactured part designs now holding active Part 21 approvals.

    What’s particularly interesting is that weight savings translate directly into fuel savings, which translate into emissions reductions — a priority that’s only intensifying under 2026’s tightening aviation sustainability regulations. So additive manufacturing isn’t just a cool tech story; it’s increasingly an environmental compliance story too.

    The Technology Landscape: Not One Tool, But an Entire Toolbox

    Here’s something worth clarifying for anyone newer to this topic: “additive manufacturing” isn’t a single technology. It’s a family of processes, and different aerospace applications call for different members of that family.

    • Selective Laser Melting (SLM) / Laser Powder Bed Fusion (LPBF): The go-to for complex, precision metal parts like fuel nozzles, brackets, and heat exchangers. Excellent resolution, but slower for large parts.
    • Directed Energy Deposition (DED): Ideal for large structural components and repair applications. Think wing spars or landing gear components where you’re depositing material onto an existing substrate.
    • Binder Jetting: Gaining traction in 2026 for high-volume, medium-complexity parts. Companies like Desktop Metal and ExOne (now part of larger industrial groups) have pushed this into aerospace-adjacent certification territory.
    • Continuous Fiber Reinforcement (CFR) composites printing: A rising star for interior components — seat frames, ducting, brackets — where weight matters but metallic strength isn’t required.

    Global and Domestic Examples Setting the Pace in 2026

    Let’s ground this in what’s actually happening at real companies and programs right now.

    🇺🇸 GE Aerospace & Boeing (USA): GE Aerospace’s next-generation open fan engine architecture — part of the CFM RISE program — incorporates AM-produced components extensively, targeting a 20% fuel efficiency improvement over current engines. Boeing’s 777X program continues to expand its AM parts library, with over 300 additively manufactured components per aircraft in 2026 production builds.

    🇪🇺 Airbus & Safran (Europe): Airbus has been quietly ambitious. Their “Factory of the Future” initiatives across Toulouse and Hamburg facilities now routinely 3D print titanium structural brackets for the A350 family. Safran’s nacelle components for the LEAP engine use AM-produced acoustic liners that reduce cabin noise measurably — a passenger comfort win hiding inside a manufacturing innovation story.

    🇬🇧 Rolls-Royce (UK): Rolls-Royce made headlines in late 2025 when they successfully ground-tested a turbine blade with an AM-produced internal cooling channel architecture so intricate it simply couldn’t have been manufactured any other way. That kind of geometric freedom is the killer app of additive manufacturing.

    🇰🇷 Korea Aerospace Industries (KAI) & Hanwha Aerospace (South Korea): South Korea’s aerospace sector has been ramping up AM investment significantly. KAI’s KF-21 Boramae fighter program has incorporated AM-produced hydraulic manifolds and structural inserts, while Hanwha Aerospace is developing domestic LPBF capabilities for turboprop engine components — reducing dependence on imported parts and building sovereign manufacturing capacity.

    🇨🇳 COMAC & AVIC (China): China’s C919 regional jet program and the larger CR929 widebody development both incorporate substantial AM component programs. AVIC’s AM research centers are particularly active in large-format titanium printing for military airframe structures.

    aerospace factory additive manufacturing 3D printed turbine blade inspection quality control

    The Challenges Nobody Loves to Talk About (But We Should)

    Alright, let’s be honest with ourselves here — because a realistic picture matters more than a hype reel.

    • Certification timelines are still long: Even with expanded FAA/EASA frameworks, getting a new AM part from design to certified flight hardware typically takes 3–7 years. The design freedom is there; the qualification path is still a marathon.
    • Post-processing costs: Most aerospace AM parts require significant post-processing — hot isostatic pressing (HIP), heat treatment, CNC finishing, and surface treatment. These costs can eat into the savings that AM theoretically delivers.
    • Powder supply chain complexity: High-purity aerospace-grade metal powders are expensive and have a complex supply chain. Contamination control is non-negotiable.
    • Skills gap: The specialized expertise to design for AM (not just design and then 3D print) remains scarce. Companies are investing in training pipelines, but it’s a multi-year problem.

    Realistic Alternatives and Strategic Considerations

    So what does this mean if you’re not a major OEM with a billion-dollar R&D budget? The good news is that AM’s benefits are scaling down to smaller players too — and there are smart ways to engage with this trend at different levels:

    • For MRO (Maintenance, Repair & Overhaul) organizations: Focus on AM for obsolete parts and on-demand spares first. The business case is clearest here — no minimum order quantities, no long lead times, digital inventory instead of physical shelves.
    • For Tier 2/3 suppliers: Consider hybrid approaches — combining AM for complex internal geometries with conventional machining for critical mating surfaces. This balances design freedom with proven quality assurance.
    • For startups and new entrants: AM is genuinely democratizing access to aerospace manufacturing. If you’re designing a UAV, satellite structure, or small propulsion system, the barrier to prototyping and even limited production has never been lower.
    • For engineers and designers: Invest time in Design for Additive Manufacturing (DfAM) training now. Topology optimization, lattice structures, and consolidated part design are skills with compound career value in 2026’s aerospace job market.

    The underlying logic here is straightforward: additive manufacturing rewards those who design with its constraints and freedoms in mind from the start, not those who retrofit conventional designs onto new machines. The companies winning in 2026 understood this years ago.

    We’re watching an industry in genuine transformation — not the overnight disruption that tech hype cycles love to promise, but the steady, methodical kind that reshapes everything it touches. The sky, quite literally, is being rebuilt one layer at a time.

    Editor’s Comment : What strikes me most about the aerospace AM story in 2026 isn’t any single technological breakthrough — it’s the compounding effect. Every year that passes, there are more certified designs, more trained engineers, more qualified material specs, and more proven track records in service. The flywheel is spinning. If you’re anywhere near the aerospace or advanced manufacturing space and haven’t mapped out your AM strategy, the window for leisurely observation is genuinely closing. The parts that will fly in 2030’s aircraft are being designed — and printed — right now.

    태그: [‘aerospace additive manufacturing 2026’, ‘3D printing aviation components’, ‘metal additive manufacturing aerospace’, ‘aerospace innovation news’, ‘LPBF titanium aerospace’, ‘sustainable aviation manufacturing’, ‘aerospace supply chain technology’]


    📚 관련된 다른 글도 읽어 보세요

  • 2026년 항공우주 부품 적층 제조 혁신 뉴스: 3D 프린팅이 하늘을 바꾸고 있다

    얼마 전 한 항공 엔지니어 친구와 커피를 마시다가 흥미로운 이야기를 들었어요. 예전엔 제트 엔진 하나의 특정 브래킷 부품을 납품받는 데 14주씩 걸렸는데, 요즘은 사내 적층 제조(Additive Manufacturing, AM) 설비로 72시간 안에 뽑아낸다고 하더라고요. 단순한 속도 문제가 아니라, 기존에는 불가능했던 형상의 부품을 아무렇지도 않게 만들어낸다는 게 더 충격적이었습니다. 2026년 현재, 항공우주 산업에서 적층 제조는 더 이상 ‘미래 기술’이 아니라 현장을 바꾸는 실전 기술로 자리 잡았어요. 지금부터 함께 그 흐름을 짚어볼게요.

    aerospace 3D printing additive manufacturing jet engine parts

    📊 숫자로 보는 항공우주 AM 시장 — 2026년 현황

    글로벌 시장조사 기관들의 2026년 최신 집계에 따르면, 항공우주 분야 적층 제조 시장 규모는 약 48억 달러(한화 약 6조 4천억 원)에 달하는 것으로 추정됩니다. 이는 2022년 대비 연평균 성장률(CAGR) 약 18~20%를 기록한 수치로, 전체 제조업 AM 시장 성장률(약 14%)을 크게 웃돌고 있어요.

    특히 주목할 만한 수치들을 정리해 보면:

    • 🔩 부품 무게 절감률: 위상 최적화(Topology Optimization) 설계를 적용한 AM 부품은 기존 절삭 가공 대비 평균 30~55% 경량화가 가능한 것으로 보고됩니다.
    • ⏱️ 리드타임 단축: 복잡한 내부 냉각채널을 가진 터빈 블레이드 등은 기존 주조·단조 공정 대비 납기를 최대 70% 단축할 수 있다고 봅니다.
    • ♻️ 소재 활용률: 절삭 가공(Subtractive Manufacturing)의 경우 티타늄 소재의 최대 90%가 칩으로 버려지지만, AM은 소재 손실이 5~10% 수준으로 극적으로 줄어들어요.
    • ✈️ FAA/EASA 인증 AM 부품 수: 2026년 기준 상용 항공기에 적용 인증을 받은 AM 부품 종류는 전 세계적으로 10만 개 이상으로 집계되고 있습니다.
    • 🏭 국내 시장: 한국항공우주산업(KAI), 한화에어로스페이스 등 국내 주요 방산·항공 기업들의 AM 설비 투자액이 2026년 상반기 기준 전년 대비 약 35% 증가한 것으로 알려져 있어요.

    🌍 국내외 주요 사례 — 실제로 어떻게 쓰이고 있나요?

    ① GE 에어로스페이스 — LEAP 엔진 연료 노즐
    아마 AM 항공우주 적용 사례 중 가장 유명한 것이 GE의 LEAP 엔진 연료 노즐일 거예요. 기존엔 18~20개의 부품을 용접해 만들던 것을 금속 AM(직접 금속 레이저 소결, DMLS 방식)으로 단 1개의 일체형 부품으로 제작합니다. 내열성과 연료 효율이 동시에 개선됐고, GE는 2026년까지 누적 10만 개 이상의 이 부품을 AM으로 생산했다고 공식 발표했어요.

    ② 에어버스 — 티타늄 브래킷과 객실 파티션
    에어버스는 A350 기종을 시작으로 구조용 티타늄 브래킷, 객실 파티션 등 다양한 부품에 AM을 적용해 왔습니다. 2026년에는 차세대 수소 연료 추진 실증기 관련 연료 시스템 핵심 부품 일부를 AM으로 제작한다는 계획을 공개하기도 했어요. 복잡한 유로(Flow Channel) 설계가 가능하다는 AM의 특성이 수소 연료 시스템에 특히 잘 맞는다고 봅니다.

    ③ SpaceX — 랩터 엔진 부품
    SpaceX는 팰컨 시리즈와 스타십의 랩터 엔진에 AM 부품을 상당 비중으로 활용하고 있어요. 특히 재생 냉각(Regenerative Cooling) 구조처럼 내부 미로 같은 채널이 필요한 부품에서 AM의 진가가 발휘됩니다. 빠른 설계 변경과 생산 사이클이 SpaceX 특유의 ‘빠른 반복 개발 문화’와도 잘 맞아 떨어진다고 봅니다.

    ④ 한화에어로스페이스 — 국내 동향
    국내에서도 빠른 움직임이 포착되고 있어요. 한화에어로스페이스는 2025~2026년 사이 항공 엔진 부품 관련 AM 내재화 역량 확보에 적극 투자하고 있으며, KAI는 차세대 전투기 및 위성 발사체 부품의 AM 적용 연구를 산학연 협력 형태로 진행 중인 것으로 알려져 있습니다.

    metal 3D printing titanium aerospace component factory

    🔬 2026년 주목받는 기술 트렌드

    최근 항공우주 AM 분야에서 가장 뜨겁게 논의되는 키워드는 크게 세 가지인 것 같아요.

    • 멀티 머티리얼 AM(Multi-Material AM): 하나의 부품 안에 두 가지 이상의 소재를 동시에 적층하는 기술로, 열 차폐와 구조 강도를 동시에 잡는 부품 개발에 활용되고 있어요.
    • 대형 구조물 AM (Large-Format AM): 소형 브래킷을 넘어, 위성 버스(Bus) 구조체나 로켓 탱크 돔 같은 대형 부품을 직접 프린팅하려는 시도가 늘고 있습니다.
    • AI 기반 공정 모니터링: AM 공정 중 발생하는 결함(기공, 잔류응력 등)을 실시간 AI 비전 시스템으로 감지·보정하는 기술이 상용화 단계에 가까워지고 있어요. 이는 항공우주 부품의 가장 큰 AM 걸림돌이었던 ‘신뢰성 인증’ 문제를 해소하는 데 핵심 역할을 할 것이라 봅니다.

    ⚠️ 아직 해결해야 할 현실적인 과제들

    물론 장밋빛 뉴스만 있는 건 아니에요. 항공우주 AM이 더 넓게 쓰이려면 아직 몇 가지 장벽이 남아 있습니다.

    • 인증(Certification)의 복잡성: FAA, EASA, 국내 국토교통부 항공 인증 체계가 AM 부품의 빠른 설계 변경 속도를 따라가지 못하는 경우가 많아요.
    • 소재 데이터베이스 부족: 적층 방향, 열처리 조건에 따라 달라지는 소재 물성 데이터가 아직 충분히 축적되지 않은 소재들이 많습니다.
    • 후처리(Post-Processing) 비용: AM으로 뽑은 부품도 열처리, HIP(열간 등방 가압), 표면 가공 등의 후처리가 필요한 경우가 많아 총비용(TCO) 계산 시 이를 빠뜨리면 안 됩니다.

    에디터 코멘트 : 항공우주 AM은 분명 인상적인 속도로 발전하고 있지만, 무조건적인 낙관론보다는 “어떤 부품에, 어떤 공정으로, 어떤 인증 경로를 통해” 적용할 것인가를 따지는 실용적 접근이 중요한 것 같아요. 투자자나 부품사 입장에서는 AM 기술 자체보다, AI 기반 공정 모니터링과 인증 자동화 솔루션 분야가 오히려 더 현실적인 기회가 될 수도 있다고 봅니다. 하늘을 나는 부품인 만큼 ‘빠름’만큼 ‘안전한 빠름’이 핵심이니까요.

    태그: [‘항공우주적층제조’, ‘3D프린팅항공부품’, ‘금속AM기술’, ‘항공우주산업2026’, ‘적층제조혁신’, ‘스페이스테크제조’, ‘항공부품경량화’]


    📚 관련된 다른 글도 읽어 보세요

  • Build Your Own Docker Home Lab in 2026: The Complete Self-Hosting Automation Guide

    A couple of years ago, a friend of mine — a mid-level developer who was tired of paying $80/month across five different SaaS subscriptions — handed me a dusty old mini PC and said, “I heard you can run your own stuff on this. Help me figure it out.” Fast forward to today, and that little box runs his password manager, media server, note-taking app, and home automation dashboard. His monthly cloud bill? Nearly zero. That moment was my introduction to the beautiful, occasionally maddening world of Docker home labs.

    If you’re curious about self-hosting but don’t know where to start — or you’ve already got a server humming in the corner but feel like your setup is held together with digital duct tape — let’s think through this together. By 2026, the tooling has matured dramatically, and automating a home lab is genuinely accessible even if you’re not a DevOps professional.

    docker home lab server rack mini pc self-hosting setup 2026

    Why a Docker Home Lab Makes More Sense Than Ever in 2026

    The self-hosting movement has exploded over the past few years, largely driven by growing privacy concerns, rising SaaS prices, and frankly — the sheer fun of owning your own infrastructure. But what’s changed in 2026 is the automation layer. Tools like Portainer, Watchtower, and especially Docker Compose v3+ combined with lightweight orchestration via Coolify or Dokploy mean you can maintain a surprisingly complex stack with minimal manual intervention.

    Let’s look at some realistic numbers. A used Intel N100-based mini PC (think Beelink EQ12 or similar) runs around $150–$200 and consumes only 6–10W at idle. Compare that to AWS EC2 t3.medium at roughly $30–35/month — your hardware pays for itself in under 6 months, and you get full control of your data.

    The Core Architecture: What You Actually Need

    Before jumping into YAML files and containers, it helps to think about your lab in three layers:

    • Hardware Layer: Mini PC, Raspberry Pi 5, or a repurposed laptop. For most home users, an N100 or N305 mini PC in 2026 offers the best performance-per-watt ratio. If you want to run AI workloads locally (more on that below), look for something with at least 16GB RAM.
    • Networking Layer: A basic managed switch, a Tailscale or Cloudflare Tunnel setup for secure remote access, and ideally a dedicated VLAN for your home lab traffic. Tailscale in particular has become the go-to zero-config VPN for home labbers — it just works.
    • Orchestration Layer: This is where Docker shines. Use Docker Compose for defining your stack as code, Watchtower for automated container updates, and a reverse proxy like Traefik v3 or Caddy for routing traffic with automatic HTTPS.

    Real-World Examples: How People Are Actually Doing This

    The global self-hosting community, centered around communities like r/selfhosted (which crossed 600k members in early 2026) and the Awesome-Selfhosted GitHub repository, has produced some remarkable reference architectures.

    In South Korea, for instance, a community around 홈서버 구축 (home server building) has grown steadily on platforms like Naver Café and Discord. Many Korean home labbers favor compact setups running Jellyfin for media, Vaultwarden (a lightweight Bitwarden-compatible password manager), and Immich for photo management — all containerized. The pattern is consistent globally: start small, automate aggressively, and gradually consolidate services.

    In the European market, the post-GDPR sensitivity around data privacy has made self-hosting even more culturally resonant. Platforms like Nextcloud remain extremely popular in Germany and the Netherlands as full Google Workspace replacements. Many users pair Nextcloud with Collabora Online (a containerized LibreOffice suite) to create a genuinely capable productivity environment.

    Automation Is the Real Game-Changer

    Here’s where things get genuinely exciting in 2026. The combination of Ansible (for provisioning and configuration) with Docker Compose or Portainer stacks means you can treat your home lab as infrastructure as code. Store your Compose files in a private Git repo, hook it up to Gitea (a self-hosted Git service), and use Drone CI or Woodpecker CI to auto-deploy changes. Yes, you can have a fully automated GitOps pipeline running on a $150 mini PC.

    A practical automation stack worth considering:

    • Portainer CE — visual Docker management, great for beginners and power users alike
    • Watchtower — polls Docker Hub or your registry and auto-updates containers on a schedule
    • Uptime Kuma — lightweight monitoring dashboard with alerting (Telegram, Discord, etc.)
    • Diun (Docker Image Update Notifier) — sends alerts when new image versions drop, so you can decide whether to update manually
    • Homer or Homarr — a clean dashboard to access all your self-hosted services from one place
    docker compose yaml self-hosted services dashboard portainer traefik automation

    Common Pitfalls (And How to Sidestep Them)

    Let me be honest with you: home labs can become a time sink if you’re not intentional about scope. The most common trap is what the community lovingly calls “shiny object syndrome” — adding one more service every weekend until your Compose file is 800 lines long and you’ve forgotten what half of it does.

    A few grounding principles that experienced home labbers swear by in 2026:

    • Document as you go. Use a simple README.md in your Git repo. Future-you will be grateful.
    • Back up your volumes. Use Duplicati or Restic to back up Docker volumes to a secondary drive or a cheap object storage bucket (Backblaze B2 is popular). A home lab that can’t survive a disk failure isn’t really production-ready.
    • Don’t expose everything to the internet. Use Tailscale or Cloudflare Tunnels instead of opening ports on your router. Security is not optional, even at home.
    • Start with three services, not thirty. Prove the concept, get comfortable with Compose and volumes, then expand.

    Realistic Alternatives Based on Your Situation

    Not everyone can — or should — go full home lab. Let’s think through some realistic alternatives:

    If you’re a complete beginner and just want to dip your toes in: Start with a Raspberry Pi 5 running CasaOS — it’s a beautifully simple app store-style interface built on Docker that requires almost zero command-line knowledge. It’s a fantastic on-ramp.

    If you’re renting and can’t run a dedicated server 24/7: Consider a cheap VPS (Hetzner’s CAX11 ARM server is around €4/month in 2026) paired with Docker. You lose the “at home” aspect but keep the self-hosting benefits and the automation skills transfer directly.

    If privacy is your primary concern but technical complexity is a barrier: Managed self-hosting providers like PikaPods or Elest.io deploy open-source apps on your behalf with one click. Not quite DIY, but a meaningful middle ground.

    If you want to run local AI workloads (which is increasingly common in 2026): You’ll need more horsepower. An N305 mini PC with 32GB RAM running Ollama in a Docker container can handle smaller LLMs (7B–13B parameter models) comfortably. Pair it with Open WebUI for a ChatGPT-like interface that never leaves your house.

    Editor’s Comment : What I find genuinely compelling about the 2026 home lab landscape is that the barrier to automation has collapsed. Two years ago, setting up a GitOps pipeline at home felt like over-engineering. Today, with tools like Coolify and Woodpecker CI, it’s practically the default recommendation for anyone serious about their stack. The philosophical shift matters too — owning your data and your infrastructure isn’t a nerd hobby anymore, it’s a reasonable lifestyle choice. Start small, automate one thing at a time, and enjoy the process. The learning curve is part of the reward.

    태그: [‘Docker Home Lab’, ‘Self-Hosting 2026’, ‘Docker Compose Automation’, ‘Home Server Setup’, ‘Portainer Traefik’, ‘Self-Hosted Apps’, ‘Home Lab Beginner Guide’]


    📚 관련된 다른 글도 읽어 보세요

  • 2026년 Docker 홈랩 자동화 셀프호스팅 완전 구축 가이드 – 월 0원으로 나만의 서버 운영하기

    작년 말, 지인 한 분이 매달 클라우드 서비스 비용으로 15만 원 넘게 나간다며 한숨을 쉬었어요. Notion 대신 쓰는 메모 앱, 사진 백업, 개인 VPN, 가족 공유 스트리밍 서버까지 하나씩 SaaS로 구독하다 보니 어느새 청구서가 눈덩이처럼 불어난 거죠. 그때 제가 슬쩍 꺼낸 말이 “홈랩(Home Lab) 한번 해보지 않을래요?”였고, 3개월 뒤 그분은 중고 미니PC 한 대로 대부분의 서비스를 직접 돌리고 있었습니다.

    2026년 현재, Docker + 자동화 스택을 활용한 셀프호스팅은 더 이상 괴짜 개발자들만의 전유물이 아닌 것 같습니다. 오픈소스 생태계가 성숙해지고, Portainer·Traefik·Watchtower 같은 도구들이 GUI까지 지원하면서 진입 장벽이 크게 낮아졌거든요. 지금부터 실제로 어떻게 구성하고 자동화하는지, 비용과 구조 면에서 함께 뜯어보겠습니다.

    home lab server docker setup desk

    1. 왜 지금 홈랩인가 – 비용 구조로 따져보기

    단순한 감각이 아니라 숫자로 비교해 보는 게 중요하다고 봅니다. 아래는 일반적인 개인·소규모 팀이 SaaS로 지출하는 비용과 셀프호스팅 전환 시 예상 비용을 대조한 것이에요.

    • Notion Pro 월 약 11,000원 → Obsidian + Silverbullet(셀프호스팅) 월 0원
    • Google One 2TB 월 약 13,500원 → Nextcloud + 2TB HDD 초기 60,000원(이후 월 전기료 약 1,500원)
    • 1Password Families 월 약 7,000원 → Vaultwarden(Bitwarden RS) 셀프호스팅 월 0원
    • Plex Pass 평생권 139,000원 → Jellyfin 오픈소스 완전 무료
    • Tailscale Pro 월 약 8,000원 → Headscale(오픈소스 컨트롤 서버) 월 0원

    이 항목만 합산해도 월 구독료가 약 39,000~50,000원 수준인데, 중고 Intel N100 미니PC(약 130,000~180,000원 선)로 전환하면 4~5개월이면 손익분기점을 넘는다는 계산이 나와요. 전기료는 N100 기준 TDP 6W, 24시간 풀가동 시 월 약 1,000~1,500원 수준이라 사실상 무시할 만한 수준이라고 봅니다.

    2. 핵심 스택 구조 – Docker Compose + 자동화 레이어

    홈랩의 핵심은 “한 번 설정하면 알아서 돌아가는” 자동화에 있습니다. 2026년 기준 가장 안정적으로 쓰이는 스택 조합은 다음과 같이 정리할 수 있어요.

    • 컨테이너 런타임: Docker Engine 27.x + Docker Compose v2 (YAML 기반 선언적 관리)
    • 리버스 프록시: Traefik v3 – Let’s Encrypt SSL 자동 발급, 도메인 라우팅 자동화
    • 컨테이너 관리 GUI: Portainer CE – 비개발자도 브라우저에서 컨테이너 상태 확인 가능
    • 자동 업데이트: Watchtower – 지정한 스케줄에 맞춰 이미지 최신 버전 자동 pull & 재시작
    • 모니터링: Grafana + Prometheus + cAdvisor – 컨테이너 CPU·메모리 사용량 실시간 대시보드
    • 백업 자동화: Duplicati or Restic + Rclone – 로컬 + 클라우드(B2/S3) 이중 백업 스케줄링
    • 시크릿 관리: Docker Secrets 또는 .env 파일 + Vault – 비밀번호·API 키 평문 노출 방지

    이 구조의 핵심 장점은 IaC(Infrastructure as Code) 개념을 홈랩에 그대로 가져온다는 점이에요. docker-compose.yml 파일 하나로 전체 서비스 구성이 코드로 문서화되고, GitHub Private Repo에 올려두면 어떤 기기로 이전하더라도 docker compose up -d 한 줄로 환경 재현이 가능합니다.

    3. 국내외 실제 사례 – 이미 검증된 구성들

    해외에서는 Reddit의 r/selfhosted 커뮤니티(2026년 현재 구독자 약 42만 명)가 사실상 홈랩 자동화의 집단지성 역할을 하고 있어요. 이곳에서 가장 많이 회자되는 구성은 “Immich + Nextcloud + Vaultwarden + Jellyfin” 4종 세트인데, 하드웨어 요구사항이 낮으면서도 Google 포토·드라이브·1Password·Plex를 완벽하게 대체한다는 점에서 높은 평가를 받고 있습니다.

    국내에서도 상황이 달라졌습니다. 기술 블로그 플랫폼과 개발자 커뮤니티(okky, disquiet 등)를 중심으로 2025~2026년 사이 “홈서버 구축기” 포스트 수가 눈에 띄게 늘었고, 특히 SK브로드밴드·KT 기가인터넷 사용자들이 고정 IP 없이 DDNS + Cloudflare Tunnel을 조합해 외부 접근 문제를 우회하는 방식이 정착되는 추세라고 봅니다. Cloudflare Tunnel은 포트 포워딩 없이도 안전한 외부 접근 채널을 만들어 주기 때문에, ISP 환경에 구애받지 않는다는 게 국내 사용자들에게 큰 메리트가 되고 있어요.

    docker compose yaml terminal automation selfhosted

    4. 초보자가 가장 많이 막히는 포인트 3가지

    • 네트워크 설정 혼란: Docker의 bridge, host, macvlan 네트워크 모드 차이를 모르고 시작하면 컨테이너 간 통신이 안 되는 상황이 자주 발생해요. 처음엔 커스텀 bridge 네트워크 하나만 만들어서 모든 컨테이너를 같은 네트워크에 올리는 방식으로 단순하게 시작하는 걸 권장합니다.
    • 볼륨 마운트 실수: 데이터 영속성을 위한 volumes: 설정을 빠뜨리면 컨테이너 재시작 시 데이터가 사라져요. ./data:/app/data 형식의 바인드 마운트를 명시적으로 적어두는 습관이 중요합니다.
    • 업데이트 후 설정 초기화: Watchtower로 자동 업데이트를 걸어놓고 환경변수나 볼륨 경로가 바뀐 경우 서비스가 먹통이 되는 경우가 있어요. 주요 서비스는 Watchtower에서 제외(com.centurylinklabs.watchtower.enable=false 라벨)하고 수동으로 관리하는 게 안전한 것 같습니다.

    5. 보안 – 셀프호스팅의 아킬레스건을 다루는 법

    “내 서버를 인터넷에 여는 게 위험하지 않나요?\

    태그: []


    📚 관련된 다른 글도 읽어 보세요

  • 2026 Global 3D Printing Market Growth Forecast: What the Numbers Really Mean for You

    Picture this: a surgeon in Seoul holds a custom-printed titanium implant that was designed, optimized, and manufactured overnight — tailored precisely to a patient’s bone structure. Meanwhile, a small furniture startup in Detroit is printing load-bearing chair frames on demand, eliminating warehouse costs entirely. These aren’t futuristic fantasies anymore. They’re happening right now, in 2026, and they’re reshaping what we thought we knew about manufacturing, healthcare, and even fashion.

    So what’s actually driving the 3D printing market this year, and where is it realistically headed? Let’s think through this together — because the data tells a fascinating, if sometimes complicated, story.

    3D printing industrial machine factory floor 2026

    📊 The 2026 Market Snapshot: Breaking Down the Big Numbers

    As of early 2026, the global 3D printing (additive manufacturing) market is valued at approximately $31.5 billion USD, according to aggregated forecasts from IDC and MarketsandMarkets. More striking is the compound annual growth rate (CAGR) — hovering around 19.3% through 2030 — which places it among the fastest-growing industrial technology sectors globally.

    But raw market size numbers can be deceptive. Let’s unpack what’s actually moving the needle:

    • Industrial & Aerospace Applications: Still the heavyweight champion, accounting for nearly 28% of market revenue. Companies like Boeing and Airbus are now using metal 3D printing for structural aircraft components, reducing part weight by up to 55% compared to traditional machining.
    • Healthcare & Bioprinting: One of the most explosive sub-sectors in 2026. The global bioprinting market alone is projected to exceed $4.2 billion this year, driven by orthopedic implants, dental prosthetics, and early-stage organ scaffold research.
    • Construction 3D Printing: A surprising breakout performer. Large-format concrete printers are being deployed in the Middle East and Southeast Asia to address housing shortages, with full single-story structures completed in under 48 hours.
    • Consumer & Retail: While still a smaller slice of the pie (~9%), this segment is growing rapidly through customized footwear, eyewear, and on-demand spare parts ecosystems.
    • Education & Research: Universities and vocational training programs worldwide are integrating desktop 3D printers as standard curriculum tools, creating a new generation of design-literate engineers.

    🌍 International Case Studies: Who’s Leading the Charge?

    United States: The U.S. remains the single largest market, fueled by defense contracts and a robust startup ecosystem. The Department of Defense’s 2025-2026 advanced manufacturing initiative has funneled over $800 million into additive manufacturing R&D. Companies like Desktop Metal and Carbon 3D are pushing material boundaries, now printing with ceramics, carbon fiber composites, and even edible materials.

    Germany & the EU: Europe’s industrial heartland is leaning into metal additive manufacturing for automotive parts. BMW’s additive manufacturing campus in Munich reportedly produced over 300,000 3D-printed components in 2025 alone — a figure expected to grow by 40% through 2026. The EU’s Horizon Europe program continues to fund cross-border bioprinting research consortiums.

    China: China is executing an aggressive national strategy. By 2026, China accounts for roughly 22% of global 3D printing market share, up from 15% in 2022. State-backed investment in large-scale metal sintering technology has positioned Chinese manufacturers as serious competitors in aerospace supply chains.

    South Korea: Korea’s approach is noteworthy for its precision. Companies like Hanhwa and SLM Solutions Korea are focusing on high-value medical and semiconductor industry applications. The Korean Ministry of SMEs and Startups has also launched a dedicated 3D printing industrial cluster in Incheon, targeting 500 certified additive manufacturing SMEs by end of 2026.

    Middle East: Dubai’s government-mandated target — that 25% of new buildings incorporate 3D-printed elements — is actually starting to bear fruit. Multiple residential complexes using printed concrete cores were completed in early 2026, and the technology is being exported to neighboring markets.

    3D printed building construction Dubai futuristic architecture

    ⚙️ What’s Actually Fueling Growth? The Technology Behind the Boom

    It’s worth pausing on why this market is growing so aggressively, because it’s not just hype. Several genuine technological breakthroughs have compounded over the past two years:

    • Multi-material printing: Printers that can simultaneously deposit multiple materials — including conductive inks alongside structural polymers — are enabling entirely new product categories like printed electronics and soft robotics.
    • AI-driven generative design: Tools like Autodesk Fusion and nTopology now use machine learning to generate optimized geometries that would be impossible to machine traditionally, then feed those designs directly to printers.
    • Speed improvements: Continuous Liquid Interface Production (CLIP) and similar resin-based technologies have reduced print times by 5-10x compared to traditional FDM, making just-in-time manufacturing economically viable at scale.
    • Material science expansion: The material palette now includes biocompatible resins, recycled thermoplastics, and even lunar regolith simulants (yes, for potential off-planet construction).

    🚧 Realistic Challenges You Won’t Hear in the Press Releases

    Here’s where it gets intellectually honest. Despite the impressive trajectory, there are genuine friction points slowing adoption:

    • Post-processing bottleneck: Most printed parts still require significant manual finishing — sanding, curing, heat treatment. This hidden labor cost frequently surprises companies doing cost comparisons against traditional manufacturing.
    • Certification & regulation lag: In aerospace and medical, regulatory approval for printed components can take 3-5 years. Many promising applications are stuck in qualification cycles, which inflates projected market timelines.
    • Intellectual property concerns: As digital files replace physical inventory, IP theft risks increase dramatically. The industry is still developing robust DRM frameworks for print files.
    • Skilled workforce gap: Operating industrial metal printers requires specialized knowledge in powder metallurgy, machine calibration, and simulation software. This talent is genuinely scarce globally.

    💡 Realistic Alternatives & Strategic Paths Forward

    Not everyone needs to buy a $500,000 industrial metal printer. Let’s think practically about how different readers can engage with this market growth:

    • Small business owners: Instead of investing in in-house printing, consider partnering with local 3D printing service bureaus. Platforms like Xometry and Protolabs now offer instant quoting APIs that make outsourced printing as frictionless as ordering office supplies.
    • Investors: Rather than chasing pure-play printer manufacturers (which face intense commoditization), look at the materials supply chain and software layer — companies producing specialty filaments, bioinks, and generative design tools often carry better margin profiles.
    • Educators & students: Entry-level FDM printers (Bambu Lab, Prusa) now cost under $400 and print reliably enough for professional prototyping. Getting hands-on experience now builds genuinely marketable skills for 2026’s job market.
    • Healthcare professionals: If you’re in a clinical setting, engage with your hospital’s R&D or procurement team about pilot programs for printed anatomical models and surgical guides. These don’t require regulatory approval and deliver immediate training value.

    The 3D printing market in 2026 isn’t a moonshot story anymore — it’s an infrastructure story. The technology has quietly woven itself into aerospace supply chains, hospital operating rooms, and construction sites. The growth isn’t coming from novelty; it’s coming from genuine industrial utility, and that’s a much more durable foundation.

    The most exciting part? We’re probably still in the early chapters of this particular story.


    Editor’s Comment : What strikes me most about the 2026 3D printing landscape is how it’s stopped being a “future technology” conversation and started being an operations conversation. The companies winning aren’t necessarily those with the flashiest printers — they’re the ones who’ve figured out where additive manufacturing slots into a specific workflow and solves a specific problem better than the alternative. If you’re exploring this space, I’d suggest starting with one concrete use case rather than a general technology strategy. Identify the one part, one component, or one process in your world that’s most constrained by traditional manufacturing — and ask whether printing changes that equation. That focused question tends to yield much clearer answers than broad market enthusiasm alone.

    태그: [‘3D printing market 2026’, ‘additive manufacturing growth’, ‘global manufacturing trends’, ‘bioprinting industry’, ‘industrial 3D printing’, ‘manufacturing technology forecast’, ‘3D printing investment opportunities’]


    📚 관련된 다른 글도 읽어 보세요

  • 2026 글로벌 3D 프린팅 시장 성장 전망 분석 — 제조업의 판도를 바꿀 기술, 지금 어디까지 왔나

    2026 글로벌 3D 프린팅 시장 성장 전망 분석 — 제조업의 판도를 바꿀 기술, 지금 어디까지 왔나

    몇 년 전만 해도 3D 프린터는 학교 공작실이나 스타트업 해커톤에서나 볼 법한, 어딘가 ‘미래 장난감’ 같은 인상이 있었어요. 그런데 최근 지인 중 한 명이 자동차 부품 제조업체에 다니는데, 이런 말을 하더라고요. “우리 공장에서 이제 시제품을 외주 맡기지 않아요. 다 인하우스에서 3D 프린팅으로 해결해요.” 이 한 마디가 꽤 인상적이었습니다. 단순히 ‘신기한 기술’이 아니라, 실제 산업 현장의 워크플로우를 바꾸고 있다는 신호인 거잖아요.

    2026년 현재, 3D 프린팅(적층 제조, Additive Manufacturing) 시장은 그야말로 ‘조용한 폭발’ 국면에 접어든 것 같습니다. 소재의 다양화, AI 기반 설계 자동화, 그리고 대기업들의 공격적인 투자가 맞물리면서 시장 규모와 적용 범위가 동시에 확장되고 있거든요. 오늘은 이 흐름을 숫자와 사례로 차근차근 짚어보려 해요.

    global 3D printing market growth 2026 industrial manufacturing


    📊 본론 1. 숫자로 보는 2026년 3D 프린팅 시장 규모

    시장조사 기관들의 최근 보고서를 종합해 보면, 2026년 글로벌 3D 프린팅 시장 규모는 약 290억~320억 달러(한화 약 39조~43조 원) 수준으로 추정됩니다. 이는 2021년 대비 약 2.5배 이상 성장한 수치로, 연평균 성장률(CAGR)은 대략 17~20% 수준을 유지하고 있다고 봐요.

    특히 주목할 만한 세부 지표들이 있어요.

    • 산업용 금속 3D 프린팅 시장: 전체 시장에서 약 35% 비중을 차지하며 가장 빠르게 성장하는 세그먼트. 항공우주·방산 분야의 수요가 견인하고 있어요.
    • 바이오프린팅(Bio-printing) 분야: 2026년 기준 약 35억 달러 규모로, 의료 조직 재생 및 맞춤형 의약품 제조 쪽으로 적용 범위가 확대 중입니다.
    • 건설 및 주택 3D 프린팅: 글로벌 주거 부족 문제와 맞물리면서 연 25% 이상의 성장률을 기록하는 ‘다크호스’ 분야로 떠오르고 있어요.
    • 소비재·패션 분야: 맞춤형 신발, 주얼리, 안경 등 B2C 시장이 빠르게 커지면서 전체 파이에서 차지하는 비중이 꾸준히 증가 중.
    • 아시아-태평양 지역: 중국, 한국, 일본을 중심으로 전체 시장의 약 30%를 차지하며 북미를 猛추격하고 있는 상황입니다.

    이런 수치를 보면서 흥미로운 점은, 3D 프린팅이 더 이상 ‘프로토타입 제작 도구’에 머물지 않는다는 거예요. 이제는 최종 제품(End-use Part) 생산 비중이 전체 활용의 50%를 넘어선 것으로 집계되고 있거든요. 이게 사실상 패러다임 전환의 핵심 신호라고 봅니다.


    🌍 본론 2. 국내외 주요 사례로 보는 3D 프린팅의 현재

    해외 사례 — 항공우주부터 주택까지

    미국의 GE 에어로스페이스(GE Aerospace)는 3D 프린팅으로 제작한 연료 노즐을 LEAP 엔진에 양산 적용한 대표 사례인데요, 2026년 현재 이 기술은 더욱 고도화되어 단일 부품으로는 제작하기 어려운 복잡한 냉각 채널 구조를 가진 터빈 부품 생산에까지 확장됐어요. 기존 주조 방식 대비 부품 수 75% 감소, 무게 25% 절감 효과가 검증된 걸로 알려져 있습니다.

    네덜란드의 ICON과 유럽의 여러 스타트업들은 콘크리트 3D 프린팅으로 저비용 주택을 72시간 안에 짓는 프로젝트를 현실화했어요. 멕시코의 저소득층 주거 단지, 유럽의 난민 임시 주택 등에 실제 적용되면서 ‘소셜 임팩트 + 기술 혁신’이 교차하는 분야로 주목받고 있습니다.

    국내 사례 — 빠르게 추격 중인 한국

    국내에서도 흐름은 뚜렷해요. 현대자동차그룹은 자체 R&D 센터에 금속 3D 프린팅 설비를 대규모로 도입해, 전기차 플랫폼의 경량화 부품 개발 주기를 기존 대비 60% 이상 단축했다고 알려져 있어요. 한화에어로스페이스도 차세대 엔진 부품의 일부를 적층 제조 방식으로 전환 중입니다.

    스타트업 씬에서도 주목할 기업들이 있어요. 국내 바이오프린팅 스타트업들이 인공 연골, 피부 조직 등을 3D 프린팅으로 제작하는 연구를 임상 단계까지 진전시키고 있고, 정부의 ‘첨단 제조 R&D 투자 로드맵’ 하에 관련 예산도 꾸준히 늘어나는 추세입니다.

    3D printing bioprinting construction aerospace Korea industry 2026


    🔍 성장을 가속하는 핵심 동인 vs. 여전한 과제

    왜 지금 이렇게 빠르게 성장하는지를 이해하려면, 기술 외적인 맥락도 함께 봐야 할 것 같아요.

    • 공급망 리스크 대응 수단: 코로나 팬데믹 이후 글로벌 공급망 불안정성을 경험한 기업들이 ‘로컬 생산 능력’을 강화하는 수단으로 3D 프린팅을 채택하는 사례가 급증했습니다.
    • AI·소프트웨어와의 결합: 제너레이티브 디자인(Generative Design) 기술과 AI 최적화 알고리즘이 결합되면서, 사람이 설계하기 어려운 초경량·고강도 구조물을 자동으로 설계하고 출력하는 ‘자율 제조’에 가까운 흐름이 생겨나고 있어요.
    • 소재 혁신: 탄소섬유 강화 복합재, 생체 적합성 고분자, 고엔트로피 합금 등 출력 가능한 소재 종류가 폭발적으로 늘어나고 있습니다.
    • 과제 — 표준화와 인증 문제: 반면 여전히 풀어야 할 숙제도 있어요. 산업별 품질 인증 기준의 부재, 출력물의 반복 재현성 이슈, 그리고 숙련된 운용 인력 부족 문제는 대규모 양산 적용의 발목을 잡는 요인으로 꼽힙니다.

    💡 결론 — 이 흐름을 어떻게 활용할 것인가

    3D 프린팅 시장은 이제 ‘성장할 것인가’의 단계를 넘어 ‘어떤 분야가 얼마나 빨리 성숙할 것인가’를 논의하는 단계에 와 있는 것 같아요. 투자자라면 금속 프린팅 소재 기업과 바이오프린팅 플랫폼에, 제조업 종사자라면 인하우스 도입보다 먼저 서비스형 3D프린팅(MaaS, Manufacturing as a Service)을 적극 활용해보는 것이 현실적인 진입로라고 봅니다. 초기 설비 투자 없이 기술 내재화를 경험할 수 있거든요.

    일반 소비자 입장에서도 ‘맞춤형 제품’에 대한 기대치를 높여도 좋을 것 같아요. 3D 프린팅이 대중화되면서 앞으로 5년 안에 개인 맞춤 의료기기나 맞춤 신발 생산이 훨씬 저렴해질 가능성이 높으니까요.

    에디터 코멘트 : 3D 프린팅은 ‘멋진 기술’이기 이전에 ‘일하는 방식’을 바꾸는 인프라에 가깝다고 생각해요. 공장의 재고를 디지털 파일로 대체하고, 부품 하나를 주문하기 위해 6주를 기다리지 않아도 되는 세상 — 그게 이 시장이 향하는 방향인 것 같습니다. 숫자 뒤에 있는 이 맥락을 이해하면, 3D 프린팅 시장의 성장이 단순한 트렌드가 아니라 구조적 전환이라는 게 더 잘 보이지 않을까요?

    태그: [‘3D프린팅시장’, ‘글로벌적층제조’, ‘2026제조업트렌드’, ‘3D프린팅투자’, ‘산업용3D프린팅’, ‘바이오프린팅’, ‘스마트제조’]


    📚 관련된 다른 글도 읽어 보세요

  • Build Your Own Home Security Camera System in 2026: The Open-Source Homelab Guide That Actually Works

    A few years back, my neighbor came to me frustrated. She’d been paying $40/month for a cloud-based security camera subscription — only to find out the company had experienced a data breach, and footage from thousands of users’ homes had been leaked online. Her private backyard, her kids playing outside, all of it potentially exposed. That conversation stuck with me, and honestly, it’s what pushed me deep into the world of self-hosted, open-source home security systems.

    Fast-forward to 2026, and the DIY homelab security camera scene has matured dramatically. The hardware is cheaper, the software is more polished, and the community support is phenomenal. So let’s think through this together — whether you’re a privacy-conscious parent, a tech tinkerer, or just someone tired of subscription fees bleeding your wallet dry.

    homelab server rack security camera setup raspberry pi 2026

    Why Go Self-Hosted? The Real Numbers Behind the Decision

    Let’s talk numbers first, because the financial case alone is compelling. A typical cloud-based security camera service in 2026 costs between $10–$60/month per plan, depending on the number of cameras and storage duration. Over three years, that’s $360 to $2,160 — just for the software layer, not counting the cameras themselves.

    In contrast, a self-hosted setup using open-source software and a modest homelab server costs roughly:

    • Mini PC or repurposed old laptop (server): $80–$200 one-time
    • IP cameras (PoE or Wi-Fi): $25–$80 per camera (Reolink, Amcrest, or ONVIF-compatible models)
    • Hard drive (2–4TB for local storage): $60–$100
    • Electricity overhead: roughly $3–$8/month depending on hardware efficiency
    • Software cost: $0 (open-source)

    For a 4-camera setup, your total first-year cost lands around $450–$600, and then it’s essentially free after that. The ROI compared to cloud subscriptions kicks in before year two in most cases.

    The Open-Source Software Stack Worth Knowing in 2026

    This is where things get exciting. The ecosystem has consolidated around a few standout projects, each with its own personality:

    • Frigate NVR: The community darling right now. Frigate uses AI-powered object detection (via Google Coral TPU or even your CPU) to distinguish between a person, a car, and a stray cat — so you’re not drowning in false alerts. It integrates beautifully with Home Assistant, which many homelab enthusiasts are already running.
    • Shinobi: A more feature-rich, browser-based NVR (Network Video Recorder) solution. It supports multi-user access, has a polished UI, and handles RTSP streams from almost any ONVIF-compatible camera. Great for users who want something that feels more “enterprise-grade.”
    • MotionEye / MotionEyeOS: The lightweight veteran. Perfect for Raspberry Pi deployments where resources are tight. Less powerful on AI detection, but dead simple to configure and incredibly stable.
    • Scrypted: A newer player gaining serious traction in 2026. Scrypted acts as a middleware layer — it can transcode and bridge your cameras to HomeKit Secure Video, Google Home, or Alexa, giving you best-of-both-worlds smart home integration without any cloud dependency.

    Real-World Deployments: How People Are Actually Doing This

    Let’s ground this in some real examples, because theory only gets you so far.

    In South Korea, the homelab and “자작 NAS” (DIY NAS) communities on platforms like CLIEN and SLRclub have seen a significant uptick in self-hosted security camera discussions throughout 2025–2026. A popular setup involves a Synology NAS running Surveillance Station (technically proprietary but widely used in the Korean homelab scene) alongside Frigate running on a separate low-power Intel N100 mini PC. The N100 chip, which became widely available in budget mini PCs around 2023–2024, is surprisingly capable of running Frigate’s object detection without a dedicated Coral TPU.

    In the US, the r/homelab and r/selfhosted communities on Reddit regularly feature builds centered around Proxmox (a hypervisor) running Home Assistant OS as a VM, with Frigate as an add-on. Users are running 8–16 camera setups on hardware that costs less than $300 total. One particularly popular build from early 2026 uses a decommissioned Optiplex desktop with a Coral M.2 TPU card — achieving real-time object detection across 12 cameras with CPU usage barely breaking 15%.

    In Europe, privacy regulations like GDPR have actually accelerated self-hosted adoption among small businesses and homeowners who are wary of cloud providers storing biometric-adjacent data (facial movement patterns, behavioral data) on overseas servers.

    frigate NVR dashboard open source camera detection home assistant

    The Security Paradox: Is Your Security Camera Actually Secure?

    Here’s a layer of nuance that most “just buy a Wyze camera” recommendations gloss over: cheap IP cameras themselves can be security vulnerabilities. Many budget cameras ship with outdated firmware, hardcoded credentials, or undocumented backdoors. In 2026, this remains a real and documented concern — even some mid-tier brands have had forced firmware update controversies.

    The open-source homelab approach lets you mitigate this by:

    • VLAN isolation: Put your cameras on a dedicated network VLAN with no internet access. They stream only to your local NVR server, which is the only device that needs outbound connectivity (and even that can be restricted).
    • Firewall rules: Block all outbound traffic from camera IPs using your router or a dedicated firewall like pfSense or OPNsense.
    • Regular firmware audits: With community-supported cameras, you’re more likely to know about vulnerabilities quickly through forums and GitHub issues.
    • Local-only access with VPN: Use Tailscale or WireGuard to securely access your camera feeds remotely without exposing ports to the open internet.

    Honest Caveats: When Self-Hosting Might NOT Be the Right Call

    I want to be real with you here — this path isn’t for everyone, and that’s okay. If any of these describe your situation, let’s think through alternatives:

    • You’re not comfortable with networking basics: Concepts like RTSP streams, VLANs, and port forwarding will come up. The learning curve is real. That said, solutions like Scrypted and Frigate have dramatically improved their onboarding in 2026.
    • You rent your home: Installing PoE (Power over Ethernet) infrastructure might not be feasible. In this case, Wi-Fi cameras with local SD card storage + a simple NAS might be a better hybrid approach.
    • You need 24/7 professional monitoring: Self-hosted systems don’t call the police for you. If professional monitoring is a priority, consider hybrid solutions like Unifi Protect (more of a prosumer option) or pairing your system with a monitoring service that accepts RTSP feeds.
    • You travel frequently and have unreliable home internet: If your home goes offline, so does your remote access. Cloud backup for critical clips (using something like Backblaze or a personal encrypted cloud) is worth considering as a fallback.

    Getting Started: A Realistic First-Timer’s Roadmap

    If you’re convinced and ready to dip your toes in, here’s a sensible progression rather than a “boil the ocean” approach:

    • Step 1: Start with a single ONVIF-compatible IP camera (Reolink E1 Pro or Amcrest IP5M are solid entry points under $40 in 2026) and install Frigate on an old laptop or Raspberry Pi 4/5.
    • Step 2: Get comfortable with Home Assistant if you haven’t already — it becomes the glue that ties notifications, automations, and camera feeds together elegantly.
    • Step 3: Set up Tailscale for secure remote access. This takes about 20 minutes and eliminates the need for risky port forwarding.
    • Step 4: Once you’re comfortable, expand to more cameras and consider a dedicated mini PC (Intel N100 or N305-based) as your permanent NVR host.
    • Step 5: Implement VLAN segmentation for your cameras once you’re ready to level up your network security posture.

    The beauty of this ecosystem in 2026 is that you can start embarrassingly small and scale organically. Nobody expects you to build a 16-camera, Coral TPU-powered fortress on day one.

    Privacy is increasingly treated as a luxury, but with the open-source homelab approach, it’s actually more accessible and affordable than ever. You’re not just building a security system — you’re building digital sovereignty over your own home.

    Editor’s Comment : After years of watching the smart home space evolve, what strikes me most about 2026’s DIY security camera scene is how it’s flipped the original narrative. We were told cloud was easier, safer, and smarter. And for a while, that was arguably true. But the combination of maturing open-source software like Frigate, affordable low-power hardware, and genuine privacy concerns has made self-hosting not just the idealist’s choice — it’s becoming the pragmatist’s choice too. If you’ve been on the fence, 2026 is genuinely the friendliest entry point this ecosystem has ever had. Start with one camera. See how it feels. I’d bet you won’t look back.

    태그: [‘homelab security camera’, ‘open source NVR 2026’, ‘Frigate home assistant’, ‘self-hosted surveillance’, ‘DIY home security system’, ‘privacy home camera’, ‘Frigate NVR setup’]


    📚 관련된 다른 글도 읽어 보세요

  • 홈랩 보안 카메라 자체 구축 완벽 가이드 2026 | 오픈소스로 클라우드 없이 내 집 지키기

    얼마 전 지인이 이런 말을 했어요. “집에 IP 카메라 달았는데, 알고 보니 영상이 중국 서버로 올라가고 있더라고.” 공유기 로그를 들여다보다 발견했다고 하더군요. 소름 돋는 이야기죠. 저렴한 스마트 카메라 제품들이 기본적으로 제조사 클라우드에 영상을 업로드하는 구조를 취하고 있다는 건 꽤 알려진 사실인데, 막상 내 집에 달린 카메라가 그런다고 생각하면 기분이 썩 좋지 않습니다. 그래서 요즘 IT에 관심 있는 분들 사이에서 홈랩(Home Lab) 환경에서 보안 카메라를 직접 구축하는 흐름이 꽤 강해지고 있어요. 오늘은 그 방법을 같이 뜯어보려 합니다.

    home lab security camera self-hosted open source server rack

    1. 왜 직접 구축인가? — 클라우드 카메라의 숨겨진 비용과 리스크

    시중에 유통되는 클라우드 기반 IP 카메라의 구조를 먼저 짚어볼게요. 대표적인 브랜드들의 비즈니스 모델을 보면 하드웨어는 저렴하게 팔고, 월정액 클라우드 스토리지 구독료로 수익을 만드는 방식이 지배적입니다.

    • 구독료 누적 비용: 대표적인 브랜드 기준 HD 카메라 2대 기준 월 약 6,000~15,000원, 연간 7만~18만 원 수준이에요. 5년이면 35만~90만 원이 고스란히 나갑니다.
    • 데이터 주권 문제: 2026년 현재도 상당수 저가형 IP 카메라 펌웨어에서 외부 서버로의 비정상 통신이 보안 연구자들에 의해 보고되고 있어요.
    • 서비스 종료 리스크: 제조사가 클라우드 서비스를 종료하면 카메라 자체가 무용지물이 되는 경우가 실제로 있었습니다(구글 Nest 일부 구형 모델 사례 등).
    • 로컬 스토리지 제한: 클라우드 무료 플랜은 대개 24~48시간 영상만 보존해요. 장기 이력 관리가 사실상 불가능합니다.

    반면 자체 구축 시 초기 비용은 다소 들지만, 이후 추가 비용이 거의 없고 데이터가 완전히 내 네트워크 안에 머뭅니다. 이건 단순한 절약 이상의 정보 자기결정권 문제라고 봅니다.

    2. 홈랩 보안 카메라 스택 구성 — 오픈소스 선택지 비교

    자체 구축의 핵심은 NVR(Network Video Recorder) 역할을 할 소프트웨어입니다. 2026년 기준 가장 많이 사용되는 오픈소스 솔루션은 다음 세 가지로 압축할 수 있어요.

    • Frigate NVR — 현재 홈랩 커뮤니티에서 가장 핫한 선택지입니다. Home Assistant와의 네이티브 연동이 강점이고, Google Coral TPU나 NVIDIA GPU를 활용한 로컬 AI 객체 인식(사람, 차량, 동물 등 구분)이 핵심 기능이에요. RTSP 스트림을 지원하는 카메라라면 대부분 붙일 수 있습니다.
    • Shinobi — Node.js 기반으로 동작하며 다중 사용자, 다중 모니터 환경을 지원해요. 웹 UI가 직관적이고 모션 감지 알림 기능도 충실합니다. Frigate보다 진입 장벽이 낮은 편이라고 봅니다.
    • MotionEye / MotionEyeOS — Raspberry Pi에 바로 올릴 수 있는 경량 솔루션이에요. 카메라 1~4대 정도의 소규모 환경에 적합합니다. 복잡한 설정 없이 빠르게 띄울 수 있다는 점이 매력적이에요.

    3. 국내외 실제 구축 사례 — 어떻게들 하고 있나

    해외 Reddit의 r/homelab, r/selfhosted 커뮤니티를 보면 Frigate + Home Assistant 조합으로 Google Coral USB Accelerator를 붙여서 하루 수십 건의 탐지 이벤트를 클립으로 저장하는 사례가 굉장히 보편화되어 있어요. 흥미로운 점은 단순 녹화를 넘어서 특정 인물 재방문 감지, 차량 번호판 인식(LPR) 같은 고급 기능까지 오픈소스 플러그인으로 구현하는 사례도 늘고 있다는 겁니다.

    국내에서는 네이버 카페 ‘홈네트워크 동호회’나 클리앙 커뮤니티를 중심으로 미니 PC(Intel NUC, 미니포럼 등)에 Proxmox를 올리고 그 위에 Frigate를 Docker 컨테이너로 띄우는 방식이 자리를 잡아가고 있는 것 같아요. 특히 아파트 현관 카메라와 주차장 카메라를 PoE 스위치로 묶어서 한 번에 관리하는 구성이 많이 공유되고 있습니다.

    Frigate NVR dashboard home assistant CCTV local AI detection

    4. 직접 구축 시 고려해야 할 핵심 보안 설정

    아이러니하게도 보안을 위해 구축한 시스템 자체가 보안 허점이 되는 경우가 있어요. 아래 항목들은 반드시 챙겨야 한다고 봅니다.

    • 카메라 네트워크 분리(VLAN): IP 카메라는 IoT VLAN에 격리하고 인터넷 아웃바운드를 완전히 차단하는 게 기본이에요. 카메라가 외부와 통신할 이유는 없습니다.
    • NVR 서버 외부 노출 금지: NVR 대시보드를 인터넷에 직접 노출하지 마세요. VPN(WireGuard 추천)을 통해서만 원격 접근하는 구조가 훨씬 안전합니다.
    • 펌웨어 업데이트 주기 관리: 오픈소스 NVR 소프트웨어도 정기적인 업데이트가 중요해요. 특히 Frigate는 업데이트 주기가 빠른 편이라 Docker 이미지 버전 관리에 신경 쓸 필요가 있습니다.
    • 저장 공간 RAID 구성: 영상 데이터 손실은 치명적일 수 있어요. 최소 RAID 1 미러링이나 ZFS 기반 스토리지 구성을 권장합니다.
    • 기본 자격증명 즉시 변경: 너무 당연한 말 같지만, IP 카메라의 admin/admin 같은 기본 계정을 그대로 두는 경우가 생각보다 많습니다.

    5. 추천 구성 예시 — 현실적인 입문 스택

    처음 시작하는 분들께 제가 현실적으로 추천드리는 구성은 이런 식이에요.

    • 하드웨어: 중고 미니 PC(예: N100 탑재 미니포럼 미니 PC) 또는 남는 노트북 → 소비전력 10~15W 수준으로 24시간 운용 가능
    • 카메라: Reolink 또는 Dahua RTSP 지원 PoE 카메라 (카메라 자체 클라우드 기능 비활성화 필수)
    • NVR 소프트웨어: Docker로 Frigate 설치
    • AI 가속: Google Coral USB Accelerator (약 6~7만 원대, 탐지 속도 획기적 향상)
    • 원격 접근: WireGuard VPN 또는 Tailscale
    • 저장: 2TB~ NAS HDD (영상 보존 기간에 따라 조정)

    총 초기 비용은 카메라 포함 20~40만 원 수준으로 잡으면 현실적이에요. 클라우드 구독 없이 2~3년이면 충분히 본전을 뽑는 구조입니다.

    결론

    홈랩 보안 카메라 자체 구축은 한 번의 설정 투자로 데이터 주권, 장기 비용 절감, 커스터마이징 자유도라는 세 마리 토끼를 잡을 수 있는 방법이라고 봅니다. 처음엔 Docker나 네트워크 설정이 낯설게 느껴질 수 있지만, Frigate나 Shinobi 모두 커뮤니티 문서화가 매우 잘 되어 있어서 생각보다 진입 장벽이 높지 않아요. 가장 중요한 건 카메라를 VLAN으로 격리하고, NVR을 인터넷에 직접 노출하지 않는 것 — 이 두 가지만 지켜도 상당히 견고한 구성이 됩니다.

    에디터 코멘트 : 클라우드 카메라를 쓰는 게 무조건 나쁜 건 아니에요. 기술적 진입 장벽이 부담스럽다면 신뢰할 수 있는 브랜드를 고르고 로컬 SD 카드 저장 옵션을 활성화하는 것만으로도 어느 정도 보완이 됩니다. 하지만 집에 항상 켜져 있는 서버가 한 대라도 있다면, Frigate 하나 올려보는 경험은 정말 강력 추천이에요. 한번 로컬 AI 탐지 알림을 받아보면, 클라우드로 돌아가기 어렵습니다.

    태그: [‘홈랩보안카메라’, ‘오픈소스NVR’, ‘Frigate’, ‘자체구축CCTV’, ‘셀프호스팅보안’, ‘홈네트워크보안’, ‘홈오토메이션’]


    📚 관련된 다른 글도 읽어 보세요