Author: likevinci

  • Why I Almost Gave Up on Egg Rolls — The Real 2025 Guide to Getting Them Crispy Every Time

    A friend of mine — someone who’s been cooking for her family for over two decades — called me last month genuinely frustrated. She’d tried making egg rolls three times in a row, and every single batch came out soggy, greasy, or burst open in the fryer. “I followed the recipe exactly,” she said. “What am I doing wrong?” Honestly? She wasn’t alone. Egg rolls are one of those dishes that look simple but have about six different failure points that nobody talks about in a standard recipe card. So let’s actually dig into this together.

    What Makes an Egg Roll… an Egg Roll?

    Before we troubleshoot, it helps to understand what we’re working with. Egg rolls are a Chinese-American staple — not quite the same as spring rolls (those use a thinner, rice-based wrapper and are often served fresh or lightly fried). Egg rolls use a thicker wheat-and-egg dough wrapper, which is specifically engineered to blister and crisp up under high heat. That crackly, bubbly texture? That’s the goal. And it only happens under specific conditions.

    The filling typically includes:

    • Shredded cabbage (Napa or green — each behaves differently in heat)
    • Ground pork or shrimp (or both)
    • Shredded carrots
    • Bean sprouts (optional, but they add crunch)
    • Aromatics: ginger, garlic, sesame oil, soy sauce
    • The egg roll wrappers themselves (brand matters — more on this below)

    The ratio of wet to dry ingredients in the filling is arguably the single most important variable most home cooks underestimate.

    egg roll filling preparation, shredded cabbage pork filling bowl

    The Moisture Problem — Why Your Egg Rolls Get Soggy

    Here’s the cause-and-effect chain nobody spells out clearly: excess moisture in the filling → steam builds inside the wrapper during frying → wrapper softens from the inside out → you get a greasy, limp egg roll instead of a crispy one. This is what happened to my friend, almost certainly.

    The fix is a two-step process that takes maybe 15 extra minutes but completely changes the outcome:

    • Salt your cabbage first. Toss shredded cabbage with about 1 teaspoon of kosher salt per 2 cups of cabbage, let it sit for 10 minutes, then squeeze out the water aggressively with a clean towel. You’ll be shocked how much liquid comes out — sometimes nearly half a cup.
    • Cook the filling before wrapping. A raw filling releases moisture as it cooks inside the wrapper. Pre-cooking and then cooling the filling completely (spread it on a sheet pan, even refrigerate briefly) means the filling is already dry and stable before it goes anywhere near a wrapper.
    • Don’t overfill. 2–3 tablespoons of filling per wrapper is plenty. More than that and you can’t seal it properly.

    Wrapper Selection: Not All Brands Are Equal

    This is where research actually pays off. In side-by-side tests documented by home cooking communities on platforms like Serious Eats and Reddit’s r/cooking, Nasoya and Twin Dragon egg roll wrappers consistently outperform generic store brands in blister formation and structural integrity. The key difference is thickness — you want wrappers labeled specifically “egg roll wrappers” (not spring roll wrappers), typically around 7-inch square, with egg listed as an ingredient. Wrappers without egg tend to stay pale and don’t develop that signature blistered surface.

    Keep wrappers covered with a damp paper towel while you work — they dry out and crack in minutes if left exposed, which causes the dreaded burst-open-in-the-fryer situation.

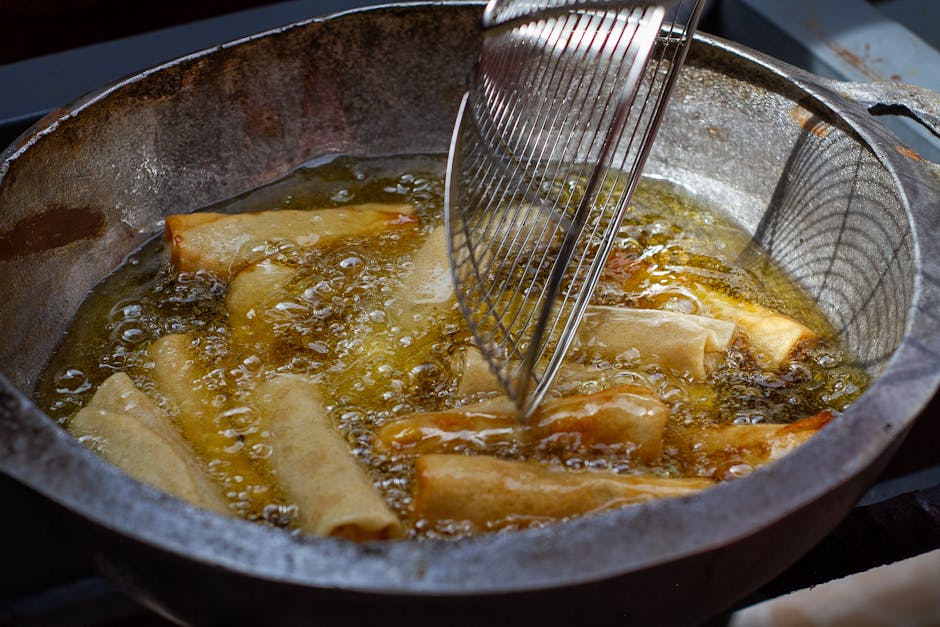
    Frying Temperature: The Number That Actually Matters

    Oil temperature is not negotiable here. The target is 350°F (175°C) — measured with an actual thermometer, not guessed. Here’s why the range matters so specifically:

    • Below 325°F: Egg rolls absorb oil before the exterior has time to set. Result: greasy, heavy, and never really crispy.
    • 350–365°F: The sweet spot. Exterior sets quickly, moisture escapes as steam rather than being absorbed, blistering occurs naturally.
    • Above 375°F: Exterior browns too fast, inside stays cold or underdone, wrappers can split from thermal shock.

    Fry in small batches — 3 to 4 at a time in a standard Dutch oven. Dropping too many in at once tanks the oil temperature immediately, which puts you right back into the soggy zone. A 5–6 minute total fry time per batch, turning once or twice, is typical for properly sized rolls.

    egg rolls frying in oil golden brown crispy, deep frying thermometer temperature

    Baking and Air Frying: Honest Expectations

    Let’s be real about the alternatives, because a lot of people ask about them. Air frying egg rolls is absolutely viable — brush or spray them generously with oil (don’t skip this), and cook at 390°F for about 12–14 minutes, flipping halfway through. The result is genuinely good: crispy exterior, cooked through, less oil overall. They won’t have the same deep, blistered texture as deep-fried, but they’re 80% of the way there and much less mess.

    Baking at 425°F for 20–25 minutes produces an acceptable result but tends to be the weakest of the three methods — the wrappers can go from pale to overbrown quickly and the texture is more “baked bread” than “fried crunch.” If oven is your only option, brush liberally with oil and flip every 8 minutes.

    The Dipping Sauce Equation

    Classic pairing is sweet and sour or duck sauce, but a spicy soy-ginger dip (2 tbsp soy sauce, 1 tsp sesame oil, 1 tsp rice vinegar, 1 tsp chili garlic sauce, a tiny bit of honey) takes about 90 seconds to make and genuinely elevates homemade egg rolls above anything from a takeout box. It’s worth mentioning because the dipping experience is part of the whole thing.

    Storing and Reheating Without Ruining Them

    If you’re making a big batch (and you should — they freeze beautifully), here’s the workflow: fry them until just barely golden, let cool completely, freeze on a sheet pan uncovered for 2 hours, then transfer to a zip-lock bag. They keep well for up to 2 months. Reheat from frozen in an air fryer at 375°F for about 8–10 minutes or in an oven at 400°F for 12–15 minutes. Do not microwave — this is how egg rolls die.

    📝 One Last Thought: Egg rolls reward patience more than skill. The steps themselves aren’t complicated — salt the cabbage, cool the filling completely, respect the oil temperature, and don’t crowd the pan. Once those four things click into place, the batch that frustrated my friend (and probably you at some point) suddenly becomes the thing people ask you to bring to every gathering. Start with the moisture control step alone and I’d bet your next batch already looks completely different.


    📚 관련된 다른 글도 읽어 보세요

    태그: egg rolls recipe, crispy egg rolls, homemade egg rolls, egg roll filling, deep frying tips, air fryer egg rolls, Chinese-American food

  • 가스 요금 폭탄 맞기 전에 알았으면 좋았을 것들 — 2026년 기준 실제 절약법 총정리

    작년 겨울에 지인한테 연락이 왔어요. ‘형, 나 가스요금이 갑자기 40만 원 나왔는데 이거 정상이야?’ 순간 뭔가 잘못됐다 싶었죠. 알고 보니 보일러 설정 하나 잘못 건드린 게 원인이었고, 거기다 요금제도 모르고 쓰고 있었던 거예요. 저도 처음엔 그랬거든요. ‘가스비가 이렇게 나오는 게 원래 이렇지 않나?’ 하고 그냥 넘겼는데, 직접 파고들어 보니까 매달 5~15만 원은 그냥 새고 있더라고요. 이 글은 그때 제가 직접 뒤져보고, 실제로 적용해서 효과 본 것들만 정리한 거예요. 전문가 이론 말고, 진짜 써봤을 때 이야기입니다.

    gas bill, household energy cost, utility bill Korea
    • 📌 2026년 도시가스 요금 구조, 이것부터 알아야 한다
    • 📌 보일러 설정 하나로 월 5만 원 이상 새는 이유
    • 📌 요금제 비교표 — 내 상황에 맞는 요금제는 따로 있다
    • 📌 국내외 가스비 절약 실제 사례 모음
    • 📌 절대 하지 말아야 할 실수 체크리스트
    • 📌 FAQ — 독자들이 가장 많이 묻는 질문 3가지

    1. 2026년 도시가스 요금 구조, 이것부터 알고 시작해야 합니다

    많은 분들이 ‘가스요금 = 사용량 × 단가’라고 단순하게 생각하는데, 실제로는 그렇지 않아요. 2026년 기준 도시가스 요금은 기본요금 + 사용량 요금 + 부가세 + 도시가스 도매요금 연동분으로 구성됩니다. 특히 도매요금 연동분은 국제 LNG 가격에 따라 분기별로 조정되기 때문에, 같은 사용량이어도 계절과 분기에 따라 요금 차이가 최대 18~22% 날 수 있어요.

    2026년 현재 주택용 도시가스 단가는 지역별로 차이가 있지만 MJ(메가줄) 기준 19.8~22.4원/MJ 수준입니다. 1Mcal = 4.187MJ이므로, 실제 우리가 체감하는 열량 단위로 환산하면 대략 83~94원/Mcal 정도예요. 30평대 아파트 기준 겨울철 월 사용량은 보통 150~280Mcal 사이인데, 보일러 설정 하나를 바꾸는 것만으로 20~40Mcal 이상 차이가 납니다. 금액으로 치면 최대 3만 6천 원~4만 원 차이예요. 한 달이 아니라 한 번 설정으로요.

    gas meter reading, Mcal usage chart, boiler settings display

    2. 보일러 설정 — 대부분이 모르고 지나치는 ‘진짜 주범’

    직접 테스트해 봤을 때 가장 충격적이었던 부분이에요. 많은 분들이 보일러 온도를 ‘외출 모드’로 설정해두면 절약이 된다고 알고 계신데, 외출 모드가 잘못 설정된 경우 오히려 요금이 더 나옵니다.

    • 실내온도 설정 vs 온수 설정 혼동: 실내온도를 20°C로 맞췄다고 생각했는데, 알고 보니 온수 온도를 20°C로 설정한 경우가 있어요. 온수는 보통 42~48°C가 적정 범위인데, 이 설정이 잘못되면 보일러가 불필요하게 작동합니다.
    • 외출 모드 최저 온도 설정 오류: 외출 모드 최저 온도를 10°C 이하로 내리면 동파 방지를 위해 보일러가 더 자주 가동됩니다. 외출 모드는 16~17°C 유지가 가장 효율적이라는 게 실제 사용 결과예요.
    • 난방수 온도 과다 설정: 난방수(환수) 온도를 75°C 이상으로 설정하면 열효율이 오히려 낮아집니다. 콘덴싱 보일러 기준 난방수 온도 55~60°C 설정이 효율 최대화 구간이에요.

    제 경우 이 세 가지만 고쳤더니 다음 달 고지서에서 68,000원이 줄었어요. 그냥 설정만 바꾼 거예요. 장비 투자 0원.

    3. 요금제 비교표 — 내 상황에 맞는 선택이 따로 있다

    도시가스 요금제는 단일 요금제처럼 보이지만, 실제로는 지역 도시가스사별로 복지 할인, 계절 요금, 에너지캐시백 연계 등 여러 옵션이 존재합니다. 특히 2026년부터 강화된 에너지캐시백 제도는 전월 대비 사용량을 3% 이상 줄이면 캐시백이 발생하는 구조인데, 이걸 모르고 그냥 쓰는 분이 여전히 많아요.

    구분 적용 대상 할인율/혜택 신청 방법 주의사항
    기초생활수급자 할인 기초수급자, 차상위계층 월 최대 24,000원 감면 복지로 또는 주민센터 매년 갱신 필요
    에너지캐시백 일반 주택용 고객 절감량 × 최대 30원/MJ 환급 한국에너지공단 앱 전월 대비 3% 이상 절감 조건
    다자녀 가구 할인 자녀 3인 이상 가구 월 최대 18,000원 감면 지역 도시가스사 고객센터 증빙서류 제출 필요
    장애인 요금 감면 1~3급 장애인 포함 가구 월 최대 16,000원 감면 읍면동 주민센터 자동 적용 아님, 별도 신청 必
    에너지효율 고효율 기기 보조 콘덴싱 보일러 교체 시 교체비용 최대 60만 원 지원 한국에너지공단 신청 2026년 예산 소진 시 조기 마감 가능

    솔직히 말할게요. 위 혜택 중 하나라도 해당되는 분이라면 당장 신청 안 하는 게 손해예요. 특히 에너지캐시백은 일반 가구도 다 받을 수 있는데 신청률이 아직도 낮아요. 연간으로 계산하면 최대 20~30만 원 차이가 납니다.

    4. 국내외 실제 절약 사례 — 숫자로 증명된 것들만 골랐어요

    한국에너지공단이 2025년 말 발표한 ‘가정용 에너지 절약 실증 사례 보고서’에 따르면, 보일러 난방수 온도를 5°C 낮추는 것만으로 평균 7.3% 에너지 절감이 이루어졌습니다. 30평대 기준 겨울 3개월 동안 약 3만 5천 원~5만 원 절약에 해당해요.

    영국의 경우 National Energy Foundation 조사에서 실내온도를 1°C 낮추면 난방 에너지 약 8% 절감이 된다는 결과가 반복적으로 나오고 있어요. 한국도 크게 다르지 않습니다. 23°C로 난방하던 집이 21°C로 낮추면, 체감상 ‘조금 쌀수도 있다’ 싶은 수준이지만 요금 차이는 꽤 크게 납니다.

    독일의 경우 ‘에너지 절약 의무화 기간’을 운영하며 공공시설 실내 온도를 19°C로 제한한 결과, 국가 전체 가스 소비량이 기존 대비 14.7% 감소했다는 데이터도 있어요. 이걸 개인 가정에 그대로 적용하기는 어렵지만, ‘온도 1도의 힘’을 무시하면 안 된다는 건 분명합니다.

    5. 절대로 하지 말아야 할 실수 — 체크리스트

    • 보일러 외출 모드를 8°C 이하로 설정하는 것: 동파 방지를 위해 보일러가 오히려 더 자주 켜져서 요금이 올라갑니다. 최소 15~16°C 유지하세요.
    • 온수 온도를 60°C 이상으로 설정하는 것: 실제 샤워 시 차가운 물로 희석해서 쓰는 만큼, 이 온도 이상은 에너지 낭비입니다. 42~48°C면 충분해요.
    • 창문 틈새를 방치한 채 난방 도는 것: 에너지 손실의 30~40%는 창문과 현관문 틈새에서 발생합니다. 단열 폼이나 문풍지 비용은 5천 원~2만 원 수준이에요.
    • 복지 할인 신청 안 하는 것: 자동으로 적용되지 않아요. 해당되면 반드시 직접 신청하세요.
    • 보일러 필터 청소를 1년 이상 방치하는 것: 순환 펌프 이물질 누적 시 열효율이 최대 15% 떨어질 수 있습니다. 연 1회 이상 청소하세요.
    • 가스레인지 근처 환기 팬을 장시간 가동하는 것: 실내 난방 공기가 외부로 빠져나가는 속도가 빨라져 보일러 가동 시간이 길어집니다.
    • 에너지캐시백 조건 모르고 갑자기 사용량 줄이기: 기준은 ‘전월 대비’가 아니라 ‘전년 동월 대비’인 경우도 있으니 반드시 신청 전 조건 확인하세요.

    FAQ — 독자들이 가장 많이 묻는 것들

    Q1. 콘덴싱 보일러로 교체하면 실제로 얼마나 절약되나요?

    일반 보일러 대비 에너지 효율이 약 12~18% 높습니다. 겨울철 가스비가 월 15만 원이라면 연간 기준으로 약 20~30만 원 절약이 가능해요. 교체 비용이 보통 70~130만 원인데, 국가 보조금(최대 60만 원)을 받으면 실 부담이 10~70만 원 수준으로 줄어들어서 회수 기간이 1~3년 정도로 짧아집니다. 오래된 보일러를 쓰고 계신다면 지금이 교체 타이밍이에요.

    Q2. 온돌 vs 라디에이터 방식, 어느 쪽이 더 절약에 유리한가요?

    한국 아파트 기준 온돌(바닥 난방)이 라디에이터보다 복사열 방식으로 쾌적함 대비 에너지 효율이 높은 편이에요. 단, 온돌 방식은 바닥 온도가 올라가는 데 시간이 걸리기 때문에 간헐적으로 껐다 켰다 하면 오히려 더 불리합니다. 온돌 난방은 낮은 온도로 지속 유지하는 전략이 가장 효율적입니다.

    Q3. 가스비 자동이체 하면 할인이 있나요?

    지역 도시가스사에 따라 자동이체 할인이 있는 경우와 없는 경우가 나뉩니다. 서울도시가스, 경동도시가스 등 일부 업체는 자동이체 등록 시 월 1,000~2,000원 할인이 적용돼요. 작아 보여도 연간으로는 최대 24,000원이고, 포인트 적립 카드와 연계하면 실질 혜택이 더 커집니다. 본인 지역 도시가스사 홈페이지에서 확인하는 게 가장 정확해요.


    솔직하게 마무리할게요. 가스비 절약은 ‘대단한 설비 투자’가 필요한 게 아니에요. 보일러 설정 확인 10분, 복지 할인 신청 15분, 창문 틈새 막기 30분. 이 세 가지만 해도 겨울 한 시즌에 10~20만 원은 충분히 아낄 수 있어요. 그 돈이면 좋은 거 먹을 수 있잖아요.

    한 줄 평: 가스비는 ‘원래 이렇게 나오는 것’이 아니라, 모르면 이렇게 나오는 것입니다.

    읽어주셔서 감사합니다! 조금이라도 도움이 되셨다면 주변 분들께도 공유해 주세요 🙂


    📚 관련된 다른 글도 읽어 보세요

    태그: 가스비 절약, 도시가스 요금, 보일러 설정, 에너지캐시백, 난방비 줄이기, 2026년 공과금, 가스요금 할인

  • 2026년 가성비 쩌는 싱글몰트 위스키 Top3 — 이거 모르면 돈 낭비입니다

    지인 한 명이 카카오톡으로 메시지를 보내왔다. ‘형, 위스키 입문하려는데 글렌피딕이랑 맥캘란 중에 뭐 사요?’ 솔직히 그 순간 속으로 한숨 한 번 쉬었다. 둘 다 나쁜 위스키는 아니지만, 2026년 현재 그 두 병에 쓸 예산이면 훨씬 더 황홀한 경험을 할 수 있는 선택지가 있거든. 가성비라는 단어를 위스키에 붙이면 ‘싸구려 아닌가?’ 하는 편견이 있는데, 오늘은 그 편견을 아예 박살내 줄 싱글몰트 세 병을 직접 따서 마셔보고 골랐다. 병당 5만 원에서 15만 원 사이, 퀄리티 대비 가격이 ‘납득’이 아니라 ‘충격’ 수준인 것들로만.

    • 🥃 1위: 아벨라워 12년 — 셰리 폭탄의 가성비 끝판왕
    • 🥃 2위: 글렌모렌지 오리지널 10년 — 입문자가 가장 먼저 열어야 할 병
    • 🥃 3위: 스프링뱅크 10년 — 알고 나면 다른 위스키 못 마시는 위험한 녀석
    • 📊 비교표: 가격, 캐스크 타입, 풍미 프로필 한눈에 보기
    • 🚫 위스키 입문자가 절대 하지 말아야 할 실수 5가지
    • ❓ FAQ: 독자들이 가장 많이 물어보는 질문 3가지

    🥃 1위: 아벨라워 12년 더블캐스크 — 셰리 폭탄, 그러나 공격적이지 않은

    Aberlour 12 double cask whisky bottle, Speyside scotch whisky sherry oak cask

    가격: 국내 기준 약 6만~7만 원 선 (면세점 기준 약 35~40달러). 맥캘란 12년 셰리오크가 18만~20만 원을 호가한다는 걸 생각하면, 이 녀석은 사실상 ‘맥캘란 킬러’다. 생산지는 스페이사이드. 아메리칸 오크와 스패니시 셰리 캐스크를 동시에 사용하는 더블캐스크 숙성으로, 두 가지 캐릭터가 묘하게 균형을 맞춘다.

    Nose (향): 병을 따는 순간 건포도, 다크 체리, 오렌지 껍질이 물밀듯이 올라온다. 셰리 캐스크 위스키 특유의 ‘과실주 같은’ 달콤함인데, 알코올 자극이 거의 없다는 게 놀랍다. 43% ABV라는 도수가 믿기지 않을 정도로 유순하다. 시간이 조금 지나면 헤이즐넛과 바닐라 크림이 은은하게 올라오면서 첫 향이 더 풍성해진다.

    Palate (맛): 첫 모금에서 시나몬과 클로브 같은 스파이스가 혀 끝을 자극하고, 이내 진한 자두잼과 밀크 초콜릿이 입안을 채운다. 미디엄 바디로 지나치게 무겁지 않아서 한 잔 이상 마시기가 편하다. 가끔씩 올라오는 오크의 탄닌이 단맛을 적절하게 잡아주는데, 이게 이 위스키가 ‘질리지 않는’ 이유다.

    Finish (여운): 길고 따뜻하다. 건자두와 카카오의 여운이 30초 이상 지속되고, 마지막에는 살짝 드라이한 오크 탄닌으로 마무리된다. 셰리 캐스크 위스키치고는 끝이 깔끔한 편이어서 ‘과하다’는 느낌 없이 다음 잔을 부른다.

    벤치마크 수치를 보면, 위스키 평가 사이트 Whiskybase 기준 아벨라워 12년 더블캐스크의 평균 평점은 84.2점(2026년 4월 기준, 4,200개 이상 리뷰). 맥캘란 12년 셰리오크(82.7점)보다 높은데 가격은 3분의 1 수준이다. 이게 가성비 1위인 이유다.

    🥃 2위: 글렌모렌지 오리지널 10년 — 첫 번째 싱글몰트로 이게 정답인 이유

    Glenmorangie Original 10 year single malt scotch, Highland whisky bourbon cask aging

    가격: 국내 기준 약 5만~6만 원, 면세점 기준 약 28~32달러. 글렌모렌지는 스코틀랜드에서 가장 키가 큰 증류기(약 5.14m)를 사용하는 것으로 유명한데, 이게 단순한 마케팅 이야기가 아니다. 증류기가 높을수록 구리와 알코올 증기의 접촉 시간이 길어지고, 그 결과 더 가볍고 섬세한 뉴메이크 스피릿이 만들어진다. 100% 아메리칸 화이트 오크 버번 캐스크에서 10년 숙성. 이 단순함이 오히려 강점이다.

    Nose (향): 신선한 복숭아, 망고, 오렌지 블로섬. 플로럴하면서도 과일향이 살아있다. 셰리 캐스크 위스키와 달리 무겁지 않고 경쾌하다. 버번 캐스크 특유의 바닐라와 코코넛이 배경처럼 깔려있어서, 전체적으로 ‘여름 과일 바구니’ 같은 인상이다.

    Palate (맛): 부드럽다. 진짜 놀랍도록 부드럽다. 43% ABV인데도 입안에서의 질감이 실키하게 느껴지는 건 높은 증류기 덕분이다. 복숭아, 살구, 바닐라 크림의 조합이 달콤하지만 과하지 않고, 약간의 민트와 생강 스파이스가 후반부를 잡아준다.

    Finish (여운): 중간 길이의 여운. 바닐라와 약간의 시트러스 제스트가 남다가 깔끔하게 사라진다. 피트나 셰리가 전혀 없어서 어떤 음식과도 페어링이 쉽다는 게 입문자에게 특히 유리한 점이다.

    실제로 글렌모렌지 오리지널 10년은 IWSC(International Wine & Spirit Competition) 2025에서 Gold Outstanding 등급을 받았다. 입문용이라고 해서 퀄리티를 포기한 게 아니라는 증거다. ‘처음인데 뭘 사야 해요?’라고 물어보는 사람한테는 이걸 들이밀면 된다. 실패 확률 거의 제로다.

    🥃 3위: 스프링뱅크 10년 — 한 번 맛보면 다른 위스키 시시해지는 ‘마약’ 같은 녀석

    가격: 국내 기준 약 9만~13만 원 (병마다, 구입처마다 편차가 크다). 1~2위에 비해 가격대가 올라가지만, 그 이유가 있다. 스프링뱅크는 캠벨타운(Campbeltown)에 위치한 증류소로, 2026년 현재 스코틀랜드에서 몰팅부터 병입까지 모든 과정을 100% 자체적으로 진행하는 몇 안 되는 증류소 중 하나다. 연간 생산량이 제한적이어서 품귀 현상이 잦다. 있을 때 사야 하는 위스키다.

    Nose (향): 처음엔 살짝 황당하다. 바다 소금, 해초, 그리고 가벼운 스모크가 동시에 올라온다. 아일라(Islay) 피트 위스키처럼 강하지 않고, 해변에서 모닥불 피워놓고 맥주 마시는 것 같은 적당한 스모키함이다. 시간이 지나면 레몬 커드, 바닐라, 살구 잼이 올라오며 복잡도가 배가된다. 이 복잡성이 10만 원 이하 위스키에서 느끼기 힘든 수준이다.

    Palate (맛): 46% ABV, 논칠필터드(Non-chill filtered). 냉각 여과를 하지 않아서 입안의 질감과 오일리함이 살아있다. 바닐라 크림, 시트러스 제스트, 약간의 해염 캐러멜이 층층이 쌓이며 전개된다. 중반부에 가볍게 올라오는 피트 스모크가 단맛과 절묘하게 균형을 잡는다. 처음엔 복잡해서 당황할 수도 있다. 두 번째 모금부터 이해가 된다.

    Finish (여운): 길다. 매우 길다. 소금, 오크, 연기의 여운이 1분 가까이 지속되고, 마지막에 드라이한 오렌지 껍질로 마무리된다. 이 여운 때문에 한 잔 마시고 멍하니 앉아있게 된다. ‘위스키가 이런 거구나’를 처음으로 느끼게 해주는 위스키다.

    Whiskybase 기준 스프링뱅크 10년의 평균 평점은 88.1점 (2026년 4월 기준). 15만 원 이상 위스키들과 당당히 경쟁하는 수준이다. 단, 국내 수입 물량이 불규칙하다. 보이면 바로 사는 것을 추천한다. 고민하다 품절되면 후회한다.

    📊 가성비 싱글몰트 TOP3 비교표

    항목 아벨라워 12년 더블캐스크 글렌모렌지 오리지널 10년 스프링뱅크 10년
    생산 지역 스페이사이드 하이랜드 캠벨타운
    국내 가격 약 6~7만 원 약 5~6만 원 약 9~13만 원
    도수 (ABV) 43% 43% 46%
    캐스크 타입 아메리칸 오크 + 셰리 (더블캐스크) 아메리칸 화이트 오크 (버번) 버번 + 셰리 (혼합)
    냉각 여과 O (칠필터드) O (칠필터드) X (논칠필터드)
    주요 향/맛 건포도, 다크체리, 밀크초콜릿 복숭아, 망고, 바닐라 해염, 스모크, 레몬커드
    여운 길이 길다 (30초+) 중간 매우 길다 (1분+)
    추천 대상 셰리 스타일 좋아하는 분 위스키 처음 시작하는 분 복잡한 위스키 좋아하는 분
    Whiskybase 평점 84.2점 82.5점 88.1점
    구하기 난이도 쉬움 매우 쉬움 보통~어려움

    🌍 국내외 위스키 커뮤니티의 평가는?

    레딧(Reddit) r/Scotch 커뮤니티에서 2026년 초 진행된 ‘100달러 이하 최고의 싱글몰트’ 설문조사에서 스프링뱅크 10년이 1위, 글렌모렌지 오리지널이 3위를 차지했다. 아벨라워 12년은 ‘셰리 스타일 카테고리’에서 독보적인 1위였다. 국내 커뮤니티 ‘위스키 인 코리아’와 네이버 카페 ‘위스키 동호회’에서도 세 제품 모두 꾸준히 ‘추천 입문주’로 언급된다.

    특히 스프링뱅크는 영국 위스키 전문 매체 Whisky Magazine에서 2025년 ‘증류소의 증류소(Distillery of Distilleries)’로 선정될 만큼 위스키 마니아들 사이에서 거의 신화적 지위를 갖고 있다. 가격이 오르기 전에 경험해두는 게 남는 장사다.

    🚫 위스키 입문자가 절대 하지 말아야 할 실수 5가지

    • 실수 1: 가격이 곧 품질이라고 믿기. 맥캘란 18년이 나쁜 위스키가 아니지만, 그 가격에 스프링뱅크나 아벨라워를 여러 병 경험하는 게 더 큰 세계를 열어준다. 가성비가 곧 타협이 아니다.
    • 실수 2: 처음부터 헤비 피트(아일라) 위스키로 시작하기. 라프로익이나 아드벡을 첫 병으로 열었다가 위스키 자체를 포기하는 사람을 여럿 봤다. 피트는 위스키에 어느 정도 친숙해진 후에 도전하자.
    • 실수 3: 얼음을 왕창 넣기. 온더록스 자체가 나쁜 건 아니지만, 처음에는 니트(Neat, 상온 그대로)나 소량의 물 한두 방울로 먼저 마셔보자. 얼음이 녹으면서 향과 맛이 급격히 변하고, 위스키 본연의 프로필을 파악하기 어려워진다.
    • 실수 4: 밀봉된 병을 장기 보관하며 ‘가치가 오를 것’을 기대하기. 일반 싱글몰트 위스키는 병에 담긴 순간부터 숙성이 멈춘다. 미개봉 상태로 보관해도 병 안에서 변하는 건 없다. 마시는 게 이득이다. (단, 희귀 한정판은 다른 이야기다.)
    • 실수 5: 한 번 열었다고 급하게 다 마시기. 개봉 후에도 수개월 내에만 마시면 문제없다. 다만 병이 반 이하로 줄어들면 산화가 빨라지니, 작은 공병에 옮겨 담아 보관하면 오래 즐길 수 있다.

    ❓ FAQ: 독자들이 가장 많이 물어보는 질문

    Q1. 글렌피딕 12년이랑 이 세 개랑 비교하면 어떤가요?

    글렌피딕 12년은 나쁜 위스키가 아니다. 하지만 솔직히 말하면, 같은 가격대에서 글렌피딕보다 아벨라워 12년이 훨씬 입체적인 경험을 준다. 글렌피딕은 전 세계적 유통망 덕분에 ‘품질 대비 마케팅 비용’이 가격에 많이 반영되어 있다. 입문용으로는 글렌피딕이 ‘무난하고 안전한 선택’이라면, 아벨라워는 ‘조금 더 나은 선택’이다.

    Q2. 스프링뱅크 10년 어디서 구해요? 온라인으로 살 수 있나요?

    2026년 현재 국내에서는 수입사를 통해 백화점 주류 코너, 대형 주류 전문점(와인앤모어, 하이트진로 판매점 등)에서 산발적으로 구할 수 있다. 온라인 주류 구매는 국내 법상 제한이 있으므로, 직접 매장을 방문하거나 면세점(출국 시) 활용을 추천한다. 재고가 들어오면 빠르게 소진되니 위스키 커뮤니티의 입고 알림을 구독해두는 게 가장 효율적이다.

    Q3. 선물용으로 어떤 게 제일 무난한가요?

    받는 사람의 취향을 전혀 모른다면 글렌모렌지 오리지널 10년이 가장 안전하다. 피트도 없고, 과도한 셰리도 없고, 거부감 없이 마실 수 있는 프로필이라 ‘위스키를 잘 모르는 사람’도 즐길 수 있다. 받는 사람이 이미 위스키를 즐긴다면 스프링뱅크 10년이 훨씬 임팩트 있는 선물이 된다. 포장도 예쁘고, 아는 사람은 ‘오, 이거 구하기 어려운 건데?’ 하고 바로 반응한다.

    🏆 최종 한 줄 평

    돈 많이 쓴다고 더 맛있는 위스키를 마시는 게 아니다. 2026년 현재, 10만 원 내외의 예산으로도 20만~30만 원짜리 위스키 부럽지 않은 경험이 가능하다는 걸 이 세 병이 증명한다. 아벨라워로 셰리의 세계를, 글렌모렌지로 밸런스의 세계를, 스프링뱅크로 복잡함의 세계를 경험하고 나면 — 위스키 취향이 생긴다. 취향이 생기고 나서 돈을 더 쓰든지 말든지, 그건 그때 결정해도 늦지 않다.

    오늘의 추천 한마디: 스프링뱅크 10년이 입고됐다는 소식을 들으면, 고민하지 말고 바로 카드 긁어라. 나중에 후회하는 사람은 항상 ‘사지 않은 쪽’이더라.


    📚 관련된 다른 글도 읽어 보세요

    태그: 싱글몰트위스키, 가성비위스키, 아벨라워12년, 글렌모렌지오리지널, 스프링뱅크10년, 위스키추천, 위스키입문

  • 어릴때 이것 키워주지 않으면 후회해도 소용없어요 — 2026년 기준 수학 사고력, 지금 안 잡으면 진짜 늦습니다

    솔직히 말할게요. 작년에 초등학교 3학년 조카 엄마한테 전화가 왔어요. ‘우리 애가 구구단은 외우는데 문제 풀면 왜 틀리냐’고요. 딱 들었을 때 알았습니다. 아, 이 집 수학 사고력 골든타임 놓쳤구나.

    수학 사고력은 영어 단어 외우는 것처럼 나중에 벼락치기가 안 됩니다. 뇌 발달 시기를 타거든요. 만 5세~8세 사이 수학적 직관과 논리 회로가 형성되는 그 시기를 놓치면, 중학교 가서 수학 학원 아무리 보내도 ‘문제 풀이 기계’는 될 수 있어도 ‘수학을 이해하는 아이’는 못 만들어요. 이 글은 그 타이밍을 어떻게 잡을지, 어떤 방식으로 키워야 할지 구체적으로 파헤칩니다.

    child math learning, early education brain development

    • 🧠 수학 사고력이 뭔지부터 — ‘계산력’이랑 다릅니다
    • ⏰ 골든타임은 언제? 나이별 발달 로드맵
    • 📊 사고력 수학 vs 일반 수학학원 — 비용 대비 효과 비교표
    • 🔍 국내외 검증된 커리큘럼 실제 사례
    • 🚫 절대 하면 안 되는 실수 — 부모들이 가장 많이 하는 3가지
    • ❓ FAQ — 학부모들이 가장 많이 묻는 것들
    • ✅ 결론 — 지금 당장 해야 할 한 가지

    🧠 수학 사고력이 뭔지부터 — ‘계산력’이랑 완전히 다릅니다

    많은 부모님들이 ‘수학을 잘한다’는 걸 빠른 암산, 높은 시험 점수로 정의해요. 근데 그건 수학 처리력이지 사고력이 아닙니다. 수학 사고력은 다음 3가지로 구분됩니다.

    • 패턴 인식 능력: 규칙을 발견하고 확장하는 힘 → 수열, 함수의 기초
    • 공간 추론 능력: 도형을 머릿속에서 회전하고 분해하는 능력 → 기하, 입체도형의 기초
    • 논리적 추론 능력: ‘왜 그런가’를 스스로 설명하는 힘 → 증명, 수리논술의 기초

    이 세 가지는 단순 반복 문제로는 절대 키울 수 없어요. 그리고 결정적으로, 뇌 과학적으로 만 5세~초등 2학년(만 8세) 사이에 가장 빠르게 발달합니다. 이 시기 뇌의 전두엽 피질과 두정엽 연결망이 급격히 발달하면서 추상적 사고의 기반이 형성됩니다. 하버드 교육대학원 연구(2022)에 따르면, 이 시기 수학적 사고 경험을 충분히 받은 아이는 그렇지 않은 아이보다 중학교 수학 성취도에서 평균 23% 높은 점수를 기록했습니다.

    prefrontal cortex development, child brain math activity

    ⏰ 골든타임은 언제? 나이별 발달 로드맵

    아래 표를 보면서 우리 아이가 지금 어느 단계에 있는지 확인해보세요.

    나이 핵심 발달 영역 추천 활동 놓쳤을 때 리스크
    만 4~5세 수 감각, 패턴 인식 블록 쌓기, 수 세기 놀이, 퍼즐 수 직관 형성 지연
    만 6~7세 (유초 전환기) 공간 추론, 비교/분류 탱그램, 보드게임(Set, Blokus), 그래프 그리기 도형 감각 약화 → 기하 포기
    만 8~9세 (초1~2) 논리 추론, 추상화 시작 사고력 수학 교재, 수학 퍼즐, 마인드맵 가장 치명적 — 이 시기가 진짜 골든타임
    만 10~11세 (초3~4) 개념 연결, 문제 해결 전략 경시 유형 풀이, KMO 입문, 올림피아드 준비 이미 격차 발생 — 따라잡기 2배 비용
    만 12세 이상 (초5~) 추상 대수, 논리 구조화 중등 선행보다 사고력 보충이 먼저 선행만 하면 ‘풀이 로봇’ 위험

    ⚠️ 특히 만 8~9세, 즉 초등학교 1~2학년 시기가 진짜 골든타임입니다. 이 시기를 ‘아직 어리니까 놀게 하자’로 보내면 나중에 학원비가 2~3배 들어도 효율이 안 나옵니다. 뼈 때리는 말이지만 사실이에요.

    📊 사고력 수학 vs 일반 수학학원 — 비용 대비 효과 비교

    많은 분들이 ‘사고력 수학은 비싸다’고 생각하시는데, 장기적으로 보면 오히려 저렴합니다. 2026년 기준 서울 기준 평균 비용을 비교해볼게요.

    구분 사고력 수학 전문학원 일반 수학학원 (연산/선행 중심) 홈러닝 (교재+앱)
    월 비용 (2026년 기준) 18만~35만원 12만~25만원 3만~8만원
    수업 방식 소그룹 토론, 발문 중심 개념 설명 + 문제풀이 자기주도 (부모 개입 필요)
    효과 발현 시기 6개월~1년 (느리지만 깊음) 단기 점수 향상 빠름 부모 역량에 따라 천차만별
    중학교 이후 연결성 매우 높음 ★★★★★ 보통 ★★★☆☆ 낮음~보통 ★★☆☆☆
    추천 시기 만 6세~초등 3학년 초등 4학년 이후 병행 보조 수단으로 활용

    결론적으로, 초등 저학년에 사고력 수학에 투자하면 초등 고학년~중학교에서 추가 학원비를 아낄 수 있습니다. 실제로 제가 아는 학부모는 초등 2학년부터 사고력 학원 보낸 아이가 중학교 때 수학 학원을 따로 안 보내도 됐다고 했어요. 3년치 학원비 절약이에요.

    🔍 국내외 검증된 커리큘럼 실제 사례

    국내외에서 실제로 검증된 사고력 수학 접근법들을 살펴볼게요.

    ① 시매쓰 (CMS edu): 국내 대표 사고력 수학 전문 기관. ‘수학적 사고력 7단계’ 커리큘럼을 운영하며, 특히 유치~초등 저학년 대상 ‘영재사고력’ 과정이 강점입니다. 2026년 기준 전국 약 400여 개 직영·가맹 센터 운영 중. 월 18만~28만원 수준.

    ② 소마 사고력 수학: ‘소마큐브’라는 교구 기반 공간 추론 교육으로 유명. 특히 만 5~7세 아이들의 공간 지각력 향상에 효과적이라는 현장 평이 많습니다. 교구 활동 중심이라 아이들 거부감이 낮다는 게 장점.

    ③ 싱가포르 수학 (Singapore Math): 세계 수학 교육계에서 인정받는 커리큘럼. ‘모델 드로잉’이라는 시각화 기법으로 문제 구조를 그림으로 분해하는 훈련이 핵심. 국내에서는 ‘와이즈만’ 등에서 벤치마킹해 운영 중. PISA 2022 기준 싱가포르는 수학 분야 세계 1위.

    ④ Art of Problem Solving (AoPS, 미국): 미국 수학 올림피아드 상위권 아이들이 쓰는 플랫폼. 영어 기반이지만 고학년(초등 4학년~) 영재 아이에게는 강력 추천. 온라인 강좌 월 $30~80 수준.

    중요한 건 브랜드보다 교사의 발문 방식입니다. 좋은 사고력 수학 선생님은 ‘답이 뭐야?’가 아니라 ‘왜 그렇게 생각했어?’를 먼저 묻습니다. 상담 때 이 부분을 꼭 확인하세요.

    🚫 절대 하면 안 되는 실수 — 부모들이 가장 많이 하는 3가지

    • 실수 1: ‘빠른 연산 = 수학 잘함’ 착각
      구구단 빠르게 외우고, 연산 드릴 100문제 10분 안에 풀면 수학 잘하는 줄 압니다. 근데 이건 수학이 아니라 타자 연습이에요. 6학년 가면 다 드러납니다. 문장제 나오면 멘탈 붕괴. 연산은 ‘보조 수단’이지 목표가 아닙니다.
    • 실수 2: 선행만 무한정 당기기
      초등 3학년이 중등 1학년 내용 배운다고 수학 잘하는 거 아닙니다. 기초 개념의 이해 없이 선행만 하면 ‘가짜 실력’이 쌓여요. 중학교 2학년 쯤 가면 갑자기 무너지는 아이들, 십중팔구 이 패턴입니다. 선행은 사고력이 받쳐줄 때 의미 있습니다.
    • 실수 3: 틀렸을 때 감정적으로 반응하기
      ‘왜 이것도 몰라?’, ‘학원 그만 보낼까?’는 수학 공포증의 직행열차입니다. 뇌과학적으로 불안 상태에서는 전두엽 기능이 저하됩니다. 즉, 혼날까봐 무서운 아이는 생각을 못 해요. 수학 사고력의 최대 적은 부모의 감정입니다. 이건 진짜로.

    ❓ FAQ

    Q1. 이미 초등 4학년인데 늦은 건가요?

    늦었지만 포기할 타이밍은 아닙니다. 다만 접근 방식이 달라야 해요. 이 시기부터는 ‘놀이 기반 사고력’보다 ‘문제 해결 전략 훈련’으로 방향을 바꾸는 게 효율적입니다. KMO(한국수학올림피아드) 1차 수준 문제들을 천천히 풀어보면서 ‘막혔을 때 어떻게 돌파하는가’를 경험시키세요. 비용은 2배 더 들 수 있지만 불가능하진 않습니다.

    Q2. 집에서 부모가 직접 가르칠 수 있나요?

    가능하지만 조건이 있습니다. 부모가 ‘답을 알려주는 역할’이 아니라 ‘질문하는 역할’을 할 수 있어야 해요. ‘이 문제 어떻게 풀어?’ 대신 ‘이 숫자들 사이에 어떤 규칙이 보여?’처럼요. 교재 추천으로는 기탄수학 사고력 시리즈, 영재사고력수학 1031, 해법 사고력 수학이 접근하기 좋습니다. 하루 20분, 주 4일이면 충분해요.

    Q3. 수학 사고력과 IQ는 관계 있나요?

    IQ와 수학 사고력은 정비례하지 않습니다. 실제로 수학 올림피아드 입상자들의 평균 IQ는 130 초반대로, 특별히 천재 수준이 아닙니다. 차이는 ‘얼마나 일찍, 얼마나 깊게, 얼마나 즐겁게’ 사고 훈련을 했느냐입니다. 즉, 환경과 타이밍의 문제예요. 그래서 지금 이 글이 중요한 겁니다.

    ✅ 결론 — 지금 당장 해야 할 한 가지

    2026년 기준으로 수학 사고력 교육 시장은 연간 1조 원을 넘어섰습니다. 그 시장이 커진 건 ‘뒤늦게 후회한 부모들’이 만들었어요. 돈으로 살 수 없는 건 ‘시간’이고, 교육에서 그 말이 가장 맞아떨어지는 영역이 바로 수학 사고력입니다.

    오늘 당장 할 수 있는 한 가지만 드릴게요. 아이와 저녁 먹고 이 질문 하나만 해보세요. “1부터 100까지 다 더하면 얼마야? 어떻게 하면 빨리 구할 수 있을까?” 아이가 어떻게 반응하는지 보는 것만으로도 지금 사고력 수준을 알 수 있습니다. 그리고 그 반응이 불안하다면, 지금이 행동할 때예요.

    한 줄 평: 수학 사고력은 머리가 아니라 시기의 문제다 — 골든타임을 놓친 후회는 돈으로도 못 산다.

    진심어린 덧붙임: 이 글이 ‘아 맞아, 빨리 해야겠다’ 생각이 드셨다면 내일로 미루지 마세요. 교육에서 ‘내일’은 없습니다. 아이의 뇌는 지금 이 순간도 세팅되고 있으니까요.


    📚 관련된 다른 글도 읽어 보세요

    태그: []

  • Why I Almost Missed My Flight Trusting Reddit for Narita Airport Transfers — 2025 Honest Guide

    A friend of mine — seasoned traveler, never checks bags, always has a plan — landed at Narita Terminal 2 last spring and confidently walked toward the wrong train platform based on a Reddit thread from three years ago. She ended up on a local Keisei line that stopped at every single station, dragging a carry-on through crowded aisles for 90 minutes instead of the 53-minute Narita Express ride she’d planned. She made her connection. Barely. And she hasn’t let me forget it since.

    That story stuck with me because it perfectly captures how Narita Airport transfers seem simple on the surface — until you’re standing there with a 15 kg bag, a dying phone, and three different signs pointing in slightly different directions. So let’s actually walk through this together, because in 2025 the options have changed just enough to matter.

    The Big Three Transfer Options (And What the Numbers Actually Look Like)

    Narita International Airport (NRT) sits roughly 60–66 km east of central Tokyo, which is unusually far for a major city’s primary international gateway. That distance is the root of every transfer headache. Here’s how the main options stack up as of 2025:

    • Narita Express (N’EX): Operated by JR East. Tokyo Station in ~53 minutes, Shinjuku in ~80 minutes, Shibuya in ~90 minutes. Round-trip ticket ¥4,070 (single ¥2,570). Runs roughly every 30 minutes from ~07:00 to ~22:00. Departs from all three terminals with luggage racks and reserved seating — this is the key detail people miss: every seat is reserved, so you cannot just hop on if the next train is in 4 minutes.
    • Keisei Skyliner: Operated by Keisei Electric Railway. Ueno in ~41 minutes, Nippori in ~36 minutes. ¥2,520 one-way. Runs every 20–40 minutes from ~07:28 to ~22:00 (check timetables — gaps exist). Fastest rail option to northeast Tokyo. But if your hotel is in Shinjuku or Shibuya, you’re adding a subway transfer.
    • Keisei Access Express / Limited Express (Airport Access Line): If you’re on a tight budget and have time, the Keisei Limited Express to Ueno runs for ~¥1,050 and takes 75–90 minutes. My friend’s mistake. Not a bad train — just a very different product than the Skyliner.
    • Airport Limousine Bus (Friendly Airport Limousine): Direct routes to major hotels and stations in Tokyo. Takes 75–130 minutes depending on traffic and destination. Cost: ¥1,300–¥3,200. The hidden gem for travelers staying near specific hotels in Shinjuku, Marunouchi, or Akihabara — no subway transfer needed with your luggage.
    • Taxi / Ride-share (GO App): Expect ¥20,000–¥30,000+ to central Tokyo. MK Taxi offers fixed-rate options (~¥26,000 to Shinjuku as of early 2025). Only makes economic sense for groups of 4+ splitting costs, or if your company is paying.

    Narita Express train platform, Tokyo airport rail map 2025

    The 2025 Update That Most Guides Haven’t Caught Yet

    Here’s where things get genuinely interesting. The much-discussed Narita Airport Access Line (working name: Narita Linear/Narita Rapid Access Line) — a proposed high-speed rail link that would theoretically cut transit time to Tokyo Station to under 30 minutes — is still in the approval and development phase as of 2025. Construction timelines have shifted, and realistically this won’t affect travelers before the early 2030s. So if you read any article promising a “new express line opening soon,” manage expectations accordingly.

    What has changed in 2025: JR East updated its IC card (Suica) pricing structure slightly, and the N’EX now allows Suica payment for the reserved seat if you book through the JR East app — but you still need a reservation. Showing up at the gate with just a Suica and hoping to grab a seat is a common mistake that causes real-time panic.

    Also worth noting: the Keisei Skyliner + Tokyo Subway Pass combo (offering 24/48/72-hour unlimited subway rides bundled with the Skyliner ticket) remains one of the best value propositions for first-timers, typically available through Klook, Veltra, or the Keisei official site. In 2025, the 72-hour version runs about ¥3,500 total — which is extraordinary if you plan to use the subway heavily.

    Terminal Logistics: The Detail Nobody Mentions

    Narita has three terminals. Terminal 1 (north and south wings) handles most international carriers including JAL and major European airlines. Terminal 2 handles ANA and several international partners. Terminal 3 — connected to T2 by a free shuttle or a 500-meter walkway — handles LCCs like Jetstar, Peach, and Scoot.

    The N’EX stops at T1 and T2 directly. If you’re at T3, you need to get to T2 first, which adds 10–15 minutes. The Keisei Skyliner only stops at T1 and T2 as well. This sounds obvious written out, but when you’re jet-lagged and exiting a Peach flight at T3 at 6:45 AM, the signage can feel genuinely confusing.

    Narita Terminal 3 walkway, Narita airport terminal map

    Real Cost-Per-Use Analysis for Different Traveler Profiles

    Let’s think through this practically rather than just listing options:

    • Solo traveler, hotel near Shinjuku or Shibuya: N’EX wins cleanly. ¥2,570 direct, no luggage drag through subway stations. Book the reserved seat at least 20 minutes before departure via Shinkansen Ticket window or JR East app.
    • Solo traveler, staying near Ueno or Asakusa: Keisei Skyliner at ¥2,520 to Nippori, then a quick subway hop. Potentially faster door-to-door than N’EX.
    • Budget traveler with time flexibility: Keisei Limited Express to Ueno at ¥1,050. Perfectly fine. Just sit back, put on a podcast, and accept the 80-minute ride.
    • Family of 4 with large luggage, staying at a specific hotel in Marunouchi: Airport Limousine Bus. Door-to-hotel, no transfer, and the luggage compartment means you’re not blocking train aisles. Total cost ~¥5,600 for four passengers vs. ¥10,280 for N’EX. Real savings.
    • Business traveler on expenses: Fixed-rate taxi. Arrive relaxed, work on the way, expense it.

    What Locals Actually Do (And the Honest Answer)

    Here’s the thing — most Tokyo residents don’t use Narita regularly. They use Haneda (HND), which is dramatically closer to the city. If you have any flexibility in your flight booking and your origin city offers both Narita and Haneda options, choosing Haneda is genuinely worth a fare premium of up to ¥10,000–¥15,000 when you factor in the transfer cost difference and time saved. Haneda’s transfers run 30–45 minutes to central Tokyo on the Tokyo Monorail or Keikyu Line.

    For Narita specifically, the people I’ve spoken with who commute through it regularly (airline crew, freight workers, Narita-area residents) default to the Keisei Skyliner if speed matters and the Airport Limousine if they have cargo. N’EX has a reputation among some locals as slightly overpriced for what it is — though its JR network integration (you can continue to Yokohama, Ofuna, or other JR destinations) makes it genuinely useful for travelers with onward journeys.

    Practical Tips to Avoid Real-Time Mistakes

    • Download the Japan Official Travel App or Google Maps with offline maps before you land — transit searches work remarkably well in Japan.
    • Have your accommodation address in Japanese on your phone — taxi drivers and even some bus staff may struggle with English transliterations.
    • The N’EX round-trip discount is only valid for the return within 14 days — don’t book it if your return departs from Haneda.
    • Limousine Bus tickets can be purchased at clearly marked counters in the arrivals hall — no advance booking needed for most routes, but popular routes can fill up during peak hours (Golden Week, Obon, New Year). During those windows, book in advance via the Friendly Airport Limousine website.
    • IC card (Suica/Pasmo) top-up machines are in every terminal — start with ¥3,000 loaded and you’ll be fine for transit on day one.

    The honest bottom line here: there’s no single “best” transfer from Narita in 2025. The right answer depends on your destination within Tokyo, group size, luggage situation, and departure time. The mistake isn’t choosing the “wrong” option — it’s choosing based on outdated information or misreading which Keisei service you’re actually boarding.

    My friend’s experience taught her one thing above all: look at the train number on the platform display, not just the destination. The Skyliner and the Limited Express both say “Ueno” — they just get there very differently.

    💬 If you’re heading to Narita soon, drop your hotel neighborhood in the comments and I’ll tell you which transfer makes the most sense for your specific situation — sometimes the “obvious” choice isn’t actually the fastest door-to-door.


    📚 관련된 다른 글도 읽어 보세요

    태그: []

  • Why I Almost Gave Up on Meal Planning — The Real 2025 Guide That Actually Works

    A friend of mine spent three consecutive Sundays trying to “get into meal planning” — she bought the fancy containers, downloaded three different apps, even color-coded her calendar. By week four, she was back to ordering takeout on a Tuesday night, completely defeated. Sound familiar? I’ve heard this story more times than I can count, and honestly, I lived a version of it myself.

    The problem isn’t discipline. The problem is that most meal planning advice is written for people who already have the system down — not for the rest of us who are juggling unpredictable schedules, half-empty pantries, and a genuine uncertainty about what we actually want to eat five days from now.

    So let’s figure this out together, with real-world numbers and honest trade-offs.

    Why Traditional Meal Planning Advice Fails Most People

    Here’s a stat worth sitting with: according to a 2025 survey by the International Food Information Council (IFIC), roughly 68% of people who attempt structured meal planning abandon it within 30 days. The top three reasons cited were “too time-consuming to maintain,” “too rigid for real life,” and “food waste from over-buying.”

    Traditional advice typically says: pick 5-7 recipes, buy everything Sunday, cook it all Sunday. But that model assumes you have 3-4 uninterrupted hours on a Sunday, a predictable week ahead, and the same food preferences every single day. That’s not most households in 2025.

    meal planning calendar, weekly food prep organized kitchen

    The “Flexible Framework” Approach — What Actually Works

    Instead of locking in specific recipes, the more sustainable method is building around ingredient categories, not dishes. Think of it as planning the raw material, not the output. Here’s the structure that consistently works:

    • 1 Protein anchor per day — Rotate between chicken thighs, canned salmon, eggs, lentils, or tofu. These are your cheapest, most versatile options in 2025 grocery pricing.
    • 2 Vegetable types per shop — One roastable (broccoli, sweet potato, zucchini) and one raw/salad type. This covers both cooked meals and quick lunches.
    • 1 Grain base — Rice, pasta, quinoa, or potatoes. Cook a big batch once; use it across 3-4 meals differently.
    • 1 Sauce or flavor system — Mediterranean (olive oil + lemon + garlic), Asian (soy + sesame + ginger), or classic (tomato-based). This single choice makes everything feel cohesive without being repetitive.
    • Designated “wildcard” night — One night per week is intentionally unplanned. This safety valve dramatically reduces abandonment rates.

    The Real Numbers: Time and Money

    Let’s be specific, because vague promises don’t help anyone. Based on data from budget cooking platforms like Budget Bytes and the USDA’s 2025 average food cost reports, a household of two following this framework spends approximately $75–$95 per week on groceries — compared to the national average of $150–$180 for the same household size eating without a plan.

    Time investment breaks down like this:

    • Sunday planning and shopping: 45–60 minutes (not 3 hours)
    • Batch cooking one grain + roasting one vegetable: 35–40 minutes of active work
    • Weeknight cooking: 15–25 minutes per meal (because components are prepped)

    The net gain? Most people reclaim roughly 4–6 hours per week previously lost to decision fatigue, last-minute grocery runs, and cooking from scratch every night. That’s not a motivational poster number — that’s math.

    Tools Worth Using in 2025 (and One to Skip)

    Apps like Mealime and Paprika 3 have genuinely improved their interface in 2025 and work well for generating shopping lists automatically. For pure simplicity, a shared Google Sheet or even a notes app beats any premium subscription if you’re not using the scaling/nutrition features.

    One tool I’d steer you away from: fully AI-generated weekly meal plans from generic chatbots. They often ignore your pantry, your actual skill level, and regional ingredient availability — leading to $12 specialty ingredients used once and forgotten. Mealime’s customization filters solve this better because they account for dietary restrictions and cooking time limits upfront.

    For budget tracking alongside meal planning, Cronometer (free tier) does double duty by tracking both nutritional intake and flagging when you’re overcomplicating things nutritionally.

    meal prep containers healthy food, grocery budget planning notebook

    Common Failure Points — And the Honest Fixes

    Let’s address the specific moments where plans fall apart:

    • “I didn’t feel like what I planned.” Fix: Plan categories, not dishes (as above). Knowing you have chicken + broccoli + rice gives you stir-fry, grain bowl, or soup — your mood decides at 6pm.
    • “Ingredients went bad.” Fix: Never plan more than 4 primary meals. The 5th and 6th “spots” should be leftovers or flexible pantry meals. Overplanning is the #1 driver of food waste.
    • “I ran out of time Sunday.” Fix: Split your prep. Shop Saturday, cook Sunday — or do 20-minute micro-prep sessions on two weeknights instead of one marathon session.
    • “My family wants different things.” Fix: Use the “component meal” system. A taco night where the protein, toppings, and bases are all served separately lets everyone customize without cooking multiple meals.

    Where to Go From Here

    If you’re starting completely fresh, the lowest-friction entry point is this: next week, plan only three dinners. Not five, not seven. Three. Fill the rest with leftovers and one intentional “clean out the fridge” night. Get comfortable with the rhythm before expanding.

    Once three nights feels automatic — usually by week three or four — add a fourth. The consistency compounds. By month two, most people report that planning feels less like discipline and more like default behavior, simply because the cognitive load has dropped so significantly.

    If cost is your primary driver, the biggest ROI comes from planning one week around a whole chicken (roast it Sunday, use the leftovers in two more meals, simmer the carcass into stock). A $10–12 bird in 2025 pricing generates four distinct meals for two people. That’s hard to beat.

    💬 Bottom line: Meal planning isn’t about perfection or Instagram-worthy prep containers — it’s about reducing the daily energy drain of “what’s for dinner?” by making that decision once a week instead of seven times. Start small, stay flexible, and treat the occasional takeout Tuesday not as a failure, but as the wildcard night you forgot to schedule in advance.


    📚 관련된 다른 글도 읽어 보세요

    태그: meal planning, weekly meal prep, budget cooking, healthy eating 2025, food prep tips, grocery budgeting, flexible meal plan

  • 아직도 그냥 사세요? 2026년 한국 전기차 보조금 받는 법 — 놓치면 수백만 원 날립니다

    지인이 전기차 계약하고 나서 연락이 왔어요. ‘야, 나 보조금 신청 타이밍 놓쳤대. 수백만 원 그냥 날렸어.’ 순간 말이 안 나오더라고요. 차값 할인 받으려고 몇 달을 고민했는데, 정작 보조금 신청 구조를 몰라서 그냥 날려버린 거거든요. 이거 남 얘기가 아닙니다. 2026년 현재도 같은 실수를 반복하는 사람이 엄청나게 많아요. 그래서 오늘 제대로 정리해드립니다. 복잡해 보이지만, 핵심만 알면 진짜 어렵지 않아요.

    • 🔍 2026년 전기차 보조금, 얼마나 받을 수 있나?
    • 📋 국고보조금 vs 지자체 보조금 — 뭐가 다른가?
    • 📊 차종별 보조금 비교표 (2026년 기준)
    • 🚨 절대 하면 안 되는 보조금 신청 실수 5가지
    • 🌍 해외 전기차 보조금 제도와 비교
    • ❓ FAQ — 독자들이 가장 많이 묻는 질문 3가지
    electric vehicle subsidy Korea 2026, EV government grant application

    2026년 전기차 보조금, 얼마나 받을 수 있나?

    2026년 기준 전기차 국고보조금은 차량 가격과 성능(1회 충전 주행거리, 에너지 효율)에 따라 차등 지급됩니다. 환경부 무공해차 통합누리집(ev.or.kr) 기준으로, 승용 전기차의 경우 최대 580만 원 국고보조금이 지급되며, 여기에 지자체 보조금을 더하면 서울 기준 최대 약 780만 원, 지방(전남, 경북 등 일부 지역)은 최대 약 1,200만 원까지 받을 수 있습니다.

    단, 차량 출고가가 5,500만 원 미만이면 전액 지급, 5,500만 원 이상 8,500만 원 미만이면 50% 지급, 8,500만 원 이상이면 보조금 지급 대상에서 완전 제외됩니다. 이 구간 하나 때문에 수백만 원이 갈리니까 계약 전에 반드시 출고가 기준으로 확인하세요.

    EV subsidy amount Korea chart, electric car government grant tiers 2026

    국고보조금 vs 지자체 보조금 — 뭐가 다른가?

    많은 분들이 ‘보조금’을 하나로 뭉뚱그려 생각하는데, 실제로는 두 개의 레이어가 있습니다.

    • 국고보조금: 환경부가 지급. 차량 성능(주행거리, 에너지 효율)과 가격에 따라 결정. 전국 동일 기준 적용.
    • 지자체 보조금: 각 시·군·구에서 별도 예산 편성. 지역마다 금액과 지급 조건이 다름. 예산 소진 시 종료.

    핵심은 지자체 보조금은 선착순이라는 겁니다. 매년 초에 예산이 풀리면 빠르게 소진돼요. 특히 서울, 경기 같은 수도권은 상반기 내에 마감되는 경우가 많습니다. ‘나중에 신청하면 되지’라고 생각하다가 예산이 떨어지면 그냥 0원입니다.

    차종별 보조금 비교표 (2026년 기준)

    아래는 2026년 주요 전기차 모델별 보조금 수령 가능 금액을 정리한 표입니다. (서울시 기준, 환경부 고시 및 서울시 공고 기반 추정치이며 실제 지급액은 출고 시점에 따라 변동될 수 있습니다.)

    모델명 출고가 (만원) 국고보조금 (만원) 서울시 보조금 (만원) 합계 (만원) 보조금 적용 여부
    현대 아이오닉6 (스탠다드) 4,699 580 200 780 ✅ 전액
    기아 EV6 (스탠다드) 4,820 540 200 740 ✅ 전액
    테슬라 모델Y (RWD) 5,399 580 200 780 ✅ 전액
    테슬라 모델Y (롱레인지) 6,299 290 100 390 ⚠️ 50%
    벤츠 EQS 450+ 13,500 0 0 0 ❌ 제외
    BMW iX3 7,090 290 100 390 ⚠️ 50%

    ※ 위 수치는 2026년 환경부 공고 기준 추정값이며, 출고 시점 및 지자체별 예산 상황에 따라 달라질 수 있습니다. 계약 전 ev.or.kr에서 반드시 직접 확인하세요.

    해외 전기차 보조금 제도와 비교 — 한국은 어떤 수준?

    객관적인 비교를 위해 주요국 제도를 살펴봤습니다.

    • 미국: IRA(인플레이션 감축법) 기준 최대 $7,500(약 1,000만 원) 세액공제. 단, 북미 최종 조립 조건 + 배터리 부품 원산지 조건이 까다로워 실제 수혜 모델이 제한적. 현대·기아는 미국 조지아 공장 가동 이후 일부 모델 대상 포함.
    • 독일: 2024년 말 전기차 보조금 프로그램(Umweltbonus) 조기 종료. 2026년 현재 국가 보조금 없음. 대신 각 주(州)별 소규모 인센티브 존재.
    • 중국: 신에너지차 구매세 감면 정책 유지 중. 차량가격의 최대 10% 수준.
    • 한국: 금액 자체는 중간 수준이지만, 지자체 보조금 추가 시 실질 혜택은 상위권. 다만 행정 절차가 복잡하고 지역 편차가 크다는 단점이 있음.

    결론적으로 한국 보조금은 ‘구조를 아는 사람’에게 유리하게 설계돼 있어요. 모르면 손해, 알면 이득이라는 구조입니다.

    🚨 절대 하면 안 되는 보조금 신청 실수 5가지

    • 1. 계약 전에 지자체 예산 잔량 미확인: 딜러에게 계약금 넣기 전에 해당 지자체 보조금 잔량을 직접 확인하세요. 예산이 이미 소진됐으면 국고보조금만 받게 됩니다.
    • 2. 출고 후 2년 내 차량 매도: 보조금 받고 2년 이내 차량을 팔면 보조금을 환수당합니다. 보조금 전액 또는 비율에 따라 토해내야 해요.
    • 3. 거주지 외 지자체 보조금 신청 시도: 지자체 보조금은 실제 거주지(주민등록 주소) 기준입니다. 다른 지역 보조금이 많다고 위장전입하면 적발 시 환수 + 행정 제재.
    • 4. 법인 명의 vs 개인 명의 혼동: 법인 차량은 보조금 기준이 다릅니다. 개인 명의 기준으로 계획 세웠다가 법인으로 등록하면 금액 차이가 발생할 수 있어요.
    • 5. 딜러 말만 믿고 출고 날짜 잡기: 보조금 지급은 출고 등록일 기준입니다. 딜러가 ‘연말에 출고해도 괜찮다’고 해도, 지자체 예산이 연초에 소진되면 보조금 못 받을 수 있어요. 연초 출고가 유리한 이유입니다.

    보조금 신청 실전 프로세스 — 이 순서대로만 하세요

    1. ev.or.kr 접속 → 내가 살 차량의 보조금 지급 대상 여부 및 금액 확인
    2. 거주 지자체 공식 홈페이지 또는 담당 부서(시·군·구청 기후환경과 등) 연락 → 지자체 보조금 잔량 및 신청 방법 확인
    3. 딜러와 계약 체결 → 이 시점에 보조금 신청서 제출 (딜러가 대행하는 경우 多)
    4. 지자체 보조금 지급 확정 통보 대기
    5. 차량 출고 및 등록
    6. 보조금 지급 (제조사 또는 딜러 계좌로 지급 후 차량 대금에서 차감)

    전체 프로세스는 보통 계약 후 1~3개월 소요됩니다. 인기 차종은 출고 대기 기간이 더 길어질 수 있으니 여유 있게 잡으세요.

    FAQ — 독자들이 가장 많이 묻는 질문

    Q1. 작년에 전기차 샀는데 올해 보조금 추가로 받을 수 있나요?

    아니요. 보조금은 차량 구매(출고 등록) 시점에 1회만 지급됩니다. 이미 수령했다면 추가 신청 불가하고, 보조금 없이 구매했다면 소급 적용도 되지 않습니다. 단, 올해 새 차를 구매한다면 당연히 2026년 기준으로 신청 가능합니다.

    Q2. 테슬라 모델3처럼 직영 판매 방식의 차는 보조금 신청을 어떻게 하나요?

    테슬라 같은 직영 판매 브랜드도 보조금 신청 자체는 동일합니다. 구매 계약 시 테슬라 측에서 보조금 신청 서류를 안내해주고, 딜러 대신 브랜드가 직접 지자체에 신청을 대행합니다. 단, 지자체별 처리 속도 차이가 있을 수 있으니 출고 전에 담당자에게 진행 상황을 꼭 확인하세요.

    Q3. 보조금 받은 전기차를 2년 안에 팔면 정말 환수되나요? 예외는 없나요?

    원칙적으로 환수 대상입니다. 다만 예외 사유가 있어요. 천재지변, 교통사고 전손 처리, 해외 이민 등 불가피한 사정이 인정되는 경우 지자체 심의를 통해 환수 면제가 가능합니다. 단순 ‘돈이 급해서’, ‘다른 차가 사고 싶어서’ 같은 이유는 면제 사유가 되지 않아요. 2년은 반드시 지키는 게 맞습니다.


    전기차 보조금, 솔직히 제도 자체가 복잡하게 설계돼 있어요. ‘잘 모르면 알아서 챙겨주겠지’라는 생각이 가장 위험합니다. 딜러는 차 팔면 끝이고, 보조금 못 받아도 딜러 손해가 아니거든요. 결국 본인이 공부하고 챙기는 사람이 수백만 원을 더 가져갑니다. 2026년 기준으로 최대 1,200만 원까지 챙길 수 있는 보조금, 이제 남한테 맡기지 마세요.

    에디터 한 줄 평: 전기차 보조금은 ‘아는 만큼 받는 제도’다. 모르면 그 돈은 고스란히 국고로 돌아간다.

    이 글이 도움이 됐다면, 전기차 계약 앞둔 지인에게 공유해 주세요. 수백만 원짜리 정보입니다.


    📚 관련된 다른 글도 읽어 보세요

    태그: 전기차보조금, 2026전기차, 전기차구매가이드, 국고보조금, 지자체보조금, EV보조금신청, 전기차혜택

  • 아직도 혼자 가세요? 2026 제주 현지인이 강추하는 남들 모르는 한적한 코스 7선

    지인한테 연락이 왔어요. ‘제주 또 가는데 어딜 가야 안 질리냐’고. 이미 성산일출봉, 한라산, 협재해수욕장은 다 가봤다고. 솔직히 말하면 저도 처음엔 그 루트 그대로 다녔거든요. 그런데 열 번 넘게 제주를 다니다 보니까 ‘아, 진짜 제주는 관광지 바깥에 있다’는 걸 뼈저리게 느꼈습니다. 오늘은 2026년 현재도 여전히 붐비지 않는, 로컬들이 실제로 가는 코스를 정리해 드릴게요. 실망하면 저한테 뭐라고 해도 됩니다.

    Jeju island aerial view, hidden beach, local road trip
    • 🗺️ 왜 제주 핫플은 이제 ‘실망 스팟’이 됐나 — 데이터로 보는 관광객 밀도
    • 🌿 코스 1~3: 서쪽 비밀 루트 (애월~한림~저지리)
    • 🌊 코스 4~5: 동쪽 숨은 루트 (세화~종달~오조리)
    • 🏔️ 코스 6~7: 중산간 고원 루트 (1100도로~돌오름~물영아리)
    • 📊 핫플 vs 로컬 스팟 비교표 — 주차, 가격, 대기시간 실측
    • 🚗 렌트카 vs 대중교통: 이 코스엔 뭐가 맞나
    • ⛔ 제주 여행 전 절대 하지 말아야 할 실수 6가지
    • ❓ 자주 묻는 질문 (FAQ)

    🗺️ 왜 제주 핫플은 이제 ‘실망 스팟’이 됐나

    2026년 기준, 제주 관광객은 연간 약 1,500만 명을 상회합니다. 이게 얼마나 많은 숫자냐면, 제주 인구(약 70만 명)의 21배예요. 주말 협재해수욕장 주차장은 오전 9시 기준 이미 만차, 성산일출봉 입장 대기는 평균 40~60분. 우도는 전기차 반입 제한이 걸려 있음에도 여름 성수기엔 선착장 대기가 2~3시간입니다. 여행을 하러 간 건지 줄을 서러 간 건지 모를 지경이죠.

    반면 제가 소개할 코스들은 SNS 노출 빈도가 낮고, 접근성이 살짝 떨어지거나, 그냥 ‘알려지지 않은’ 곳들이에요. 그게 오히려 장점입니다.

    Jeju crowded tourist spot vs quiet road, Jeju local village morning

    🌿 코스 1~3: 서쪽 비밀 루트

    코스 1. 납읍리 금산공원 — 제주에서 온대림을 보는 유일한 곳

    애월에서 1132번 도로를 타고 북쪽으로 5분만 올라가면 나옵니다. 입장료 무료, 주차 무료. 상록수 원시림이 그대로 보존돼 있어서, 여름엔 30도 바깥 온도인데 안에 들어가면 체감 5~6도는 내려가는 느낌이에요. 방문객 수가 하루 평균 100명 이하. 일부러 조용한 곳 찾는 분들한테 강력 추천합니다. 운영: 상시 개방 / 주차: 소형 15대 가능.

    코스 2. 저지리 예술인마을 + 제주현대미술관

    한림에서 차로 10분 거리, 중산간에 조성된 예술인 마을입니다. 2026년 현재 입장료 성인 기준 2,000원. 이게 말이 되나 싶을 정도로 저렴하고, 실내·외 조각공원이 잘 꾸며져 있어요. 카페 2곳 운영 중이고 아메리카노 기준 4,500~5,000원으로 제주 관광지 대비 착한 편입니다. 운영 시간: 09:00~18:00 (입장 17:30 마감), 매주 월요일 휴관.

    코스 3. 수월봉 지질트레일 — 올레가 아닌 ‘지질’ 걷기

    차귀도가 보이는 절벽 위 트레일. 성인 입장 무료, 왕복 약 4km, 소요 시간 1시간 30분. 제주 지질공원 UNESCO 인증 구간이라 안내판 설명이 충실하고, 바람 맞으며 걷는 해안 뷰가 협재보다 훨씬 덜 붐벼요. 단, 바람이 강하게 부는 날엔 체감온도 급락하니 얇은 겉옷은 필수. 비수기(11~2월) 방문 시 수월봉 정상에서 차귀도 일몰을 독점 감상 가능합니다.

    🌊 코스 4~5: 동쪽 숨은 루트

    코스 4. 세화 해변 + 세화민속오일장 (매월 5·10·15·20·25·30일)

    구좌읍 세화리에 있는 작은 해변과 오일장 조합입니다. 장날에 맞추면 제주 로컬 음식, 청과물, 해산물을 시중의 50~70% 가격에 살 수 있어요. 특히 자리돔 젓갈은 여기서만 볼 수 있는 가격대. 해변은 모래보다 돌이 많지만, 그만큼 물이 맑고 조용합니다. 주변 카페들도 협재·애월에 비해 가격이 15~20% 저렴한 편이에요.

    코스 5. 오조리 내수면 — 제주에서 유일하게 바다와 담수가 만나는 풍경

    성산일출봉 바로 옆 동네인데 아무도 여기서 멈추지 않아요. 이게 제일 신기한 점. 오조포구 근처에 차를 세우면 성산일출봉이 정면으로 보이는데, 일출봉 정상에서 내려다보는 풍경과는 완전히 다른 앵글입니다. 일몰 때 특히 좋고, 주차비 없음, 입장료 없음. 새벽 4시~5시에 방문하면 안개 낀 일출과 성산봉이 겹쳐서 진짜 장관입니다.

    🏔️ 코스 6~7: 중산간 고원 루트

    코스 6. 1100고지 습지 — 구름 위에서 걷는 트레킹

    해발 1,100m. 제주에서 가장 높은 도로 휴게소 바로 옆에 람사르 습지가 있어요. 걷는 거리는 약 1km, 20~30분이면 충분. 여름에도 평균 기온 18~20도 유지, 겨울엔 설경이 장관입니다. 단 겨울 폭설 시 1100도로 통제 가능 — 출발 전 제주도로관리청(064-710-6782) 또는 제주 교통정보 앱에서 반드시 도로 상황 확인하세요.

    코스 7. 물영아리오름 — 분화구 안에 호수가 있는 오름

    남원읍에 위치. 입장 무료, 정상까지 편도 약 1.2km, 30~40분 소요. 분화구 안쪽에 습지 호수가 형성되어 있어서 다른 오름과 전혀 다른 경험을 줍니다. 성수기에도 하루 방문객 200~300명 수준. 한라산 백록담이 힘들다면 이쪽 루트를 먼저 경험해 보는 걸 추천드려요. 비 온 다음 날 방문 시 안개와 습지 조합이 절정입니다.

    📊 핫플 vs 로컬 스팟 비교표

    구분 장소 입장료 평균 대기 주차 난이도 혼잡도 (성수기) 비수기 꿀팁
    핫플 성산일출봉 성인 5,000원 40~60분 매우 어려움 ★★★★★ 평일 오전 6시 전 입장
    핫플 협재해수욕장 무료 주차 30분+ 어려움 ★★★★★ 10~11월 방문
    핫플 우도 여객선 왕복 10,800원~ 선착장 1~3시간 섬 내 차량 제한 ★★★★★ 비추 (비수기도 혼잡)
    로컬 납읍리 금산공원 무료 없음 쉬움 ★☆☆☆☆ 상시 방문 가능
    로컬 수월봉 지질트레일 무료 없음 쉬움 ★★☆☆☆ 11~2월 일몰 추천
    로컬 물영아리오름 무료 없음 쉬움 ★★☆☆☆ 우천 직후 방문
    로컬 오조리 내수면 무료 없음 매우 쉬움 ★☆☆☆☆ 일출 시간 맞추기

    🚗 렌트카 vs 대중교통: 이 코스엔 뭐가 맞나

    결론부터 말하면 렌트카 필수입니다. 미안하지만 이 코스들은 대중교통으로 접근하기 어려운 곳들이 대부분이에요. 납읍리, 저지리, 수월봉, 물영아리는 하루 2~4회 버스만 운행합니다. 렌트카 기준 2026년 소형차(모닝급) 평일 하루 렌탈 비용은 3~5만 원대(보험 포함 기준). 여름 성수기엔 2~3주 전 예약이 기본이고, 전기차 렌트 시 충전소 위치 미리 파악은 필수 — 중산간 지역은 충전 인프라가 아직 부족합니다.

    ⛔ 제주 여행 전 절대 하지 말아야 할 실수 6가지

    • 성수기(7~8월) 주말 오전 10시 이후 핫플 접근 — 주차장 진입 자체가 안 됩니다. 차 막혀서 일정 전체 망합니다.
    • 오름 트레킹을 슬리퍼로 시도 — 물영아리, 1100고지는 습지라 미끄러움. 트레킹화 필수.
    • 카카오맵만 믿고 중산간 도로 진입 — 실시간 통제 정보가 반영 안 됩니다. 제주교통정보센터 앱 병행 필수.
    • 세화오일장 날짜 미확인 — 5·10·15·20·25·30일 아닌 날 가면 텅 빕니다.
    • 전기차 렌트 후 충전 계획 없이 중산간 투어 — 저지리~1100도로~물영아리 구간은 급속 충전기 없는 구간 30km 이상 가능.
    • 저지리 현대미술관 월요일 방문 — 매주 월요일 정기 휴관. 이거 모르고 갔다가 돌아온 사람 한두 명이 아닙니다.

    ❓ FAQ

    Q1. 이 코스들 차 없이 다닐 수 있나요?

    솔직히 어렵습니다. 세화 해변과 세화오일장은 제주시에서 버스(701번)로 접근 가능하지만, 나머지 코스들(납읍리, 저지리, 수월봉, 1100고지, 물영아리)은 대중교통만으로는 하루에 한두 곳 가기도 빡빡합니다. 여럿이 간다면 렌트카 나눠 타는 게 훨씬 합리적이에요.

    Q2. 비수기(11~2월) 제주는 정말 볼 게 없나요?

    오히려 반대입니다. 1100고지 설경, 수월봉 겨울 일몰, 납읍리 동백 시즌(1~2월)이 있고, 항공권·숙소 가격이 성수기 대비 30~50% 저렴합니다. 단 날씨가 변덕스러워서 최소 하루 여유 일정은 잡아두세요. 제주 겨울 바람은 진짜 장난 아닙니다.

    Q3. 아이 동반 가족 여행으로도 괜찮은 코스인가요?

    납읍리 금산공원(평탄 산책로), 저지리 현대미술관(실내외 관람), 세화 해변+오일장은 아이와 함께 무난합니다. 수월봉과 물영아리는 비포장·경사 구간이 있어서 유아차는 무리고, 초등 저학년 이상이라면 문제없어요. 1100고지는 겨울에 아이와 갈 경우 방한 장비 꼭 챙기세요.

    📝 한 줄 평: 제주는 아직 안 죽었습니다. 다만 대부분의 관광객이 같은 1% 구역만 돌고 있을 뿐. 나머지 99%를 발견하는 게 진짜 제주 여행입니다. 주관적 만족도 ★★★★☆ (4.5/5) — 0.5점 뺀 이유는 렌트카 없으면 접근이 제한된다는 점 때문입니다.

    여행작가 한줄평: 비행기 타고 가서 줄만 서다 오는 여행은 이제 그만. 2026년엔 제주 로컬 루트로 진짜 제주를 만나보세요. 한 번 맛보면 다음 제주 여행은 핫플 건너뛰고 이 코스부터 먼저 잡게 될 거예요.


    📚 관련된 다른 글도 읽어 보세요

    태그: 제주여행, 제주숨은여행지, 제주로컬코스, 제주비수기여행, 제주오름추천, 제주현지인추천, 2026제주여행

  • Why I Almost Gave Up on Roofing — A Real 2025 Guide to Getting It Right

    A friend of mine called me last spring in a panic. She’d just gotten three quotes for a new roof — ranging from $7,000 to $22,000 — and had absolutely no idea what she was paying for or why the prices were so wildly different. Sound familiar? That conversation is exactly why I wanted to put this together. Roofing is one of those home improvement topics where a little knowledge can save you thousands, and a lot of ignorance can cost you even more.

    Let’s dig into what’s actually going on with roofing in 2025, from materials and costs to contractor red flags and long-term maintenance — without the fluff.

    roofing shingles close-up, roof replacement contractor

    What’s Actually Changed About Roofing in 2025

    The roofing industry in 2025 looks meaningfully different from even five years ago. Labor costs have climbed roughly 18–24% since 2021, driven by skilled trade shortages. Meanwhile, asphalt shingle prices — which account for roughly 70% of residential roofing in the US — have stabilized somewhat after supply chain chaos pushed them up nearly 30% between 2021 and 2023. As of early 2025, a mid-grade architectural shingle bundle runs about $105–$140 per square (100 sq ft), up from around $80 pre-pandemic.

    But here’s what most homeowners miss: material costs are typically only 40–50% of your total bill. Labor, underlayment, flashing, decking repair, and disposal fees make up the rest. When my friend got that $22,000 quote, it included full decking replacement (her roof had significant rot) plus a premium Class 4 impact-resistant shingle. The $7,000 quote? It was a second layer of shingles laid over the existing one — a practice that saves money upfront but voids most manufacturer warranties and adds weight stress to your structure.

    Breaking Down the Three Major Roofing Material Choices

    If you’re evaluating a roof replacement, here are the materials you’ll most realistically encounter, with honest trade-offs:

    • 3-Tab Asphalt Shingles: Cheapest option at $80–$100 per square installed. 20–25 year lifespan under ideal conditions. Rarely recommended in 2025 because the price gap with architectural shingles has narrowed significantly.
    • Architectural (Dimensional) Asphalt Shingles: The sweet spot for most homeowners. $130–$180 per square installed. 30-year warranties are standard; some premium lines (like Owens Corning Duration or GAF Timberline HDZ) offer limited lifetime warranties. Impact resistance ratings (Class 3 or 4) may qualify you for a homeowner’s insurance discount of 10–30% depending on your state and carrier.
    • Metal Roofing (Standing Seam or Exposed Fastener): Installed costs range from $250–$600+ per square. Standing seam is the premium option — concealed fasteners, 40–70 year lifespans, and excellent performance in both heat and snow. Exposed fastener metal (like corrugated steel) is cheaper but requires fastener maintenance every 10–15 years as rubber seals degrade. In wildfire-prone areas like California and Colorado, metal is increasingly the default.
    • Synthetic Slate / Composite Shingles: Products like DaVinci Roofscapes or CertainTeed Belmont offer the look of natural slate at a fraction of the weight and cost. Installed price: $350–$500 per square. Lifespan claims of 50+ years, though real-world data on some brands is still accumulating.
    • Natural Slate or Clay Tile: Beautiful, but $600–$1,500+ per square installed, requires structural reinforcement in many homes, and demands specialized installers. Worth it for historic or high-end properties; overkill for most suburban homes.

    The Contractor Selection Problem (Where Most People Go Wrong)

    Here’s the brutal truth: the roofing industry has one of the highest rates of contractor fraud of any home improvement category. After major hailstorms, “storm chasers” — out-of-state contractors who appear for a few weeks, collect deposits, and disappear — are a documented and recurring problem. The Better Business Bureau and state attorney general offices received a combined 14,000+ roofing-related complaints in 2023 alone.

    What to look for when vetting contractors:

    • Manufacturer certification: Look for GAF Master Elite, Owens Corning Platinum Preferred, or similar designations. These require contractors to meet installation standards and carry proper insurance. Only about 2–3% of US contractors hold GAF Master Elite status, for example.
    • Local presence and reviews: Verify they have a physical address, not just a P.O. box. Check Google Reviews, Yelp, and the BBB — and look specifically for reviews from 6–18 months ago to gauge how they handle warranty issues post-installation.
    • Detailed written contract: Should specify shingle brand and model, underlayment type (synthetic vs. felt), decking replacement terms, disposal method, start/end dates, and payment schedule. Never pay more than 10–30% upfront.
    • Permit pulling: A legitimate contractor will pull permits in your municipality. If a contractor says “we don’t need a permit for this,” that’s a red flag in most jurisdictions.
    roof damage inspection, contractor checking roof

    Insurance Claims and Roofing: A Rapidly Shifting Landscape

    One angle that’s become increasingly important in 2025 is the insurance dimension. Several major carriers — including State Farm and Allstate — have stopped writing new homeowner policies in states like Florida and California partly due to catastrophic roof claim losses. In states where coverage still exists, many carriers have shifted to “actual cash value” (ACV) roof coverage rather than “replacement cost value” (RCV), meaning depreciation is subtracted from your claim payout.

    If your policy is ACV-based and your 18-year-old asphalt roof takes hail damage, you might receive $4,000 on a $14,000 repair because the insurer deducts for depreciation. This is worth checking before you ever need to file a claim. Upgrading to a Class 4 impact-resistant shingle can sometimes get you back to RCV coverage in certain markets — worth a call to your agent.

    DIY Roofing: Where It Makes Sense and Where It Doesn’t

    Let me be real with you here. A full roof replacement as a DIY project is genuinely dangerous (falls are the leading cause of construction fatalities) and often voids manufacturer warranties that require certified installer sign-off. However, there are legitimate DIY scenarios:

    • Minor repairs (1–3 shingles): Replacing a few storm-damaged shingles with matching materials is manageable for a confident DIYer. Materials cost $30–$80; a roofer will charge $150–$400 for the same job.
    • Flat roof patching: TPO or EPDM flat roof repairs using peel-and-stick patches are accessible. Brands like Cofair or EternaBond make products that genuinely work for temporary and semi-permanent fixes.
    • Roof maintenance: Cleaning gutters, applying zinc strips to prevent moss growth, and sealing around pipe boots are all homeowner-appropriate tasks that meaningfully extend roof life.

    Real-World Cost Benchmarks (2025 Numbers)

    To give you a concrete frame of reference, here’s what a full tear-off and replacement of a typical 2,000 sq ft single-story home (about 22–25 squares of actual roof area accounting for pitch and waste) looks like in 2025 dollars across different scenarios:

    • Budget option (3-tab shingles, basic underlayment): $8,500–$12,000
    • Mid-range (architectural shingles, synthetic underlayment, Class 3 impact): $13,000–$18,000
    • Premium (Class 4 architectural or metal, full ice-and-water shield, new decking): $20,000–$35,000+

    These ranges assume average US labor markets. Coastal California, New York City metro, and Hawaii run 30–60% higher. Rural Midwest and Southeast markets can run 15–25% lower.

    Maintenance That Actually Extends Roof Life

    One thing I wish more homeowners knew: a well-maintained 25-year shingle can realistically hit 28–32 years, while a neglected one might fail at 18. The key maintenance tasks that actually matter:

    • Annual gutter cleaning to prevent water backup under shingles (ice dams in cold climates cause enormous damage)
    • Trimming tree branches within 6 feet of the roof surface — friction abrades granules off shingles
    • Inspecting and re-caulking pipe boot flashings every 7–10 years (the rubber collar degrades before the shingles do)
    • Addressing moss and algae growth promptly — organisms accelerate granule loss and shingle degradation
    • After any major storm, visually inspecting from the ground for missing shingles or damaged ridge caps

    A $200–$400 annual maintenance mindset can genuinely push a mid-grade roof past its rated lifespan — that’s a better ROI than many home improvement projects.

    The Bottom Line on Roofing Decisions in 2025

    If you’re staring down a roof replacement, the good news is that architectural asphalt shingles in the 30-year class represent a genuinely excellent value in 2025 — especially if you can qualify for an insurance discount with a Class 4 rating. Metal roofing makes strong economic sense if you’re planning to stay in the home long-term (15+ years) or live in a hail, wind, or wildfire zone. And whatever you choose, contractor vetting deserves as much attention as material selection.

    If you’re trying to buy time on a tight budget, a professional inspection ($150–$300 from a qualified roofer — not a storm-chaser) will tell you honestly whether you have 2 years or 8 years left, so you can plan accordingly rather than getting ambushed.

    Quick tip from the field: Always get at least three quotes, ask each contractor to walk you through their bid line by line, and check whether their quotes include the same underlayment spec — it’s one of the easiest places for a low bidder to cut corners invisibly. The roof that keeps water out of your home is worth understanding deeply before you sign anything.


    📚 관련된 다른 글도 읽어 보세요

    태그: []

  • Why Most EV Charging Guides Get It Wrong — Real 2025 Home Setup Breakdown

    A friend of mine bought his first electric vehicle last spring, super excited, ready to go green. Three weeks later he called me frustrated — his Level 1 charger was adding maybe 4 miles of range overnight, and he’d already paid an electrician $600 for a panel upgrade he wasn’t even sure he needed. Sound familiar? This situation comes up constantly, and honestly, most of the setup guides out there skip the messy details that actually matter. So let’s walk through what a real 2025 home EV charging setup looks like — panel assessments, charger specs, installation costs, and the gotchas nobody warns you about.

    Level 1 vs Level 2: The Number That Changes Everything

    The core confusion starts here. Almost every EV ships with a Level 1 EVSE (Electric Vehicle Supply Equipment) — that’s the cord you plug into a standard 120V household outlet. It pulls about 12 amps and delivers roughly 1.2–1.4 kW of power. For a 75 kWh battery (like the one in a Tesla Model 3 Long Range), a full charge from empty would take over 50 hours. That’s not a misprint.

    Level 2 charging operates at 240V — the same voltage as your dryer or electric range — and typically runs at 32 to 48 amps, delivering anywhere from 7.2 kW to 11.5 kW. A realistic overnight charge window of 8 hours at 7.2 kW adds about 55–60 miles of range. For most commuters averaging 30–40 miles daily, that’s more than enough. The math is simple; the installation is where it gets complicated.

    home EV charging station Level 2 installation, electric panel upgrade residential

    Your Electrical Panel Is the Real Gatekeeper

    Here’s what the glossy charger brochures don’t mention: your panel capacity determines everything. A typical older American home runs on a 100-amp service panel. By the time you account for HVAC (typically 30–50A), electric water heater (30A), kitchen appliances (40–60A combined), and lighting circuits, you might have 20–30 amps of headroom — on paper. Adding a dedicated 50-amp circuit for a 48A charger will almost certainly trigger a panel upgrade to 200A service.

    In 2025, a 200A panel upgrade with new service entrance runs $1,800–$4,500 depending on your region and utility, with California and New York skewing high due to permit requirements and labor costs. Some utilities offer rebates — Pacific Gas & Electric’s EV Panel Upgrade Rebate covers up to $1,000, and many local co-ops run similar programs. Always check the Database of State Incentives for Renewables and Efficiency (DSIRE) at dsireusa.org before you write a check.

    If your panel is already 200A and has available breaker slots, you’re in much better shape. A licensed electrician can run a dedicated 240V/50A circuit and install the charger for $400–$900 in most markets. That’s the scenario you want to be in.

    Choosing the Right EVSE — Specs That Actually Matter

    • Amperage rating: 32A (7.6 kW) is the sweet spot for most households without panel drama. 48A chargers (11.5 kW) are faster but require a 60A breaker.
    • Smart features: Look for Wi-Fi connectivity and time-of-use scheduling. Charging at off-peak hours (typically 9 PM–6 AM) can cut electricity costs by 30–50% in states with tiered rates like California’s TOU-EV-B plan.
    • NEMA plug vs hardwired: A NEMA 14-50 plug-in unit is portable and easier to move if you relocate. Hardwired units are more permanent but often look cleaner.
    • UL listing and warranty: Non-negotiable. Stick to UL-listed units. Most reputable brands offer 3-year warranties minimum.
    • Cable length: 25 feet is the practical minimum if your garage has any layout complexity. Some budget units ship with 18-foot cables and that creates real problems.

    In terms of real-world brand performance in 2025, ChargePoint Home Flex remains a consistently reliable choice — adjustable from 16A to 50A, solid app integration, and wide vehicle compatibility. The Emporia EV Charger has been gaining traction for its energy monitoring features and competitive $199–$249 price point. Tesla’s Wall Connector is excellent if you’re in the Tesla ecosystem but note that non-Tesla vehicles using it via the included J1772 adapter cap out at 40A rather than the full 48A on some older firmware.

    The Permit Question — Don’t Skip This

    This is the step people skip most often, and it creates real headaches. In most U.S. jurisdictions, installing a new 240V dedicated circuit requires a permit and inspection. Skipping it doesn’t just create legal liability — some homeowner insurance policies have denied claims related to electrical fires originating from unpermitted work. The permit typically costs $50–$150 and the inspection adds a day or two to the timeline, but it’s absolutely worth it.

    Some jurisdictions — notably those following the 2023 National Electrical Code — now require arc-fault circuit interrupter (AFCI) protection on EV circuits in garages. If your electrician doesn’t mention this, ask specifically. The wrong breaker type gets flagged at inspection and costs rework time.

    electrical permit inspection EV charger circuit breaker panel

    Real Cost Breakdown for a Typical 2025 Install

    Let’s put concrete numbers together for a median scenario: 200A panel already in place, single-car garage, moderate-cost market like suburban Ohio or Texas:

    • EVSE unit (ChargePoint Home Flex or similar): $499–$699
    • Electrician labor + materials (50A dedicated circuit, ~30ft run): $450–$750
    • Permit and inspection: $75–$120
    • Total: approximately $1,000–$1,570

    If you need a panel upgrade, add $2,000–$3,500 to that figure. On the other end, if you qualify for the federal Alternative Fuel Vehicle Refueling Property Credit (30C), you can claim 30% of equipment and installation costs up to $1,000 back on your federal tax return in 2025 — confirm eligibility with a tax professional since income and location factors apply.

    When Level 2 at Home Isn’t the Right Answer

    If you drive fewer than 20 miles a day and have access to workplace charging or a nearby DC fast charger (DCFC), the math on a home Level 2 install can be harder to justify. Level 1 overnight charging genuinely covers short-commute scenarios, and saving $1,200 by not upgrading the setup has real value. Similarly, apartment dwellers should look at whether their building participates in programs like ChargePoint’s multifamily network or whether local municipalities have curbside Level 2 pilots — several cities including Austin, Denver, and Seattle are actively expanding these in 2025.

    The conditional recommendation is simple: if you drive more than 25 miles daily or own a larger battery EV (60+ kWh), Level 2 home charging will pay back its installation cost within 2–3 years through convenience and avoided DC fast charge session fees. If you drive less and have alternatives, Level 1 or public Level 2 may serve you just fine.

    One Last Thought: The biggest mistake I see isn’t choosing the wrong charger — it’s skipping the panel assessment before buying anything. Get an electrician to look at your box before you order hardware. That one conversation saves you from the exact situation my friend landed in: paid for equipment, then discovered the real cost was the infrastructure underneath it. Start with the panel, then pick your charger, and the rest of the decisions get a lot easier.


    📚 관련된 다른 글도 읽어 보세요

    태그: home EV charging, Level 2 charger installation, EV charging setup 2025, electric vehicle home charger, panel upgrade EV, EVSE installation cost, home electric vehicle charging guide