A friend of mine spent an entire weekend sourcing fresh goat milk from a local farm, bought all the right oils, and even ordered a fancy silicone mold set. Then she texted me a photo of a crumbly, oily, oddly-colored mess and asked, “What went wrong?” Turns out, she’d made three classic mistakes that almost every beginner makes — and none of them were obvious from the recipes she’d found online. That conversation is exactly why I wanted to put together this honest, experience-backed guide to making goat milk soap at home in 2025.
Why Goat Milk Soap Is Worth the Trouble
Before we get into the how-to, let’s talk about why people bother with goat milk in the first place. Regular cold-process soap already takes patience and precision, so adding a dairy component raises the difficulty level. But the payoff is real. Goat milk contains alpha-hydroxy acids (AHAs) — primarily lactic acid — which gently exfoliate the skin’s surface and encourage cell turnover. It also has a fat composition that closely mimics human skin’s natural lipid barrier, making finished bars noticeably more moisturizing than standard soap.
In dermatology circles, lactic acid has been studied extensively. A 2023 review published in the Journal of Cosmetic Dermatology confirmed that topical lactic acid at even low concentrations (2–5%) meaningfully improves skin hydration and texture over 4–8 weeks. Your handmade goat milk bar won’t hit pharmaceutical concentrations, but regular use adds up. That’s not marketing fluff — that’s chemistry.
The Science You Actually Need to Understand First
Cold-process soap is the result of saponification — a chemical reaction between a fat (or oil blend) and a strong alkali. For bar soap, that alkali is sodium hydroxide (NaOH), commonly known as lye. When lye contacts water — or in our case, milk — an exothermic reaction occurs. This is where goat milk soap diverges sharply from regular soap, and where most beginners crash.
Plain water heats up to around 65–80°C (150–176°F) when lye is added. That’s manageable. But milk contains sugars (primarily lactose) that react dramatically with lye, causing temperatures to spike even higher and turning your beautiful white milk into a scorched, ammonia-smelling orange mess. This is the mistake my friend made — she poured lye directly into room-temperature milk without any precautions.
The fix? Freeze your goat milk into slush or ice cubes before adding lye. By keeping the milk below 0°C, you slow the exothermic reaction enough to prevent burning the sugars. Add lye in small increments, stirring constantly, and keep the container in an ice bath throughout. Your target is to keep the temperature under 21°C (70°F) during lye incorporation. Use a digital thermometer — guessing is how batches get ruined.
Formulating Your Oil Blend: Numbers That Actually Work
Recipe formulation in soap-making is driven by a concept called the SAP value (saponification value) — each oil requires a specific amount of lye to fully saponify. You never calculate this by hand anymore; use a dedicated lye calculator like SoapCalc (soapcalc.net) or Brambleberry’s Lye Calculator. These tools also let you set a superfat percentage, which is the intentional excess of oil left unsaponified in the final bar to boost moisturizing properties.
For goat milk soap specifically, a superfat of 5–7% hits the sweet spot. Go lower and the bar feels stripping; go higher and it goes rancid faster, especially since you’re already adding milk fats. Here’s a beginner-friendly oil blend that performs consistently:
- Olive Oil — 40%: Slow to trace, produces a creamy, conditioning lather. Castile-heavy recipes are forgiving but need longer cure time (8+ weeks).
- Coconut Oil — 30%: Creates hard, cleansing bars with fluffy lather. Anything above 35% starts feeling drying.
- Palm Oil (or Lard) — 20%: Adds hardness and longevity. Sustainably sourced RSPO-certified palm is the responsible choice. Lard is an excellent, readily available substitute.
- Castor Oil — 5%: Small amounts dramatically boost lather stability and help bind the bar. Don’t exceed 10% or the bar gets sticky.
- Sweet Almond or Avocado Oil — 5%: Luxury skin-feel oils; treat them as your customization slot.
Run every recipe through a lye calculator before you mix anything. A 500g oil batch, for example, will require approximately 67–70g of NaOH at 5% superfat with the blend above — but verify this yourself because oil quality and blend ratios shift the number.
Step-by-Step Process With the Failure Points Named
Step 1 — Prep your goat milk. Use fresh or frozen whole goat milk. Pour it into an ice cube tray and freeze solid. If you’re using store-bought goat milk, confirm it’s full-fat and unflavored. Evaporated or sweetened goat milk will misbehave.
Step 2 — Weigh your lye. Use a digital scale accurate to 1g. Lye is caustic — wear gloves, eye protection, and work in a ventilated space. Weigh your lye into a dry heat-safe container (HDPE or stainless steel; never aluminum, which reacts with NaOH).
Step 3 — Combine lye and frozen milk. Place your frozen milk cubes in a stainless steel or HDPE pitcher sitting in an ice bath. Add lye in small spoonfuls — about 1 tablespoon at a time — stirring thoroughly between additions. Monitor temperature with a digital probe thermometer. If it approaches 27°C (80°F), pause and let it cool before continuing. The whole process may take 15–20 minutes. Your lye-milk solution should be pale yellow or cream-colored when done correctly. Orange or brown means burned sugar — start over.
Step 4 — Melt and cool your oils. Gently melt hard oils (coconut, palm) together, then stir in liquid oils. Allow the blend to cool to around 32–38°C (90–100°F). For goat milk soap, many experienced makers bring oils down to room temperature (~24°C/75°F) to slow trace and extend working time.
Step 5 — Combine and reach trace. Slowly pour the lye-milk solution into your oils, using a stick blender in short bursts to reach light trace — a pudding-like consistency where a drizzle leaves a brief mark on the surface. Add fragrance or essential oils at this stage (fragrance load: 3% of oil weight is a safe starting point). Some fragrances accelerate trace dramatically; lavender essential oil and most floral fragrance oils are low-risk. Spice-heavy blends like cinnamon or clove accelerate fast and can seize in the bowl.
Step 6 — Mold and insulate (carefully). Pour into your mold. Here’s where goat milk soap diverges again: do not insulate. Standard cold-process soap is wrapped in towels to encourage gel phase, which produces translucent, vibrant color. Goat milk soap doesn’t need gel phase — in fact, insulating it can cause overheating and a phenomenon called partial gel, which leaves an ugly ring pattern in your bars. Put the mold in the refrigerator or a cool room instead.
Step 7 — Unmold and cure. Unmold after 48–72 hours. Goat milk bars are softer than standard soap due to the milk fats and often need extra time before they’re firm enough to cut cleanly. Cure on a rack in a cool, dry place with good airflow for a minimum of 4–6 weeks. The cure allows excess water to evaporate, the pH to drop to skin-safe levels (~9–10), and the bar to harden into a long-lasting product.
Troubleshooting the Most Common Problems
- Orange, burned smell after mixing lye into milk: Sugar scorched. Use colder milk and add lye more slowly. This batch can still be used but expect discoloration and weaker scent.
- Soap seized in the bowl (suddenly became too thick to pour): Fragrance oil accelerated trace. Work faster next time or use a fragrance known to behave well. You can often “hand mold” seized soap into rustic chunks — it’s still usable soap.
- Oily, crumbly, or soft bars after 48 hours: Likely a formulation error — double-check your lye calculation. Also consider that high-olive-oil recipes stay soft for weeks before hardening. Wait and recheck.
- White powdery coating on the surface (soda ash): Cosmetic only, caused by unsaponified soap reacting with air CO₂. Spray the top of freshly poured soap with 91% isopropyl alcohol to prevent it. It can be planed off finished bars with a vegetable peeler.
- Rancid smell within weeks (DOS — dreaded orange spots): Usually caused by high superfat, unsaturated oils going rancid, water contamination, or fragrance oils with vanilla (which contains vanillin, a known accelerant of rancidity). Use Vitamin E oil (Tocopherol) at 0.5% of oil weight as an antioxidant.
Sourcing and Cost Reality in 2025
Fresh goat milk from a local farm runs roughly $8–$15 per quart in most US regions, which is enough for several batches. Frozen goat milk from retailers like Whole Foods or Sprouts averages $5–$7 per 16 oz. Powdered goat milk — brands like Meyenberg or NOW Foods — is a reliable alternative at about $0.40–$0.60 per reconstituted ounce, and it dramatically simplifies the lye-mixing process since you reconstitute it yourself and can freeze it precisely. Online soap supply retailers like Brambleberry, Wholesale Supplies Plus, and Nurture Soap carry everything else you need — oils, molds, lye — often with bulk pricing that brings a 500g batch cost down to $4–$7 in materials.
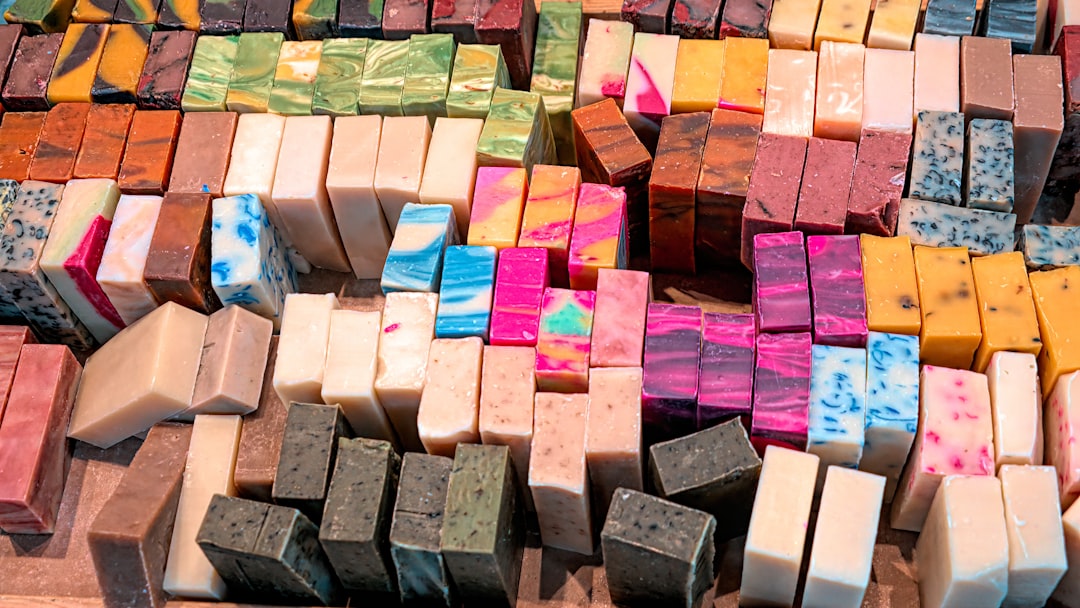
Compare that to artisan goat milk soap bars retailing at $8–$15 per bar at farmers markets and Etsy shops, and the math starts looking very interesting after your first few successful batches.
Is It Right for You? Honest Conditional Advice
If you’re sensitive to fragrance or dealing with dry, reactive skin, homemade goat milk soap genuinely offers something commercial products rarely do: complete ingredient control and no synthetic preservatives or SLS. If you’re primarily interested in the hobby or gifting aspect, the learning curve is steep but deeply rewarding — there’s a real craft community around this with resources on platforms like Soap Queen (soapqueen.com) and the Handmade Soap Makers Guild.
If you’re looking for a quick skincare fix, manage expectations: the benefits of goat milk soap are cumulative and subtle. You won’t see dramatic change in a week. But consistent use over a month? Most people notice a difference, particularly in texture and dryness.
One last thought from someone who’s watched a lot of first batches go sideways: Don’t skip the frozen milk step, don’t skip the lye calculator, and don’t skip the cure time. Those three shortcuts account for probably 80% of beginner failures. Get those right, and your first batch has a genuinely strong chance of turning out beautifully — something you’ll actually want to use and share.
📚 관련된 다른 글도 읽어 보세요
- Why I Almost Gave Up on Meal Prep — And What Finally Made It Stick in 2025
- 이것만 알면 나도 할 수 있다 — 2026년 기준 미국 주식 처음 시작하는 법 완전 정복
- 집에서 담가 먹으면 이 맛 절대 못 낸다고? 2026년 기준 막걸리 직접 빚어본 솔직 후기
태그: []